ASC — Surgical Scheduling Workflow
Note
The following describes an opt-in feature for practices that have ambulatory surgery centers (ASCs). To enable this feature for your organization, contact your CSM. For more information, see ASC Setup: Enable ASC Features.
This feature applies to practices that utilize the ambulatory surgery center (ASC) workflow.
You can now use Schedule Builder to set up room schedule templates and Appointment Schedule to book and manage procedures.
Overview
Ambulatory Surgical Centers can now:
-
Set up rooms and build schedules by room
-
Set up Block Time templates in Schedule Builder
Note
A Block Time template is a reserved window on the ASC schedule set aside for a specific provider during which procedures of a given type can be scheduled. They can be configured by length and recurrence to reflect provider availability and operational priorities.
For ASC Block Times, slots are not tied to a procedure type. The procedure type and duration are assigned when the patient’s procedure is scheduled. -
View your ASC schedule in Appointment Schedule
-
View surgical order information at the time of booking a procedure in Appointment Schedule
-
Edit the lineup by dragging and dropping procedures within the lineup in Appointment Schedule
If an appointment on the clinic (non-ASC) schedule needs to be moved to the ASC schedule, the current recommended workflow is to cancel the clinic appointment and rebook it in the ASC schedule - ASC Day view.
Note
With both of these being a cancellation, any chart prep and notes will be lost. Future updates will introduce the ability to reschedule an ASC appointment to another spot in the ASC schedule, and to reschedule a clinic appointment into the ASC schedule.
We're making this change because you requested it. Keep those suggestions coming! For the original suggestion, please see the request on Success Community.
Schedule Builder
Schedule Builder gives your staff visibility into how schedule templates interact, and makes the process of creating new templates easy and intuitive. You can also preview how templates will be applied before you finalize any template changes.
There are now two types of templates:
-
Provider Clinic templates: A template indicates to your staff which type of procedure they can expect to see in a given schedule period.
-
ASC Templates (Room Schedule & Block Time): A template indicates the available timeframe (not appointment type) of a resource (room or provider) they can expect to see in a given schedule period.
Appointment Schedule
Appointment Schedule gives staff a holistic view of providers' schedules on a calendar. You can book and manage appointments and procedures directly from the Appointment Schedule calendar.
Setup instructions
For more information on setup related to the ASC — Scheduling Workflow, see ASC Setup — Scheduling Workflow.
To view schedule
-
Display Appointment Schedule: On the Main Menu, click Calendar > Under Appointments, click View Calendar.
-
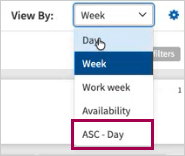
Click View by.
-
Select ASC - Day.
-
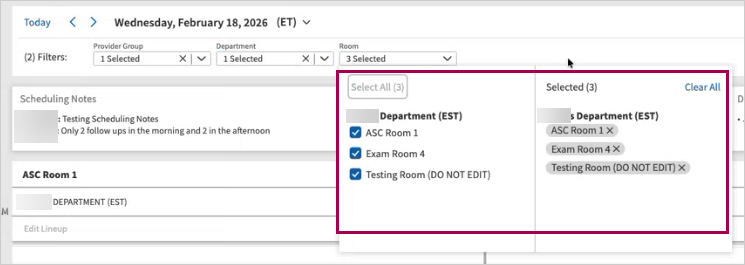
Provider Group — Automatically filled based on login information. You can still filter by different provider groups.
-
Department — Automatically filled based on login information. You can still filter by different departments.
-
Room — Select the rooms you want to filter by. You can click Select All.
-
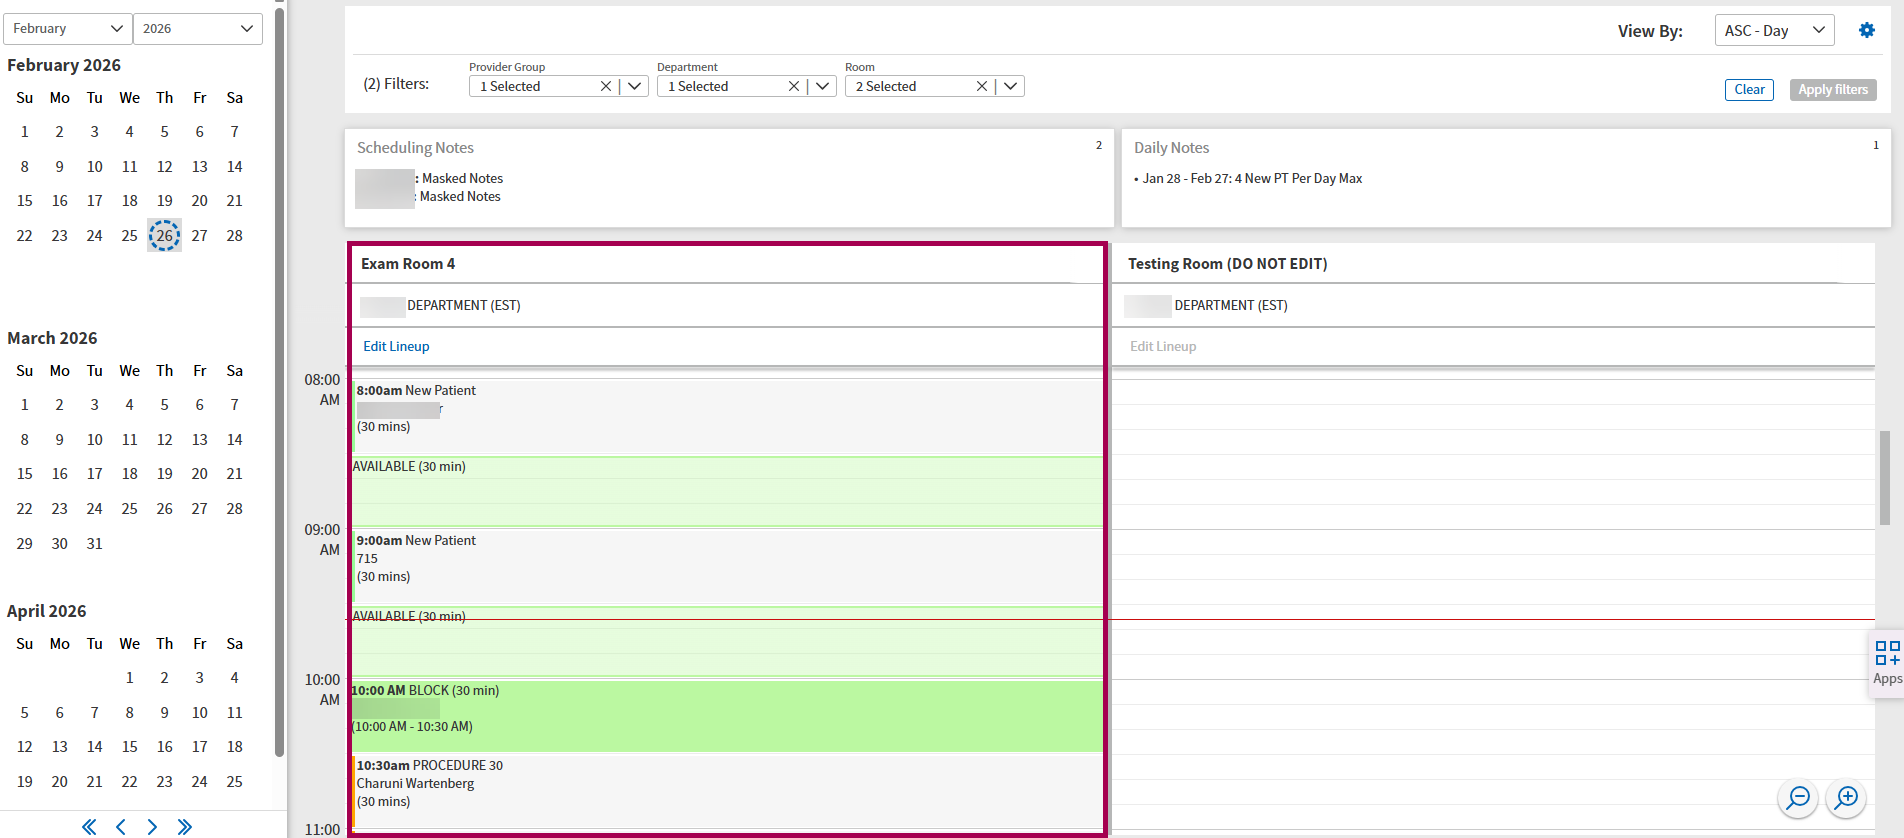
Click Apply filters.
-
View the schedule.
To book procedures
-
Display Appointment Schedule: On the Main Menu, click Calendar > Under Appointments, click View Calendar.
- Select a date from the calendar panel.
- Click any available time that is highlighted green. The Slot Details window appears.
- Click Book Appointment. The left pane expands into the Book Appointment window. athenaOne displays the date above the calendar and the room name in the calendar header. The preview panel scrolls to the current time on the calendar and displays the calendar events: booked procedures and available time.
- Enter patient details.
Patient Search — Select a search type option and enter the information in the text box. For example, select Patient DOB and enter your patient's date of birth. When you search by Patient ID, the patient details appear automatically without the need to select from a list of patients.
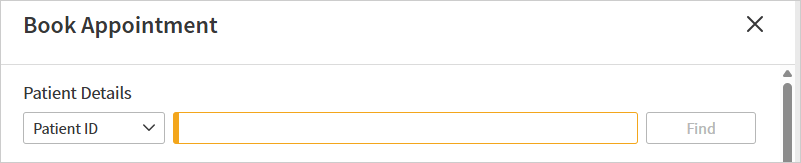
Click Find.
Select the patient for whom you’d like to book a procedure.
-
Select an Order:
-
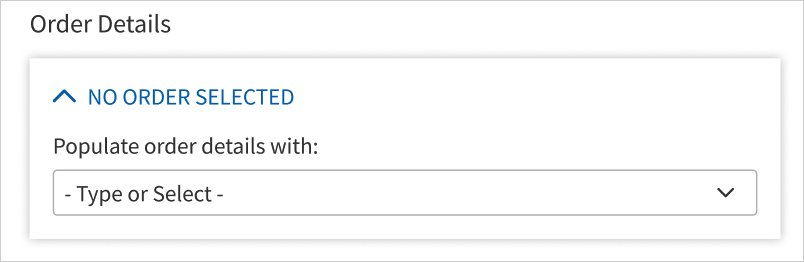
Once a patient is selected the Order Details section is enabled.
Note
-
The dropdown will contain any (SURG) and (PROC) orders related to the selected patient.
-
Currently we display ALL order statuses EXCEPT for “Closed” and “Deleted” in the dropdown options to select from.
-
Selecting an Order is not required. The scheduler can book an appointment without selecting an Order for it.
-
If an order was not selected at the time of booking, you can select the order within the surgical case workflow in the patient's chart. We don't currently support selecting an order for a booked appointment through the scheduling workflow.
-
If an Order isn't selected when booking, users can continue other scheduling tasks as normal. However, surgical order details will be absent from the calendar event, appointment tooltip, and Edit Lineup appointment cards.
-
If no Order is selected during booking, the Surgical Order description and Surgical Case ID will not appear in the scheduling experience.
-
Even if a surgical order was selected during booking, some details might still be missing — for example: side, Anatomical Site, Anesthesia, Guidance, Special Instruments/Equipment. Those fields appear only if they were populated on the Order.
-
-
Type or select an order from the dropdown menu
-
Upon selecting an Order option the Order Details section gets populated with the information from the Order document
Note
Any empty fields in the Order document will display as "No information provided" -
You can select a different Order option by typing or selecting an Order from the dropdown
-
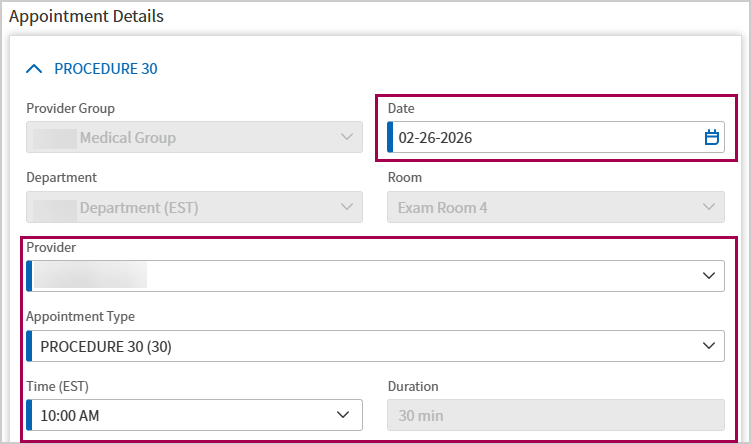
- Enter the procedure details:
- Date — Select a date for the procedure from the calendar. The time slot you select determines this field.
Department — Defaults to the selected department for the procedure associated with the time slot. Select which department practice you want to book a procedure with. The time slot you select determines this field.
Provider — Select a provider to book a procedure with.
Note
For a provider to be available in the Provider dropdown, the provider must have availability in that department in the next 180 days (same as on ambulatory Appointment Scheduling). This will be changed in an upcoming release, but for now, a small, recurring schedule template would resolve this issue. Provider dropdown should also be updated (if used).Appointment type — Select a reason for the visit.
- Time — Select a start time for the procedure.
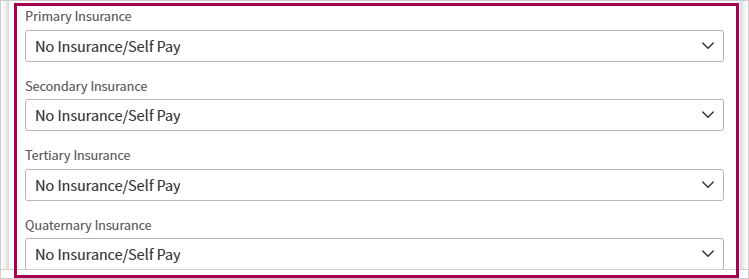
- Enter insurance information. You can enter:
- Primary Insurance
- Secondary Insurance
- Tertiary Insurance
- Quaternary Insurance
Patient's condition related to — This an optional field. Enter information related to the patient condition if applicable.
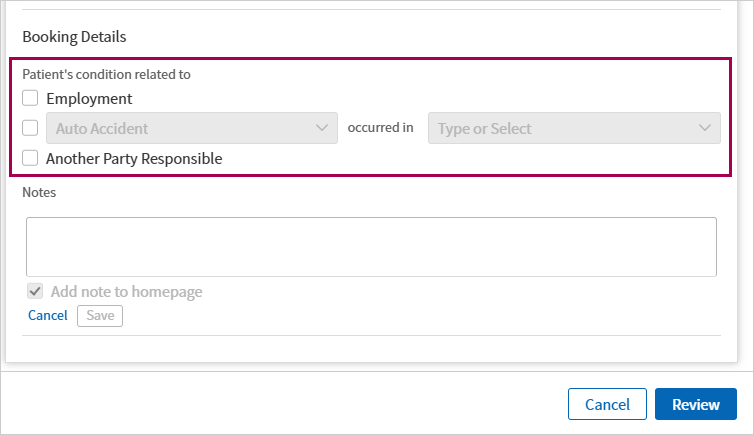
Notes — Add any information you’d like your provider to see prior to the visit.
Note
Any notes added during booking will be visible to from the ASC Calendar in the appointment tooltip.
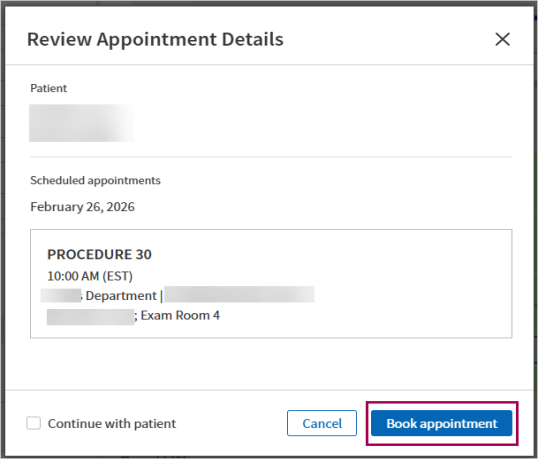
- Click Review. The Review Appointment Details page appears with a preview of how the schedule appears with the selected time slot filled.
-
Click Book appointment.
To cancel procedures
-
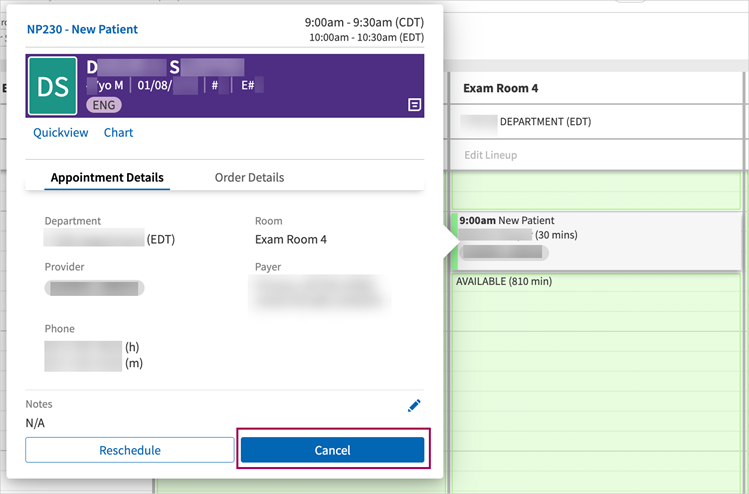
Click on a booked procedure on the calendar and click Cancel.
-
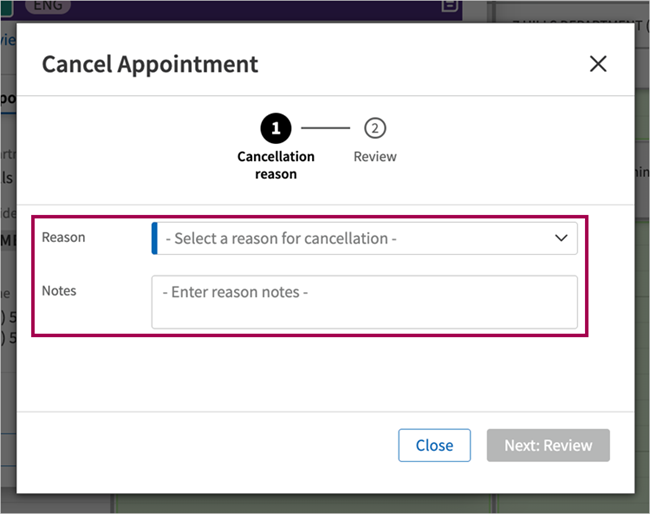
Select a Reason for the cancellation and add a note if applicable.
-
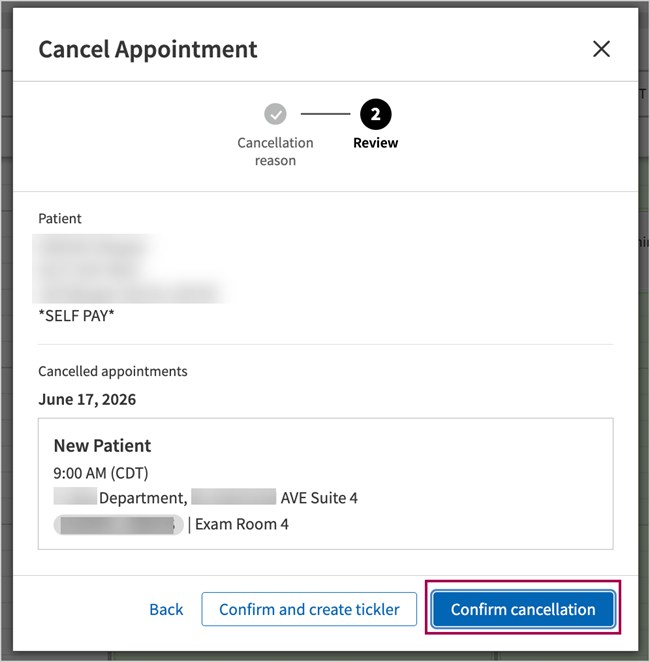
Click Next: Review. The Cancel Appointment details page appears with the details of the appointment that is to be canceled.
-
Click Confirm cancellation to cancel the procedure. Once the procedure has been successfully canceled, it will be removed from the room's schedule.
To reschedule procedures
-
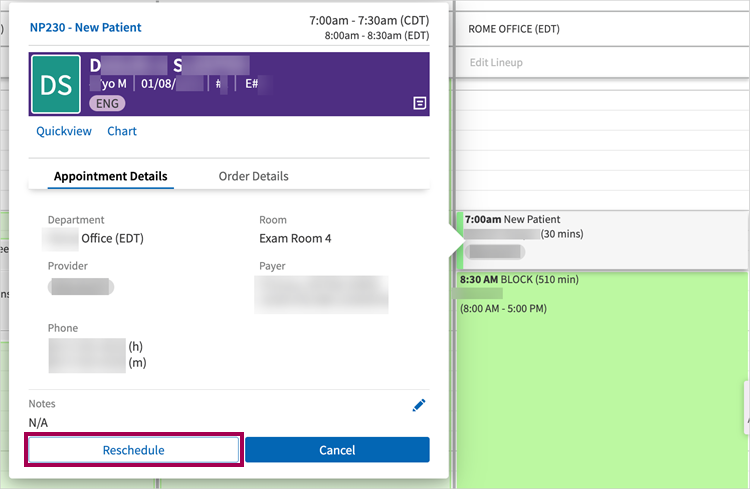
Click on a booked procedure on the calendar and click Reschedule.
-
The Edit Appointment page appears and you can edit any field except for Provider Group and Department. These fields are disabled to prevent clearing out the order selection which is dependent on provider group and
department.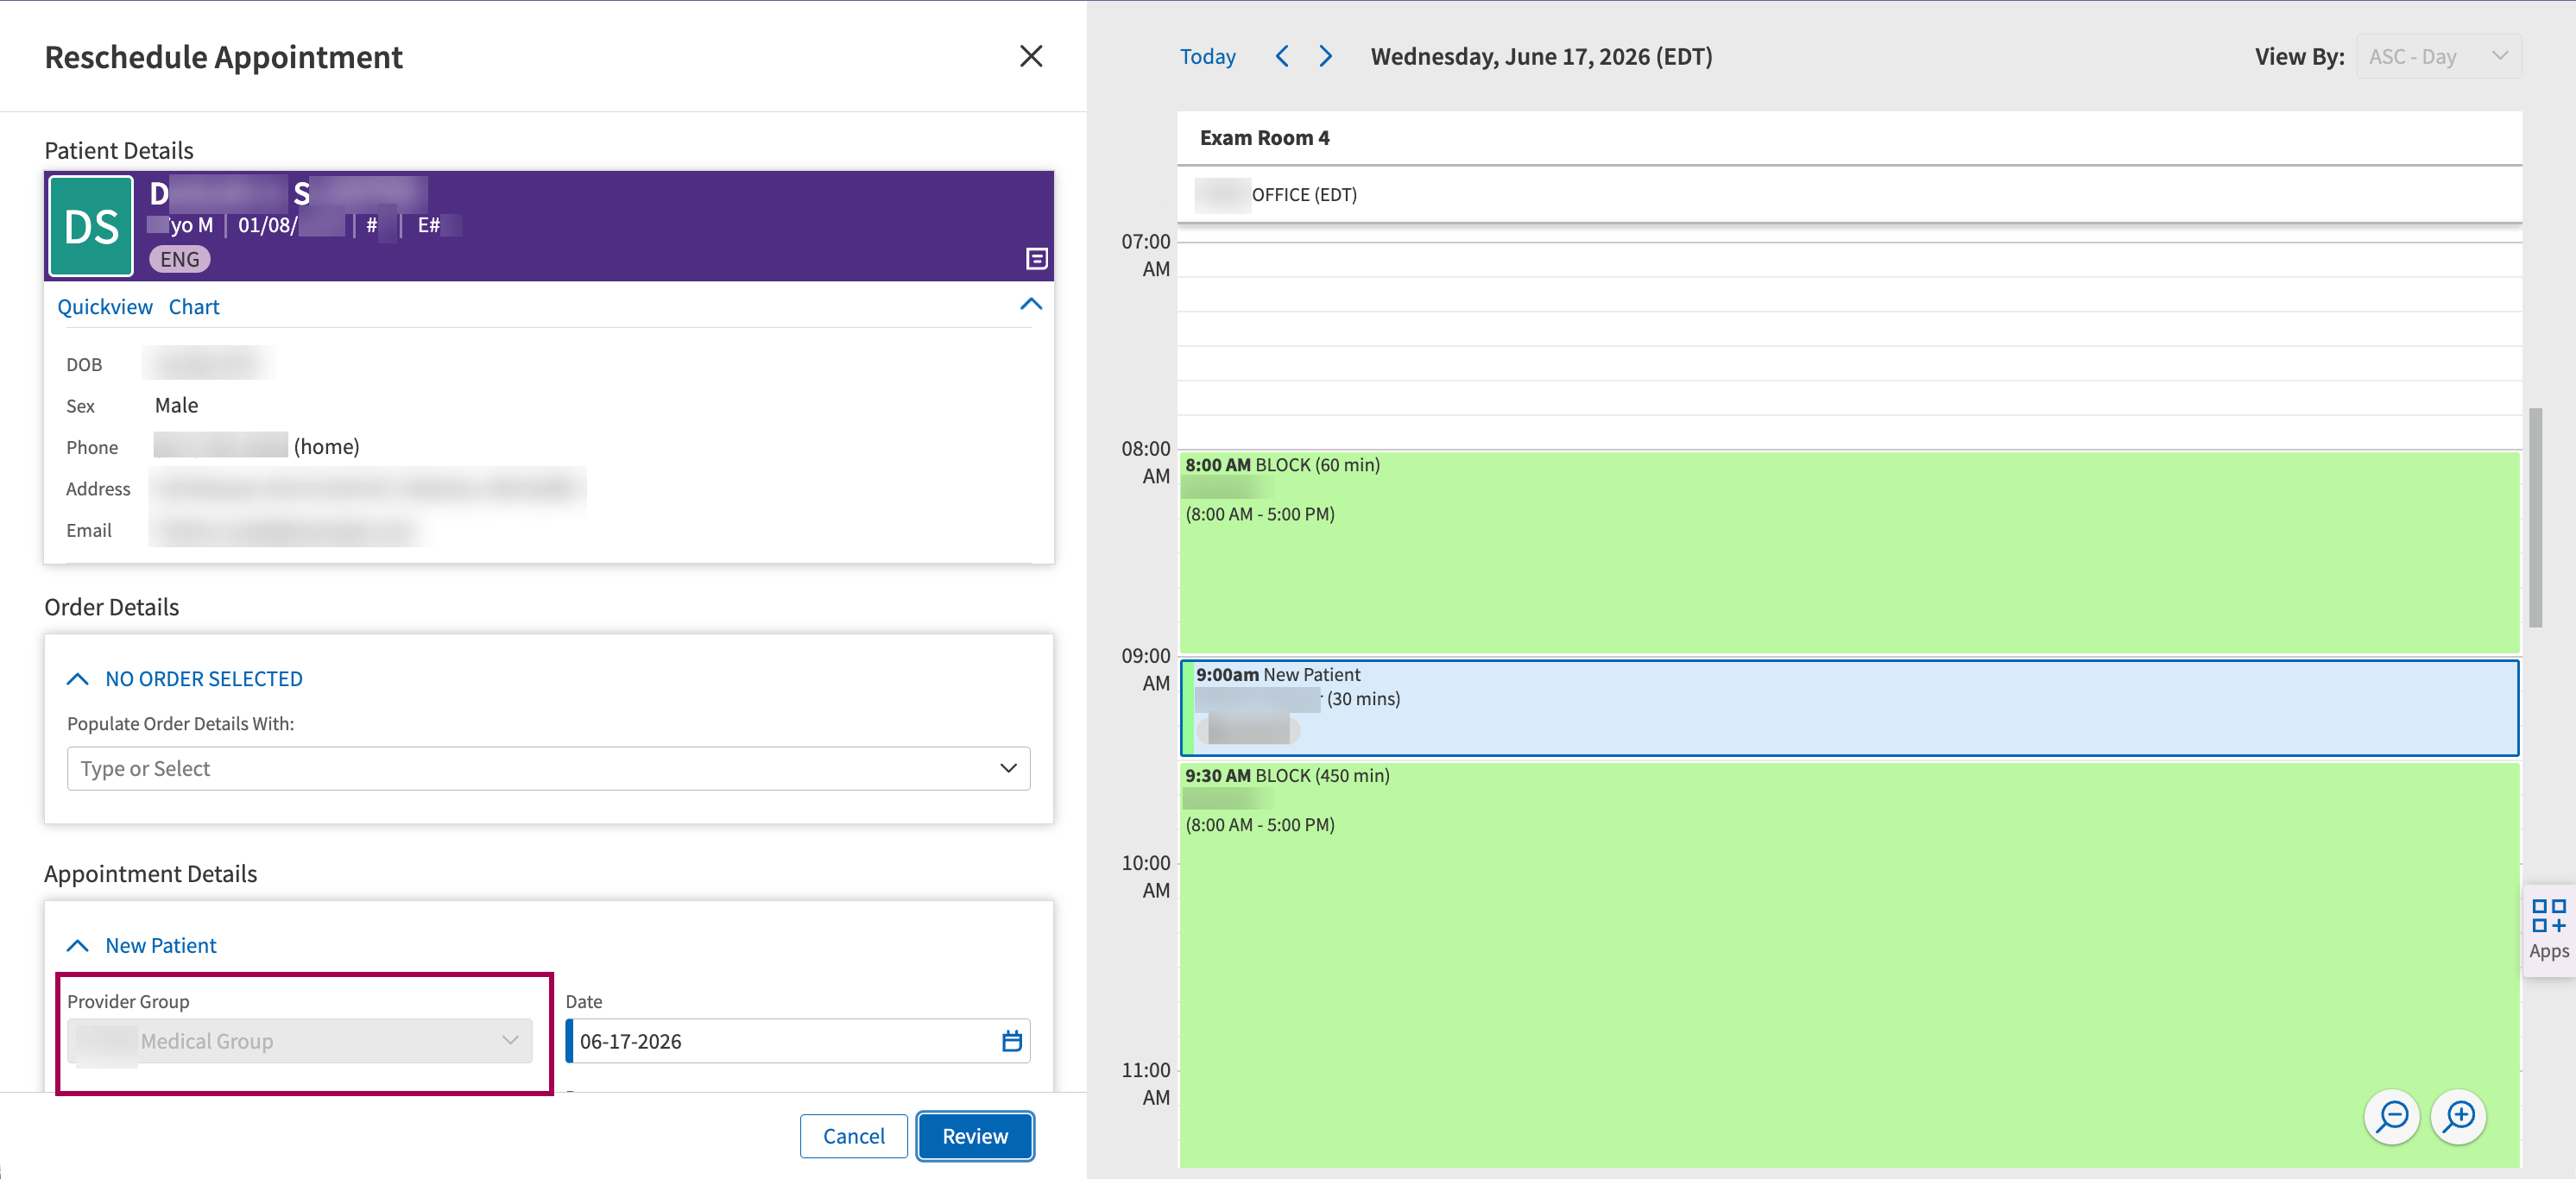
Note
If the Time, Date, or Provider is modified, the page header will update to Reschedule Appointment and you will be required to enter a reschedule reason. -
After you've made your necessary updates, click Review.
-
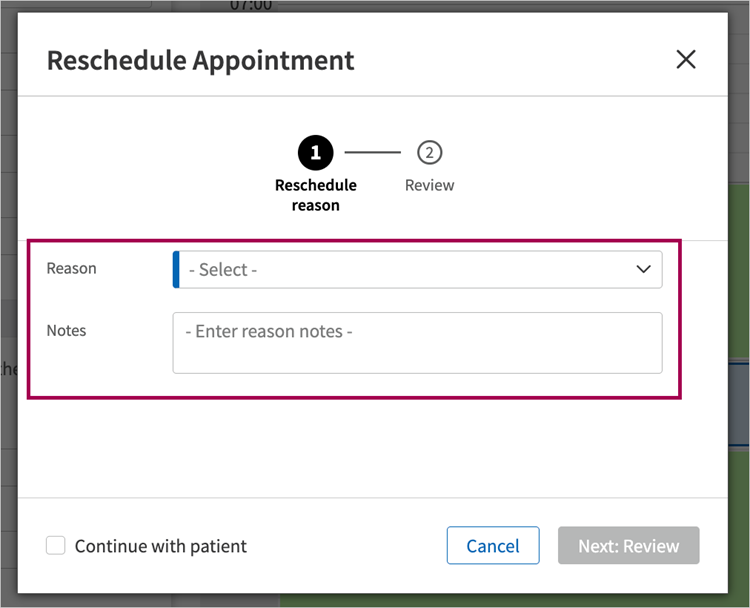
Select a Reason for the reschedule and add a note if applicable.
-
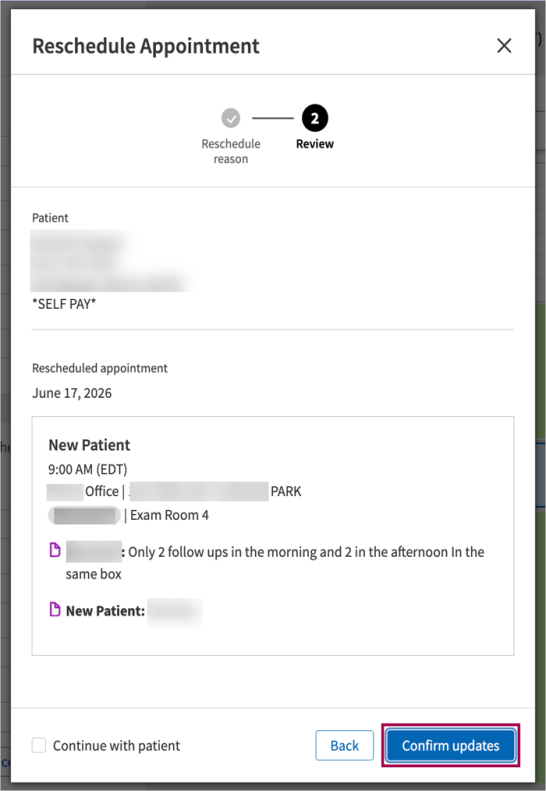
Click Next: Review. The Reschedule Appointment details page appears with the details of the appointment that is to be rescheduled.
-
Click Confirm updates to reschedule the procedure.
To edit procedures
-
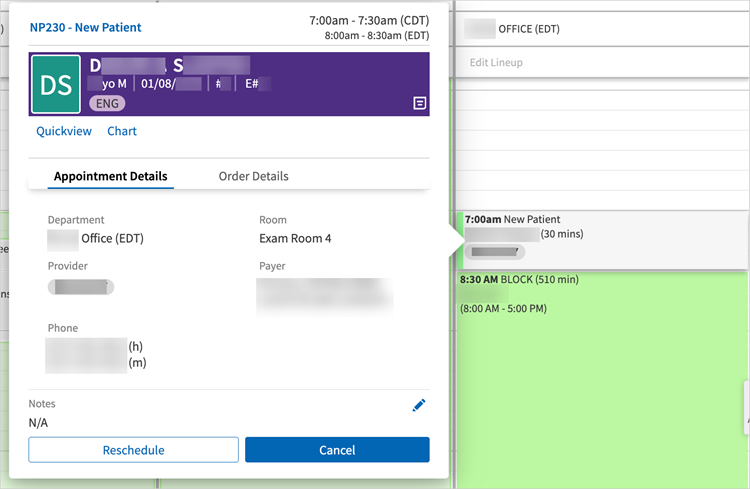
Click on a booked procedure on the calendar and click Reschedule.
-
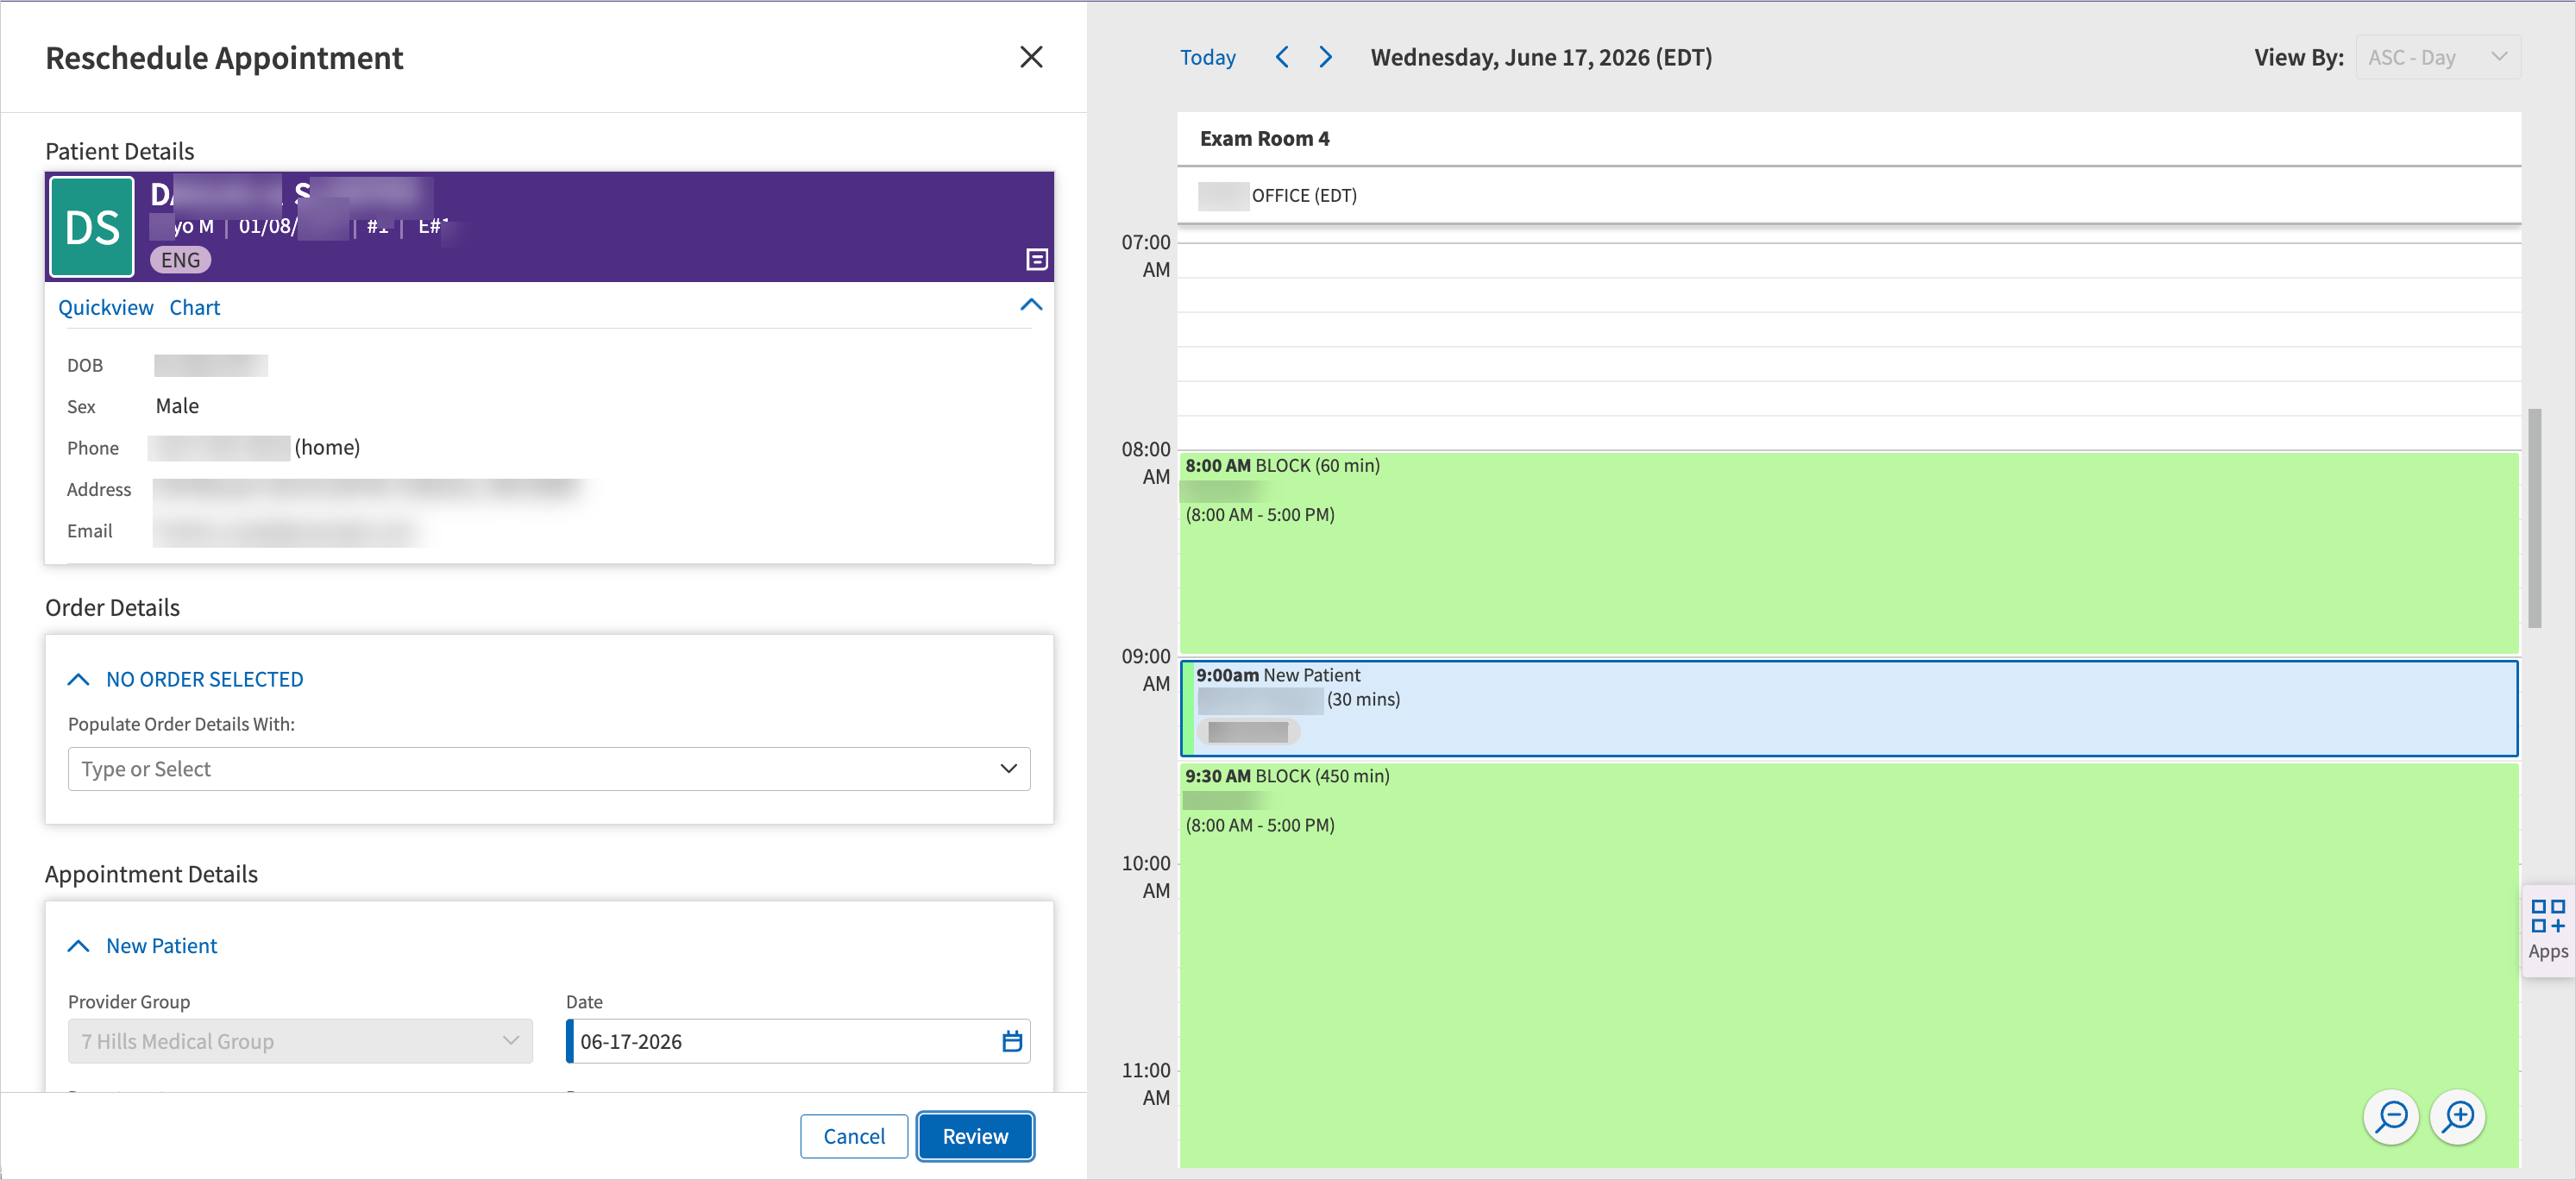
The Edit Appointment page opens and you can modify any field except for Provider Group and Department. These fields are disabled to prevent clearing out the order selection which is dependent on provider group and department.
Note
If the Time, Date, or Provider is modified, the page header will update to Reschedule Appointment and you will be required to enter a reschedule reason. -
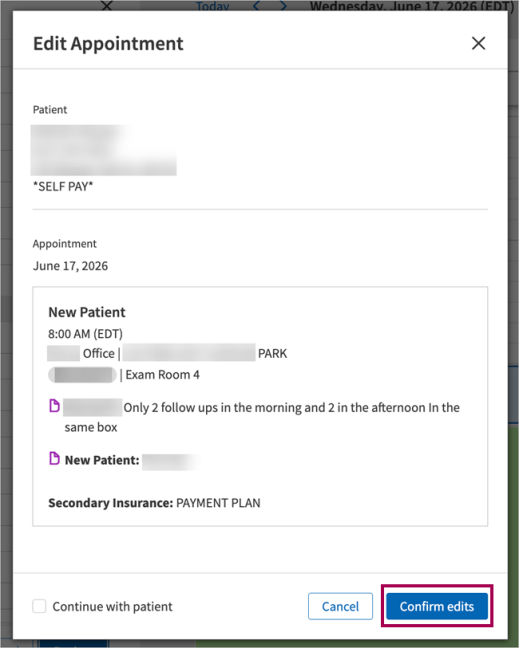
After you've made your necessary updates, click Review. The Edit Appointment details page appears with details of the procedure modifications.
-
Click Confirm edits.
-
If those updates included modifications to the Time, Date, or Provider fields, you will need to select a Reason for the cancellation and add a note if applicable.
-
Click Next: Review. The Reschedule Appointment details page appears with the details of the appointment that is to be rescheduled.
-
Click Confirm updates to reschedule the procedure.
Edit Lineup
You can edit the order of procedures without canceling or rescheduling them the day before, or as required by your organization's policy.
The Edit Lineup button is enabled when there is more than one procedure scheduled in the room on that day.
Click Edit Lineup.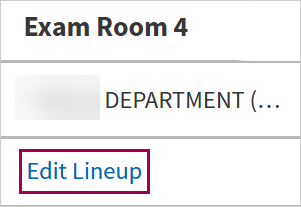
Click and hold the reorder icon to drag the procedures into your preferred order.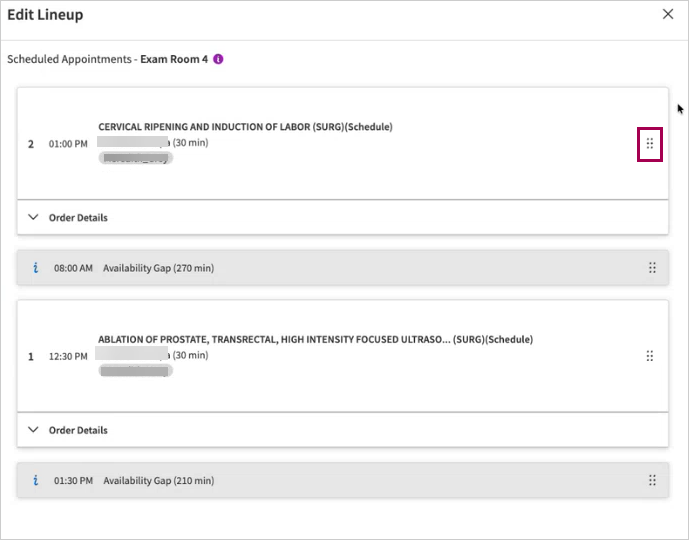
Click Save.
Important
Editing the lineup does send updates to the patient via the Patient Portal or anywhere else automatically. To hide appointments in the Patient Portal, submit a case to the CSC or to your Onboarding project team.
View surgical information in booked slot
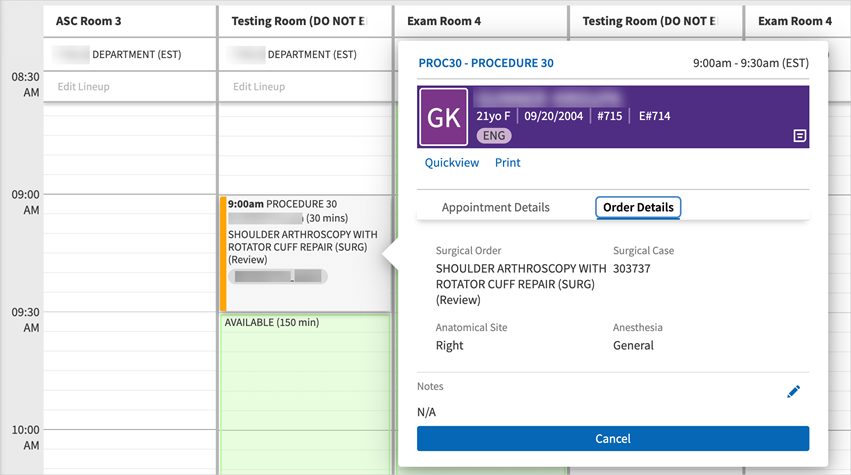
Once you book a procedure, you can see the type of surgical procedure.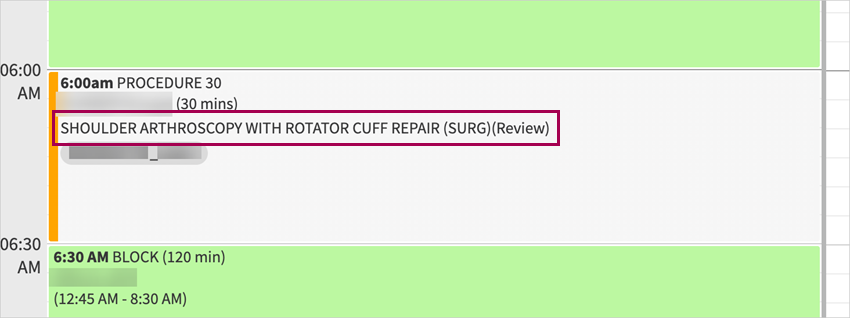
When you click into a booked slot, you can click Order Details to view more surgical procedure information:
-
Surgical Order
-
Surgical case
-
Specific details from the Surgical Order if they were populated in the Order document (Side, Anatomical Site, Anesthesia, Guidance, Special Instruments/Equipment)