VIP Access Credentials
A Symantec credential ID is a unique identifier the Symantec VIP Access app assigns to a provider’s device at installation. This ID appears above the security code generator in the app.
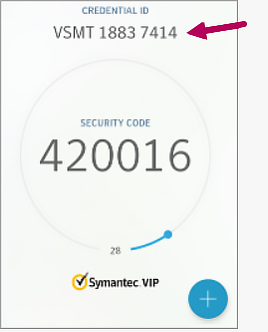
athenaOne stores this ID in a provider’s user profile within the VIP Access Credentials table, which uniquely associates the provider’s Symantec VIP Access app and their device (token) with their user account.
When you enable a credential ID in VIP Access Credentials, it allows athenaOne to further authenticate the provider’s identity as they enter security codes to prescribe controlled substances.
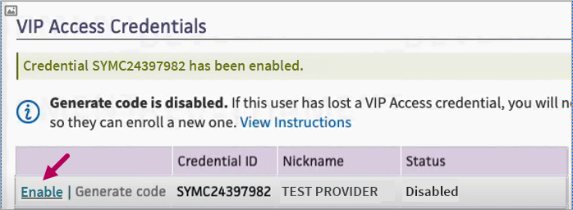
In this article, access steps to disable or enable a provider’s credential ID for EPCS authentication.
You must have superuser permissions in athenaOne to navigate to and use this feature.
- On the Main
Menu, click Settings
 >ADMIN | User. In the left menu, under PRACTICE LINKS | Users, click Users.
 -
On the Users page, enter search criteria to find the provider. Click Search. Locate the provider in the results returned. Click update.
-
In the user profile, click the Security tab.
Scroll to the bottom of the page to locate the VIP Access Credentials table.
- Navigate to VIP Access Credentials.
-
In VIP Access Credentials, check the Status column to the right of the provider’s Credential ID and Nickname.
Note: Some providers may have multiple credential IDs listed.

-
If Enabled appears in the Status column, the provider has successfully completed the verification process and has an active credential ID.
-
If Disabled appears the Status column, the credential ID is not active. This indicates that the provider cannot use security codes from a Symantec VIP Access app with this credential ID to prescribe controlled substances in athenaOne.
-
If no status appears in the Status column, the identity verification process was started for the provider but the provider has not completed it. Until the provider completes the process and their credential ID is enabled, they will be unable to prescribe controlled substances by using the Symantec VIP Access app with that credential ID.
-
- Navigate to VIP Access Credentials.
-
In VIP Access Credentials, locate the credential ID with Enabled in the Status column.
-
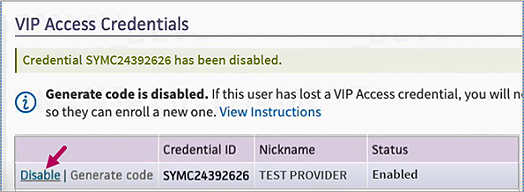
In the credential ID row, click Disable. Once disabled, a notification appears to confirm this action.
If a provider’s credential ID is currently disabled, you can enable it from the VIP Access Credentials table.
- Navigate to VIP Access Credentials.
-
In VIP Access Credentials, locate the credential ID with Disabled in the Status column.
-
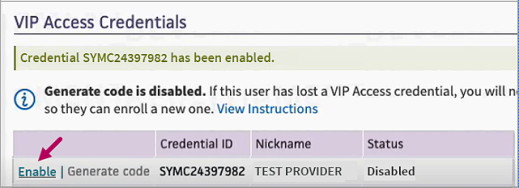
In the credential ID row, click Enable. Once enabled, a notification appears to confirm this action.
If a provider loses access to their credential ID, they will require EPCS access reinstated. Complete the following to disable their current credential ID and restart the EPCS verification process for them.
- Navigate to VIP Access Credentials.
-
In VIP Access Credentials, locate the credential ID with Enabled in the Status column.
-
In the credential ID row, click Disable.
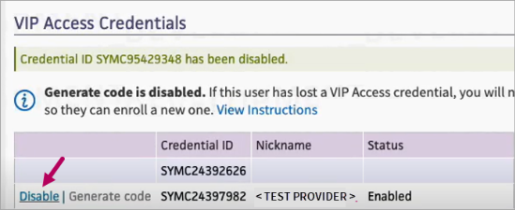
Once disabled, a notification appears to confirm this action. Click View Instructions for additional steps or complete the steps that follow.
-
Revoke the provider’s current EPCS access.
-
Display the Users page.
-
Click the Identity verification tab.
-
Click Revoke.
-
-
Start the identity verification process for the provider again. Follow the steps in the Trusted individual identity verification section of User Guide – EPCS Enrollment.
-
Have the provider complete the verification process.
-
Ask the provider to follow the steps in the Prescriber completes the verification process section of User Guide – EPCS Enrollment.
-
Remind the provider to add their new credentials, which is included in Prescriber completes the verification process section of the User Guide – EPCS Enrollment steps.
-
Remind the provider to delete any old credential IDs.
-
Ask the provider to accept terms and conditions and reset their password.
Direct them to Settings (Gear)
 > MY CONFIGURATIONS | User Profile > Identity Verification tab. In Terms and Conditions, the provider clicks Accept.
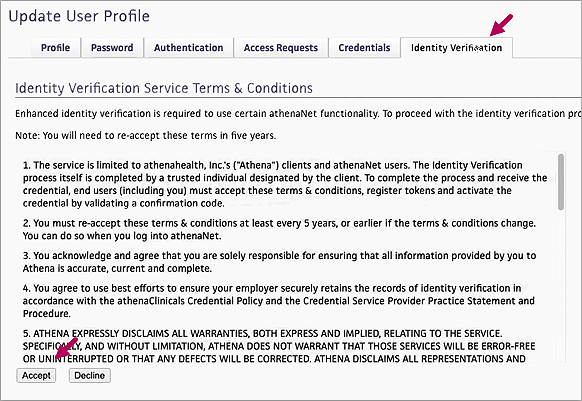
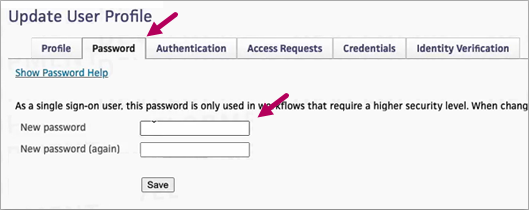
After accepting terms and conditions, the provider clicks the Password tab, enters a new password, reenters the password to confirm, and then clicks Save.
-