Multifactor Authentication for athenaOne Login
This page covers both admin and end user workflows for configuring your practice’s multifactor authentication (MFA) policy, setting up additional authentication for your account, and managing additional authentication methods for yourself and others.
Important:
Multifactor authentication (MFA) is now required for all athenaOne users who do not log in through single sign-on (SSO). This requirement is in effect for all practices created on or after January 23, 2025 and is being rolled out to all other practices between January 16 and March 21, 2025. If your practice has not yet received this requirement, you can still enable and disable MFA per the section below (Administrators: Manage MFA settings for your practice (legacy workflow)).
MFA adds a layer of protection for sensitive information in athenaOne by requiring users to provide two or more authentication methods (or “factors”) during login, where one of these methods is their password. MFA is built natively within athenaOne’s login functionality and extends to all applications accepting athenaOne user credentials, including athenaOne Mobile and athenaText mobile apps. By default, MFA is not enforced for logins using single sign-on (SSO) because those identity providers may already impose their own MFA requirements.
To avoid undue friction on clinicians and practice staff, athenaOne’s native MFA does not prompt users on every login. Instead, MFA prompts are based on an automated risk assessment that considers attributes including IP address, physical location (based on IP), device (using a browser cookie), and past login behavior.
For more detailed information on MFA mechanics and answers to common questions, please refer to our FAQ regarding MFA for athenaOne login. For basic workflow documentation, please refer to the sections below.
MFA for athenaOne supports four authentication methods in addition to a user’s password:
| Authentication Factor | How It Works |
| Text Message (SMS) | Receive a text with a one-time passcode to a mobile phone or VoIP number. |
| Voice Call | Receive a call with a one-time passcode to a mobile phone, landline, or VoIP number. |
| Authenticator App (TOTP) | Use a time-based one-time passcode (TOTP) from an authenticator app (e.g., Google Authenticator, Microsoft Authenticator, Duo Mobile). Users can freely download and set up any mobile or desktop app using the TOTP standard with this authentication method. There is no requirement that your organization must have a contractual relationship with the app developer, but you also cannot restrict users to a particular app (although for familiarity, they may prefer to use an app already deployed by your organization). |
| Okta Verify App | Use the Okta Verify mobile app (available on iOS and Android devices) to receive a one-time passcode or push notification. As with other authenticator apps, users are free to use Okta Verify regardless of whether your organization has a contractual relationship with Okta. You can only receive your code or notification to the device(s) on which you first set up Okta Verify. |
Users may only set up those authentication methods allowed by their practice’s MFA policy. Each MFA policy is distinguished by its relative security, based on the minimum ability of authentication methods allowed by that policy to reliably confirm the user’s identity:
-
Lower security: Okta Verify App, Authenticator App (TOTP), Text Message (SMS), Voice Call
-
Higher security: Okta Verify App, Authenticator App (TOTP)
By default, practices are enabled for the most flexible MFA policy option, allowing users to set up any of the four authentication methods supported by this feature.
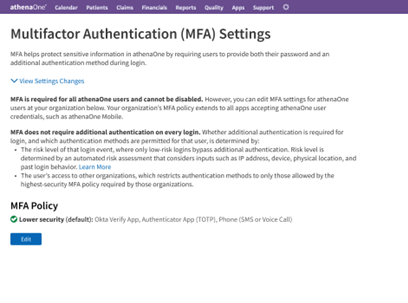
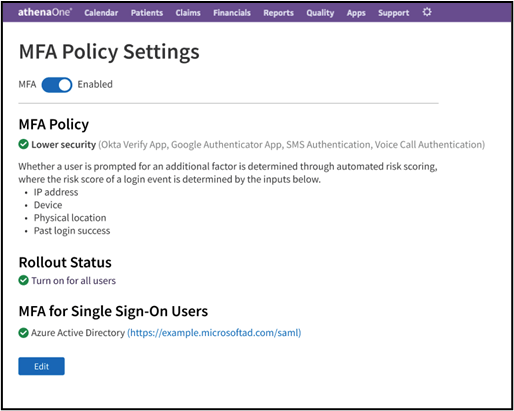
Access to the MFA Policy Settings page requires the Master User Admin role. In athenaOne, click on Settings (gear icon) > Practice Manager, search for "MFA” from the left-hand navigation, then click the resulting link for MFA Policy Settings. This takes you to the summary screen for your practice’s MFA policy:
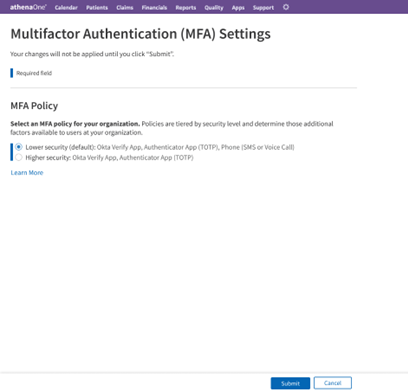
Clicking Edit on the summary view above takes you to the following screen, where you can adjust your practice’s MFA policy to be more accommodating or restrictive of additional authentication methods:
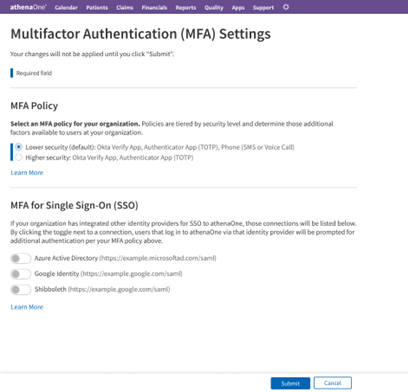
If your practice has one or more identity providers configured for inbound SSO to athenaOne, you will see an additional section letting you toggle on athenaOne’s MFA for those SSO connections. If MFA is enabled for an SSO connection, a user accessing athenaOne via that SSO connection will encounter athenaOne’s native MFA prompts in addition to any MFA already enforced by that identity provider. For this reason, MFA is disabled for all SSO connections and logins by default:
To submit changes to your MFA policy, click Submit at the bottom of the page and complete the confirmation dialog. You will be returned to the summary screen with a progress indicator of your changes being applied:
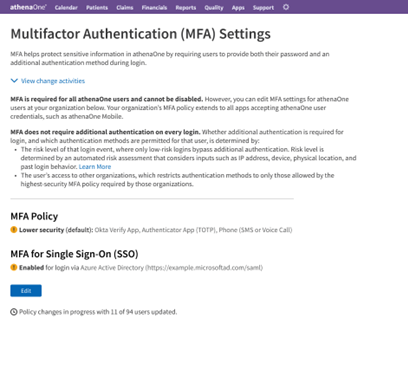
Once your changes have been applied to all users at your practice, the progress indicator disappears, and each alert icon is replaced with a green checkmark:

Important: The below workflow applies only to practices that have not yet received athenaOne’s MFA requirement. If your practice has already received the MFA requirement, refer to the previous section instead.
If you are a Master User Admin, you can enable MFA for your practice by navigating in athenaOne to  > Admin | Practice Manager > MFA Policy Settings.
The first time you visit the page, you will see that all settings are unselected and the toggle at the top of the page indicates MFA is currently disabled. To enable MFA for some or all users at your practice, click the toggle and complete each of the on-screen steps to finish setup, detailed below. Changes to your MFA policy settings will not be applied or saved until you have completed your selections and clicked Submit at the bottom of the page.
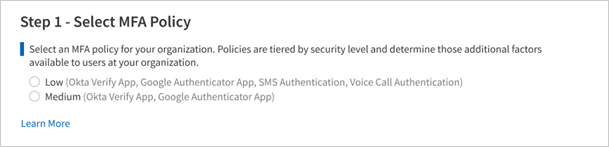
You must first choose the MFA policy that will apply to your users, selecting from either the lower security or higher security tier. As described in the previous section, the selected policy will determine which factors users can choose from when enrolling MFA for their account.
Choose Lower security to allow users to enroll in additional authentication using any of the following:
-
Okta Verify App
-
Authenticator App (TOTP)
-
SMS Authentication
-
Voice Call Authentication
Choose Higher security to allow users to enroll in additional authentication using either of the following:
-
Okta Verify App
-
Authenticator App (TOTP)
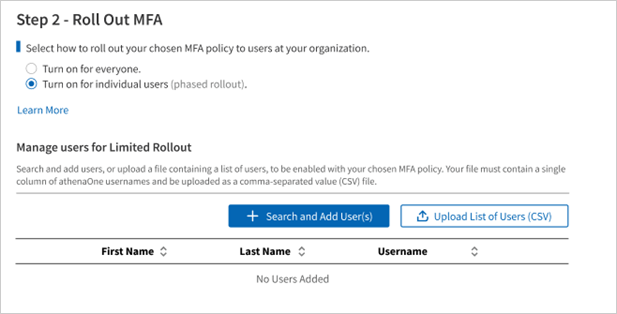
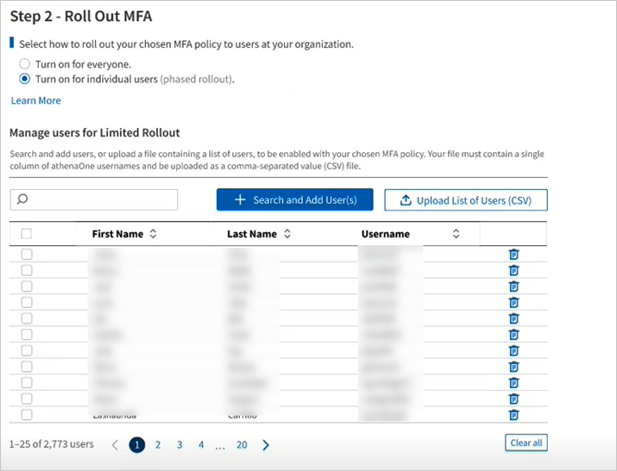
You must then choose which users at your practice will be enabled for MFA, selecting from two options:
-
Click Turn on for everyone to enable your selected MFA policy for all users with access to your practice. Selecting this option will automatically enable new users that are added to your practice.
-
Click Turn on for individual users to enable your selected MFA policy only for users you specify. Selecting this option will display a table to Manage Users for Limited Rollout, where you will add those users for which you would like MFA enabled. You can look up users and add them by clicking
 or upload the list of users in a spreadsheet by clicking
  .
.
-
Search for individual users: To look up an individual user to add to your MFA rollout, click
, then use the search box to look up a user by their first name, last name, or their athenaOne username. Click Searchto display results, which are sorted alphabetically by username.
Note only the first few results are displayed, therefore you may need to use multiple search terms to filter to a specific user. -
Add selected users: From the search results, click the checkbox next to one or more users you would like included in your MFA rollout, then click Add User.
The search box will close automatically, and your selected users will then be reflected in the table under Manage Users for Limited Rollout. You can click again and repeat the process above to continue adding users to the table.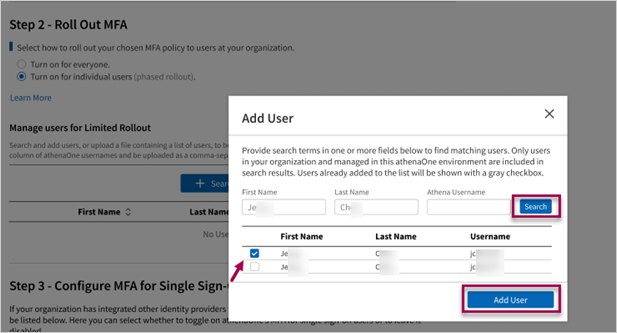
Tip
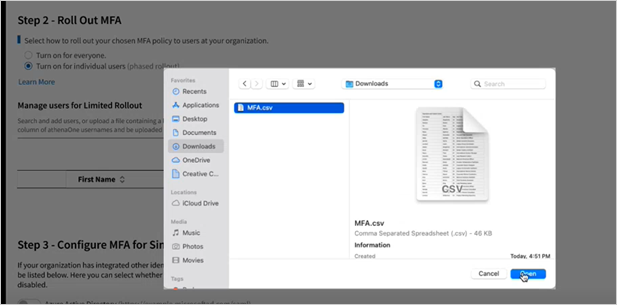
To specify many users at once to add to your MFA rollout, you can upload a spreadsheet of athenaOne usernames. Per the on-screen instructions, this spreadsheet must contain only athenaOne usernames, organized as a single column and saved with the “.csv” (comma-separated values) file extension.
Add multiple users to the MFA rollout
To specify many users at once to add to your MFA rollout, you can upload a spreadsheet of athenaOne usernames. You do not need to edit this spreadsheet for duplicate or non-existent usernames, as those will be filtered out automatically during file upload.
-
To populate the usernames in your spreadsheet to the table in Manage Users for Limited Rollout, click
.
A file navigator will appear for you to search and open the CSV file from your computer. -
Click Open and observe that all eligible usernames have been added to the rollout table. Any usernames that fail validation and are excluded from file upload will be summarized above the table with a button to Download Report for the full list of usernames and corresponding error reasons.
-
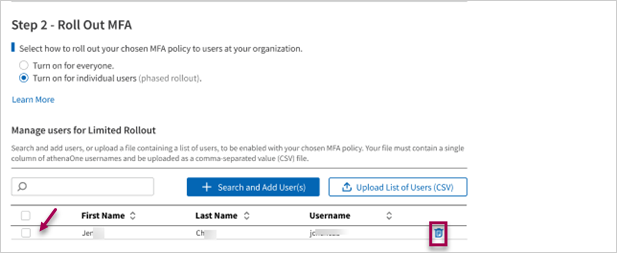
You can delete users you have previously added to the table by selecting them individually from the list and clicking the delete icon.
Note on support environments:
-
When MFA is enabled for a user, it extends across all athenaOne contexts and environments to which the user has access. For example, a Production user that has been enabled for MFA may be prompted to enroll or verify their additional factors when logging in to Preview or when logging in to another Production context to which they have access.
-
In MFA Policy Settings, when managing users for limited rollout, you can only search, add, or upload users to be enabled for MFA in the environment in which they were created. For example, Production users can only be enabled for MFA from the MFA Policy Settings in Production, while Preview-only users (those with a “p-“ prefix) can only be enabled from the MFA Policy Settings in Preview.
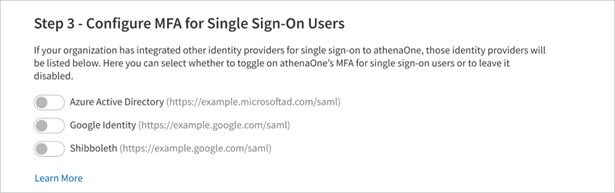
This step applies only to practices that have enabled inbound single sign-on (SSO) to athenaOne from one or more of their own identity providers (i.e., using login credentials managed by the practice instead of an athenaOne username and password) and is hidden for all other practices. If this step is visible, your practice’s enabled SSO connections will be listed here with toggles indicating whether MFA is enabled for users that access athenaOne through that identity provider.
-
If the toggle for an identity provider is left OFF, all users that access athenaOne through that SSO connection will be excluded from your selected MFA policy, even if those users were specified in Step 2.
-
If the toggle for an identity provider is turned ON, any users that access athenaOne through that SSO connection and were specified in Step 2 will be enabled for your selected MFA policy. Users excluded from Step 2 will not be enabled for MFA, even if their identity provider used to access athenaOne is toggled ON for this step.
Note
A practice might prefer to leave the toggle OFF for an SSO connection if MFA has been separately implemented and enforced through that identity provider. Otherwise, if the toggle for that SSO connection were turned ON, those users might be prompted twice for an additional factor (once through their identity provider’s MFA policy and again by the practice’s MFA policy in athenaOne) upon login to athenaOne.
To save and apply your MFA policy settings, click Submit at the bottom of the page, then review the confirmation prompt and click Confirm if you are ready to enable MFA for the selected users. If you would instead like to back out or discard your changes, click Cancel at the bottom of the page.

Once you have submitted policy settings to enable MFA, you will be shown a summary of your current settings and rollout status. On this page:
-
If you chose rollout to individual users, you can click View List of Users or Download CSV for details on those users currently enabled for MFA.
-
You can click Edit to make further changes to your settings.
-
You can click the toggle at the top of the page to quickly disable or re-enable MFA for all users specified for MFA rollout.
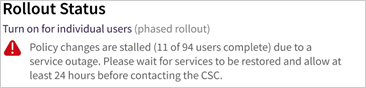
If you have recently updated your settings for a large number of users, you may see a different-colored badge next to Rollout Status indicating those changes are still being applied. A yellow status indicates changes are in progress and reports how many users have so far been enabled, while a red status indicates changes are stalled due to a known service outage.

When MFA is enabled for your account, you will be presented with an additional authentication setup page on your next login. This page appears immediately after entering your username and password on the athenaOne login page (or the athenaOne Mobile app, or any other app accepting athenaOne username and password) and requires you to set up at least one authentication method before proceeding into athenaOne.
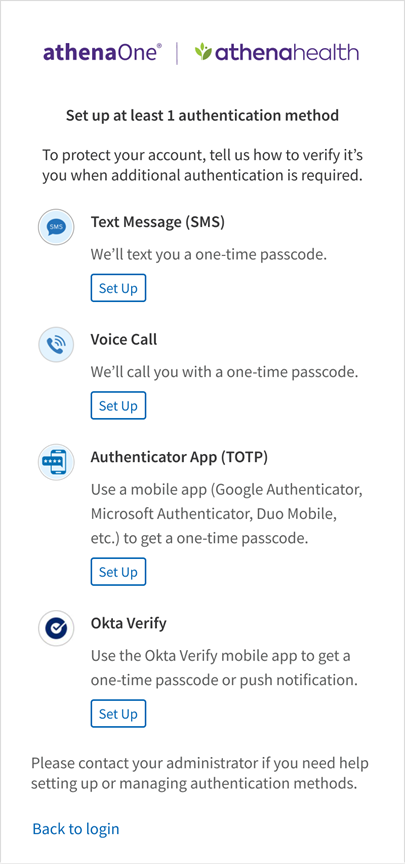
Important
User’s options for additional authentication will vary based on the athenaOne MFA policy enabled by their practice administrator (refer to Available authentication methods and policies section above).
Users with access to multiple athenaOne practices with competing policies will be subject to the highest-security policy (i.e., that with the fewest additional authentication options) enabled by those practices.
Following are the steps that you will perform to set up Okta Verify as an additional authentication method for athenaOne login:
- On the setup page, click Set Up below the Okta Verify App option.
- Select the type of device – iOS or Android – on which you will install and use the Okta Verify app for additional authentication, then click Next. To set up a different authentication method instead, click Choose a different security method.

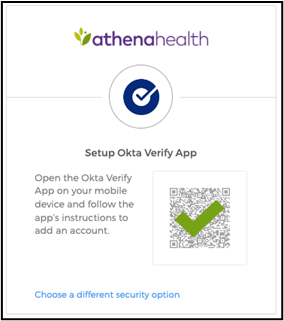
- Follow the onscreen instructions to open the Okta Verify app (you will need to download the app if you have not done so in the previous step) and scan the QR code with your mobile device’s camera.
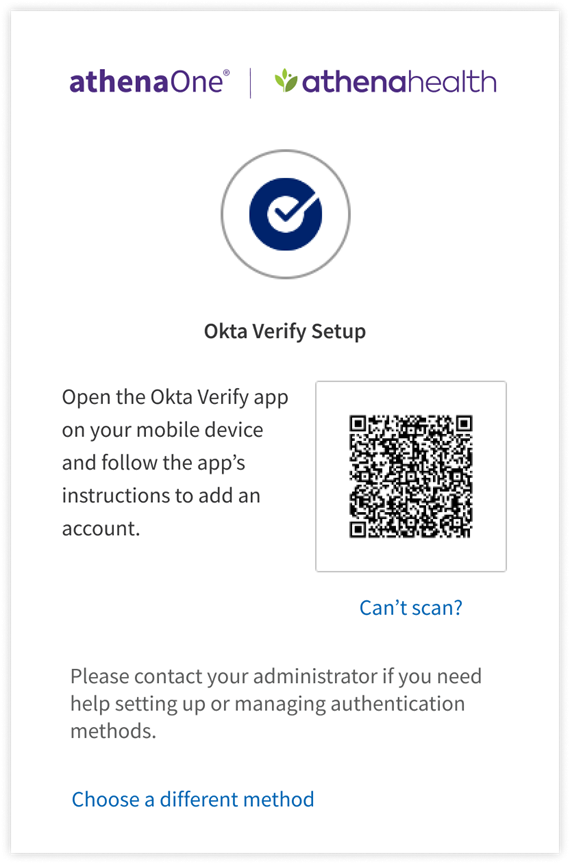
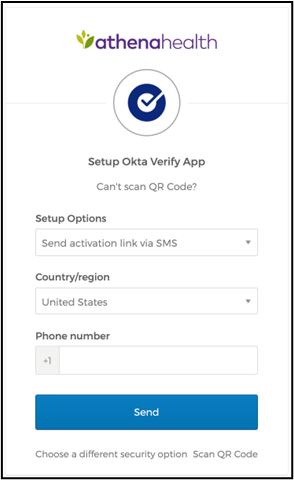
- If you can’t scan a QR code or your device does not have a camera, click Can’t scan? below the QR code to finish Okta Verify setup another way.
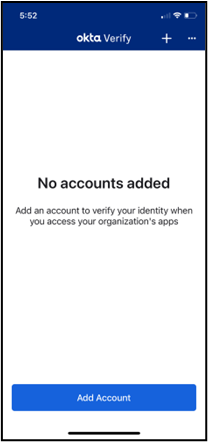
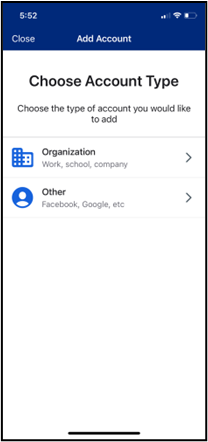
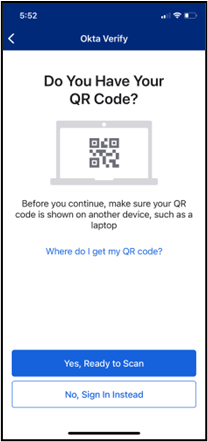
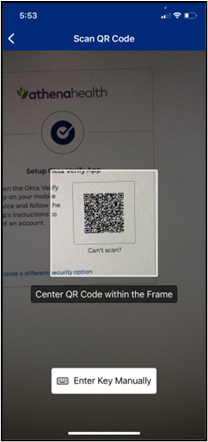
- To set up Okta Verify using the QR code, open the Okta Verify app on your mobile device, tap Add Account, choose Other as your account type, and then tap Yes, Ready to Scan to open your device’s camera to scan the QR code. When your device recognizes the QR code, it will automatically show the account as added in both the Okta Verify app and the device on which you are logging in to athenaOne.
On your mobile device:

On the device from which you are logging in to athenaOne:
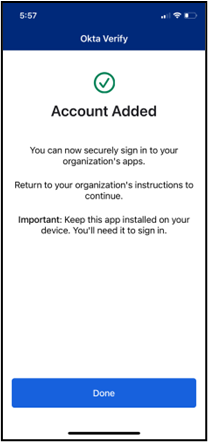
The above image will briefly display to indicate the Okta Verify app has been activated on your device and your authentication method setup is complete.
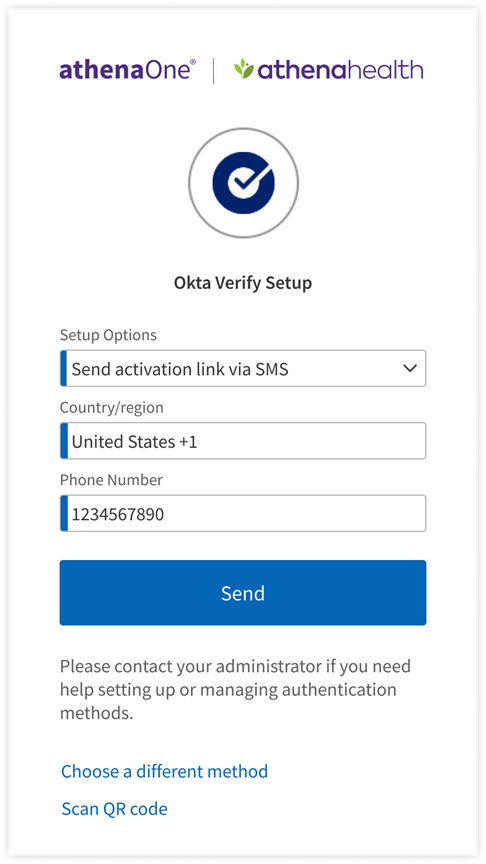
- If you instead clicked Can’t scan? to activate Okta Verify on your mobile device without a QR code, select from the Setup Options drop-down menu to choose your method, complete any required fields, then click Send; a link will be sent by the chosen method to your mobile device. Tap the link to automatically open and activate the Okta Verify app, to complete your factor setup.
On the device from which you are logging in to athenaOne:
On your mobile device:
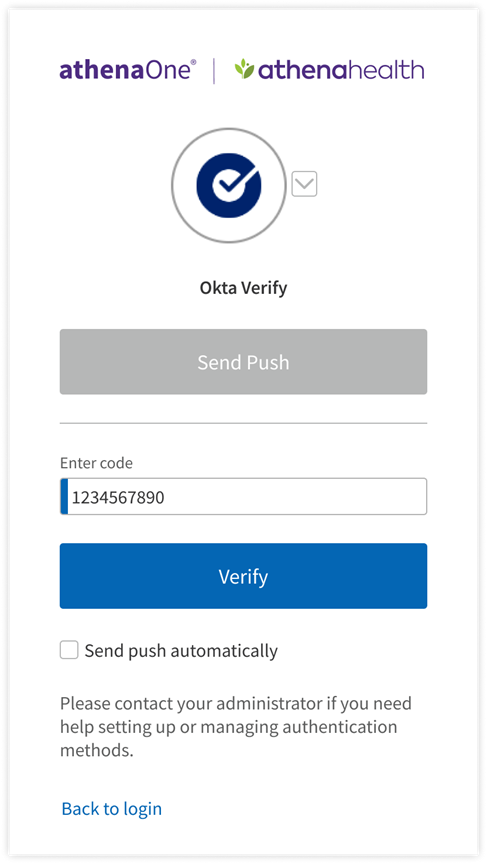
If you have previously set up Okta Verify App as an additional authentication method and are prompted for MFA upon login, you can complete authentication with the following steps:
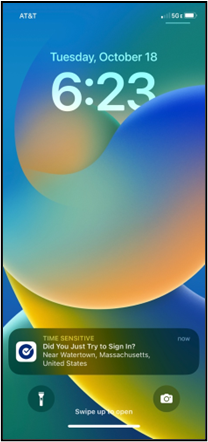
- Click Send Push to receive a notification on the mobile device you originally used to set up Okta Verify.
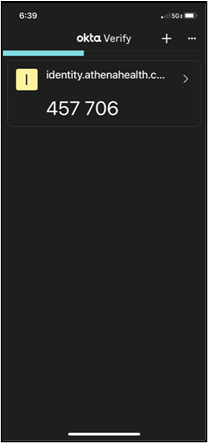
- If you cannot or prefer not to receive a push notification, click Or enter code to manually input the one-time code shown in your Okta Verify app.
- If you have previously set up multiple authentication methods, you can click the toggle next to the Okta Verify icon to choose another method for authentication.

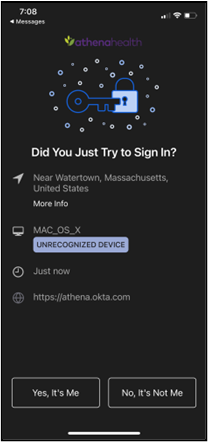
- If you click Send Push, you can complete authentication on your mobile device by tapping the notification and, when redirected to the Okta Verify app, tapping Yes, it’s Me.
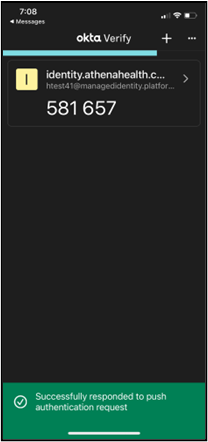
- On your mobile device a pop-up appears at the bottom of your screen indicating successful authentication. Setup is now complete, and you can proceed with login on the device you are using to access athenaOne.
- If you click Or enter code, a field will appear to input the one-time code generated by your Okta Verify app. This code changes every 30 seconds (as indicated by a progress bar at the top of the app window) and will expire and not be accepted for authentication once a new code is generated. Therefore, you must be quick to input this code on the device on which you’re logging in to athenaOne. Enter a valid code in the Enter Code field and click Verify to complete setup.
In the Okta Verify app on your mobile device:
On the device from which you’re logging in to athenaOne:
Following are the steps that you will perform to set up a time-based one-time passcode (TOTP) authenticator app as an additional authentication method for athenaOne login:
- On the setup page, click Set Up below the time-based Authenticator App option. Follow the onscreen instructions to open the Authenticator App (TOTP) (you will need to download an authenticator app if you have not done so in the previous step) and scan the QR code with your device’s camera. If you can’t scan a QR code or your device does not have a camera, click Can’t scan? below the QR code to complete setup another way. To set up a different authentication method instead, click Choose a different security option.
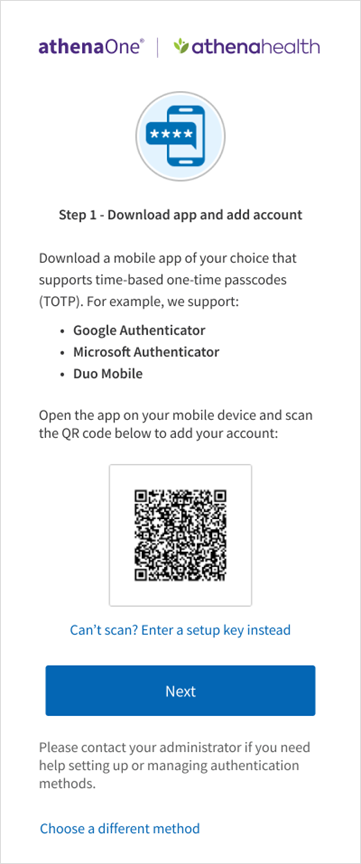
- To set up authenticator app (TOTP):
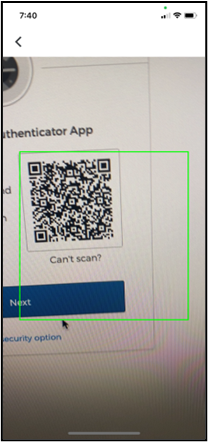
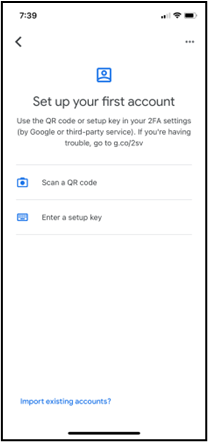
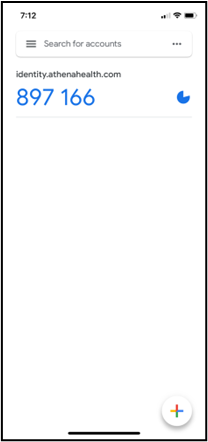
- Using the QR code - open the authenticator app on your desktop or mobile device. While many apps are compatible with this TOTP method, the following screens use Google Authenticator as an example. When prompted to add an account, tap Scan a QR code to open your device’s camera to scan the QR code. When your device recognizes the QR code, it will automatically show the account as added in the Authenticator app.


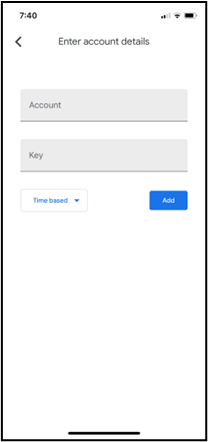
- If you instead clicked Can’t scan? to activate your authenticator app on a desktop or mobile device without a QR code, you are presented with a setup key. Open the authenticator app on your desktop or mobile device and when prompted to add an account, tap Enter a setup key. Enter a label of your choice (e.g., “athenaOne”) in the Account field, and enter the setup key in the Key field. The setup key is not case-sensitive, so you can ignore capitalization. Tap Add to show your account as added in the Authenticator app.
In the authenticator app on your desktop or mobile device:
On the device from which you’re logging in to athenaOne:

3. On the device on which you are logging in to athenaOne, click Next. A field will appear to input the one-time code generated by your authenticator app. You must be quick to input this code on the device on which you’re logging in to athenaOne. Enter a valid code in the Enter Code field and click Verify to complete setup.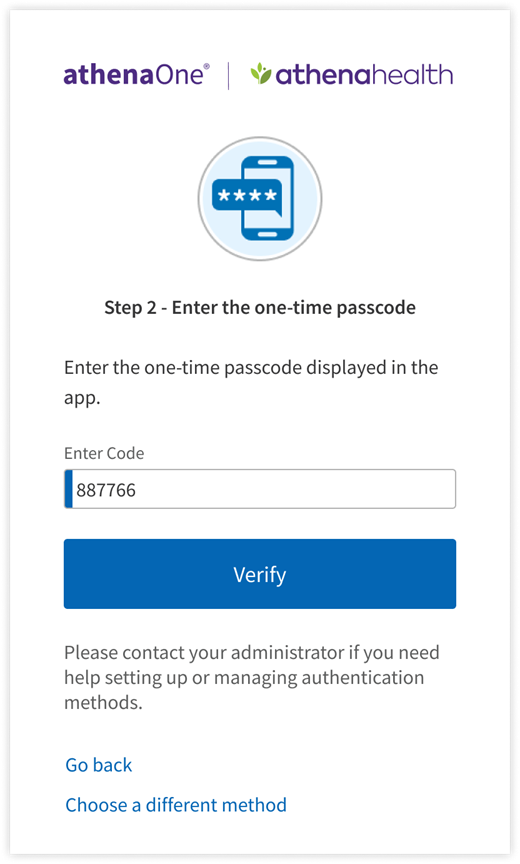
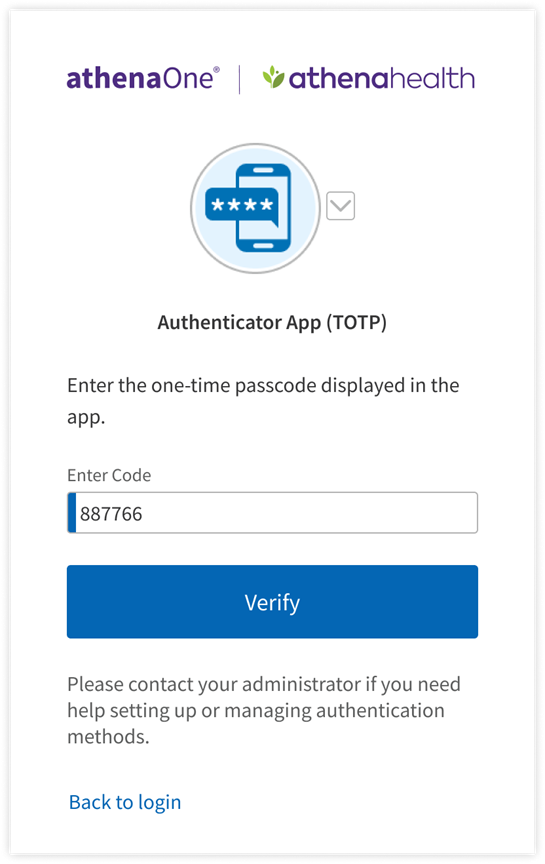
If you have previously set up Authenticator App (TOTP) as an additional authentication method and are prompted for MFA upon login, you can complete authentication by opening your authenticator app on your desktop or mobile device, then entering the one-time passcode generated by your authenticator app in the Enter Code field. This code changes every 30 seconds (as indicated by a circular progress indicator to the right of the code) and will expire and not be accepted for authentication once a new code is generated. Therefore, you must be quick to input this code on the device on which you’re logging in to athenaOne. Enter a valid code and click Verify to complete authentication and get redirected into athenaOne. If you have previously set up multiple authentication methods, you can click the toggle next to the Authenticator App (TOTP) icon to choose another method for authentication.
On the device from which you’re logging in to athenaOne:
In the authenticator app on your desktop or mobile device:

Following are the steps that you will perform to set up text messaging as your additional authentication method for athenaOne login:
- On the setup page, click Set Up below the Text Message (SMS) option.
- Select the country code and enter the number in the Phone number field of the mobile phone you would like to use as your additional authentication method.
- Click Send Code to send a text message with a one-time code to your phone number.
- To set up a different factor instead, click Choose a different method.

- Open the text message with your one-time code on your mobile phone, then enter this code in the Enter Code field and click Verify. If the code is valid, your setup is complete. If after a minute you have not received a text message with your one-time code, you will see a prompt to click Re-Send Code to receive a new one.

1. If you have previously set up text messaging for additional authentication and are prompted for MFA upon login, you can complete authentication by:Click Send Code to receive a text message at the mobile number you originally used to set up your SMS factor, for which the last four digits are shown on your screen.

2. Enter the code received in that text message in the Enter Code field and click Verify to be redirected into athenaOne.

3. If you have previously set up multiple authentication methods, you can click the toggle next to the Text Message (SMS) icon to choose another method for authentication.
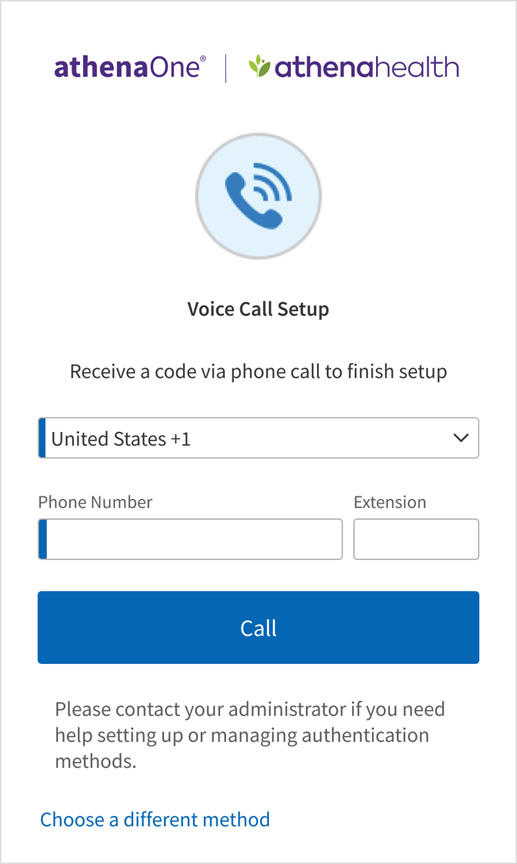
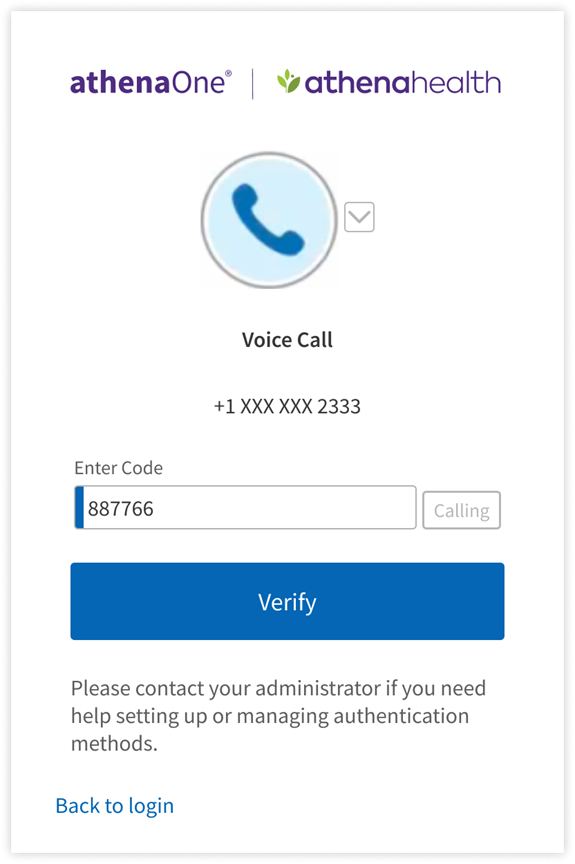
Following are the steps that you will perform to set up a phone call as your additional authentication method for athenaOne login:
- On the setup page, click Set Up below the Voice Call Authentication option.
- Select the country code and enter the number in the Phone number field of the mobile phone or landline you would like to use as your additional authentication factor
- If your phone number has an extension, you can provide it in the Extension field.
- Click Send Code to receive a phone call with a one-time code.
- To set up a different authentication method instead, click Choose a different method.
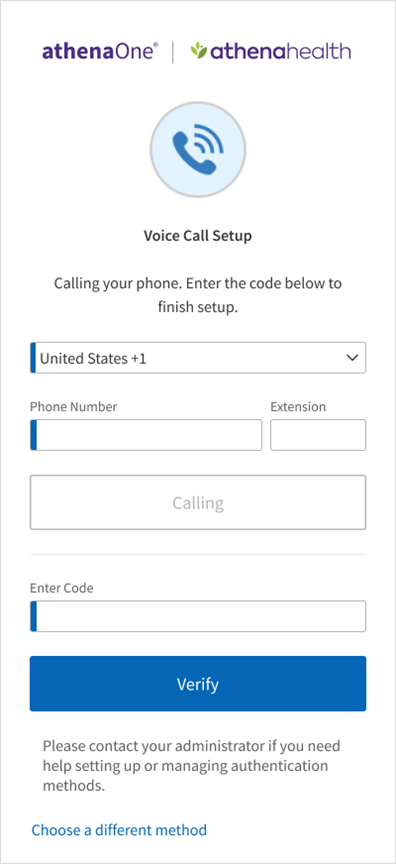
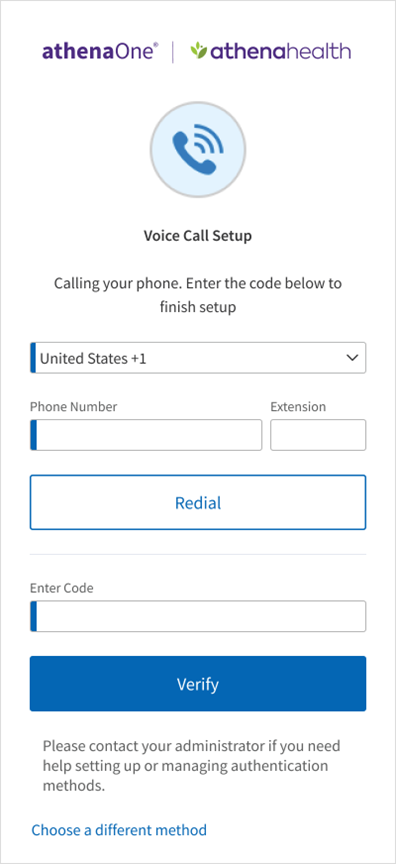
- Answer the phone call and listen for the one-time passcode. If you do not answer this call, you will receive a voicemail with the code instead. Enter this code in the Enter Code field and click Verify. If the code is valid, your authentication is complete, and you will be automatically redirected into athenaOne. If after a minute you have not received a phone call with your one-time code, you will see a prompt to click Redial to receive a new one.
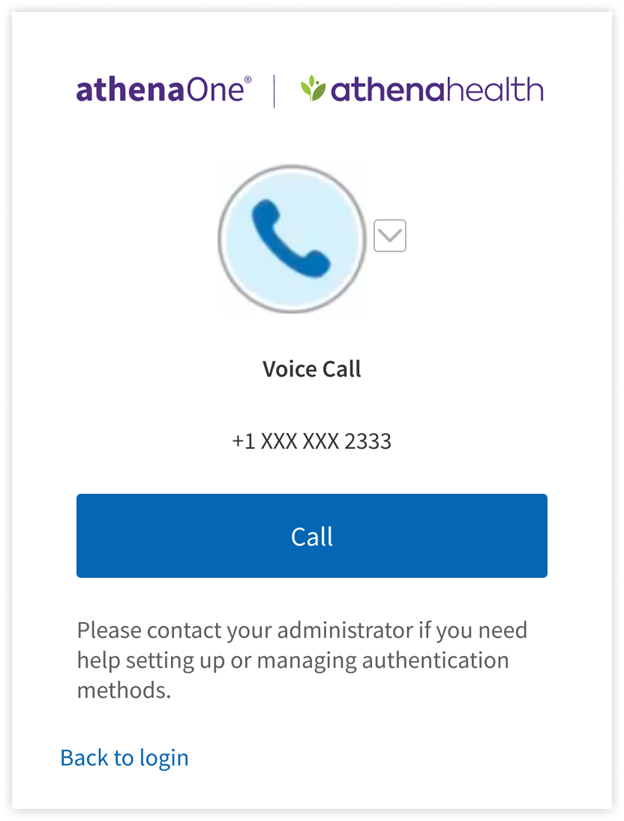
If you have previously set up Voice Call for additional authentication and are prompted for MFA upon login, you can complete authentication by:clicking Call to receive a phone call at the number you originally used to set up your voice call factor, for which the last four digits are shown on your screen. If you do not answer this call, you will receive a voicemail. Enter the code received in that call or voicemail in the Enter Code field and click Verify to be redirected into athenaOne.
You can add or remove your additional authentication methods by navigating to athenaOne > Settings > My Configurations | User Profile > Update User Profile page > Authentication tab.
- The authentication methods that you have already set up will have a
 .
. - To make changes to your authentication methods, enter your current password in the provided field to verify your identity.
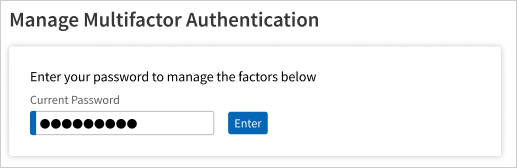
- After verification of your password, you can update/set up the factors for your account.
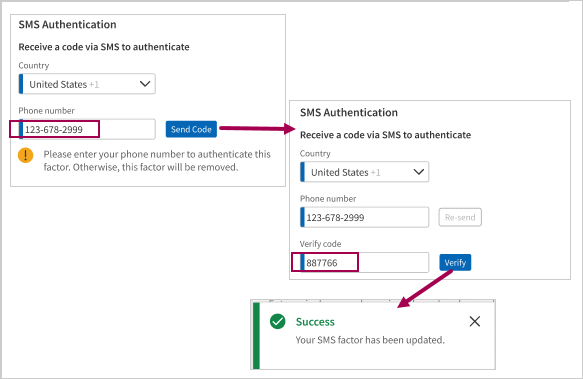
To update Text Message (SMS)
- Select Country, enter the required Phone number, and click Send Code.
- Enter the code received through SMS in the Verify Code field and click Verify.
To update Okta Verify App
- Open the app on your mobile device and follow the app’s instructions to add an account.
- Once you have added the new account, you can delete the old one as it will no longer be accepted for authentication.
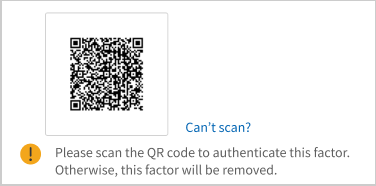
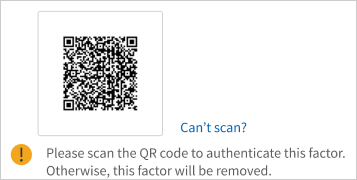
- Scan the QR code to authenticate this factor.
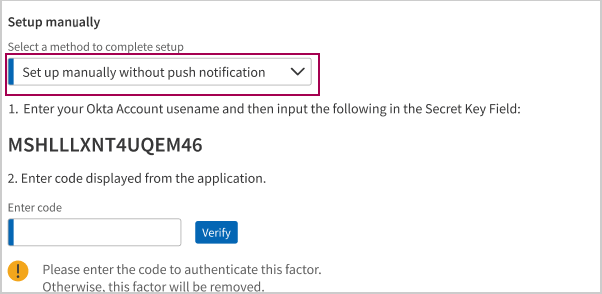
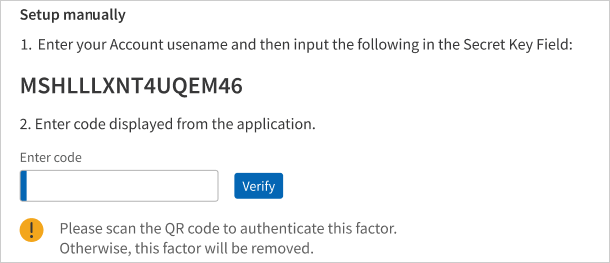
- You can choose to update manually as shown below.
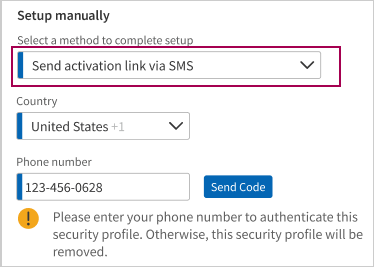
- You can choose to update by receiving an activation link via SMS as shown below.
To update Authenticator App (TOTP)
- Open the authenticator app on your mobile device and follow the app’s instructions to add an account.
- Once you have added the new account, you can delete the old one as it won’t be accepted.
- Scan the QR code to authenticate this factor.
- You can choose to update manually as shown below.
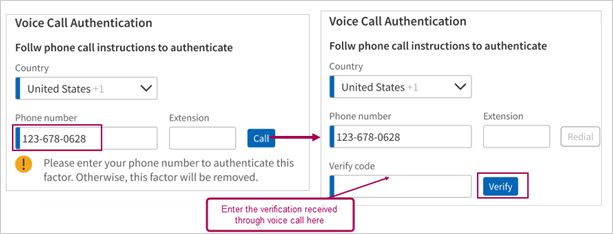
To update Voice Call
- Select Country, enter the required Phone number, and click Call.
- Enter the code received through call in the Verify Code field and click Verify.
If you are a User Admin, you will be able to view and reset authentication methods for other users at your practice. To do this, you can navigate to athenaOne >  > Admin | User > Users > User Admin page.
- Search for the user whose factors you want to view or reset.
- Click on Update next to the user's name.
- In this page under the Security tab, you can now view the Active Multifactor Authentication section which lists all the factors enabled for that user.
- You can click on the trash can next to the factor which you want to remove for that user.
- When you attempt to remove the last enrolled factor for a user, you will be prompted to confirm your action because user will be required to set up at least one factor on their subsequent login.
If your practice has one or more identity providers configured for inbound SSO to athenaOne, you will see an additional section letting you toggle on athenaOne’s MFA for those SSO connections. If MFA is enabled for an SSO connection, a user accessing athenaOne via that SSO connection will encounter athenaOne’s native MFA prompts in addition to any MFA already enforced by that identity provider. For this reason, MFA is disabled for all SSO connections and logins by default.