 Quick Reference — To add an interoperative note for implant surgery
athenaOne for Hospitals & Health Systems
You must be logged in to a department that uses athenaOne for Hospitals & Health Systems
You can add an intraoperative note when you're ready to begin intraoperative documentation.
- Display the surgery case: In the patient briefing, under Scheduled Surgeries, click the surgery name.
- Click the arrow in the green workflow menu and select Add Intra-Op Note.
The Prep stage of the intraoperative workflow appears. - Click Procedure in the intraoperative workflow menu.
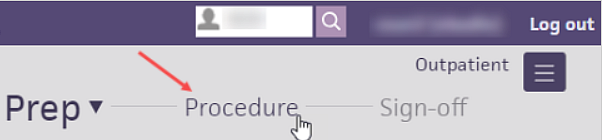
The Procedure step appears.
Record staff and procedure times
- Under Time-out, click either Yes, No, or N/A for each item.
- Under Staff and Procedure Times, enter the names of staff members and the times they scrub in and out:
- Under Procedure, enter a procedure time for all procedures.
- Under Nursing Notes, enter a nursing note.
- Click Next. The Procedure stage appears.
Complete interoperative documentation
- Click the plus icon
 next to Intraoperative Documentation.
 - Search for and select the template you need.
- Click each section to expand it and select your findings.
Click All Normal if all sections appear normal
Click Clear to clear the observations you've selected.
Click the blue arrow next to Clear to expand all sections.
Record interoperative vitals
- Click the plus icon in the Intraoperative Vitals chart to record the patient's vitals.
- Under Surgical Counts, click the plus icon to add a column title and enter the time you complete the count.
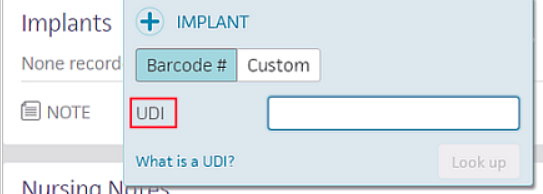
Record a standard implant UDI
- Implants — Click the plus icon and enter the implant's UDI in the field provided.
To record custom implant information
- Click Custom. Additional fields appear.
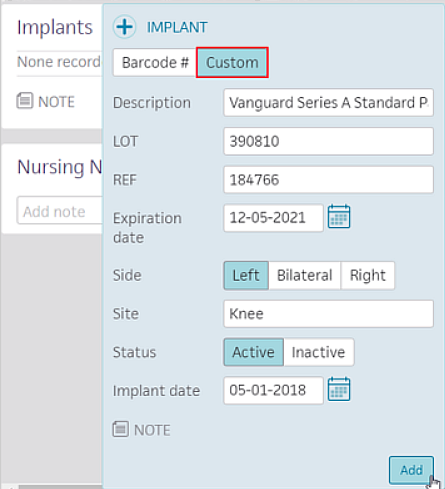
- Description — Enter a description of the implant.
- LOT — Enter the LOT number.
- REF — Enter the REF number.
- Expiration date — Click the calendar icon
 and select the implant's expiration date.
 - Side — Click Left, Bilateral, or Right.
- Site — Enter the site of the implant.
- Status — Click Active or Inactive.
- Implant date — athenaOne displays today's date by default. You can click the calendar icon to change the date if necessary.
- Click Add.
- Under Nursing Notes, add a nursing note.
- Click Next. The implant appears on the History tab
 under Implant History.
The Sign-off stage appears.
Review and sign the note
- Review the intraoperative note summary and click Sign Note.
Note:The timestamp appears just below the Sign Note button.
You can click the timestamp to update the date and time, provided that the date you enter is within 30 days of the current date. When you update a timestamp, the note is marked "Late entry."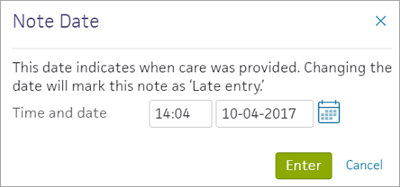
See also: Deleting unsigned notes