Hospital Pharmacy Label Printer Routing
athenaOne for Hospitals & Health Systems
You can use this page to configure medication labels to print on specific printers by creating routing rules. When you create a routing rule, you select the medication type and the printer to route it to. All labels for that medication type will then automatically print on that printer.
On the Main Menu, click Settings![]() > Clinicals. In the left menu,under Practice Links — Pharmacy, click Label Printer Routing
> Clinicals. In the left menu,under Practice Links — Pharmacy, click Label Printer Routing
You must be logged in to a department that uses athenaOne for Hospitals & Health Systems
To access this functionality, you must have these permissions:
- Inpatient Clinicals: Label Printer Configuration
- Pharmacy Label Printer Routing Configuration
-
Printer Definition and Attribute Configuration
See also: User Roles and Permissions.
- Verify that the athenaOne Device Manager (ADM) is running and up-to-date on all computers used to print labels.
- Follow the steps to configure printers for label printing.
- Create a routing rule for each medication type used in your hospital. The label used for each medication type shows the relevant content.
- athenahealth recommends that you create only one routing rule per medication type.
- There are only three medication types, so you should not create more than three routing rules.
- Enable the routing feature.
- Display the Printers page: On the Main Menu, click Settings
 > Clinicals. In the left menu,under Practice Links — Other, click Printers.
 - Click Add new.
- Name — Enter a name to identify the printer in the athenaOne system. (This can be different from the name you enter in the Printer Name field, below).
- Printer Name — Enter the name of the printer exactly as it appears in your facility's computer system. This name appears on the Windows Devices and Printers screen. This name must be unique and consistent across all machines at your facility that may need to access the printer.
Complete the remaining fields according to the size of your labels.
- Description — Enter a description of the printer.
- Unit — Select the typographic unit.
- Width — Enter the width of the label.
- Left Margin — Enter the left margin of the label.
- Right Margin — Enter the right margin of the label.
- Top Margin — Enter the top margin of the label.
- Bottom Margin — Enter the bottom margin of the label.
- Orientation — Select the page orientation of the label.
Tip: For the first test print, try setting the Orientation field to Landscape and leaving the margin fields blank.
Test your settings
- Click Test Print to make sure the printer is set up correctly.
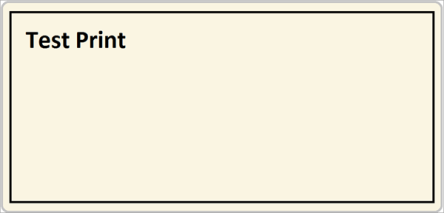
The test label should print with a border line around all four edges, with the words, "Test Print" in the top left corner.
- If any border lines are missing, adjust the corresponding margin fields and click Test Print again.
- If the text is printing sideways, change the orientation and click Test Print again.
- When the label prints with the border line and text as expected, click Save.
Note: There are only three medication types, so you shouldn't have more than three routing rules.
- Display the Hospital Pharmacy Label Printer Routing page: On the Main Menu, click Settings
 > Clinicals. In the left menu,under Practice Links — Pharmacy, click Label Printer Routing.
 - Click Add new.
- Medication Type — Select a medication type.
- Printer — Select a printer.
- Ordering — Enter a number: 1-3. This defines the order in which the routing rules are executed: the rule set to 1 runs first, and the rule set to 3 runs last. The rule with the highest priority should be set to 1.
- Click Save.
These instructions apply only if you use more than one label printer for the same medication type (general, infusion, or PCA), and each printer is connected to different computers.
You could be set up this way if each computer is connected to an individual printer, or if you print some labels from a nursing station and others from your pharmacy.
- On each computer you use to print labels:
- In the computer's printer settings, give the printers you want to use the same name. athenahealth recommends using something generic, like "Label Printer."
- Verify that the athenaOne Device Manager (ADM) is running and up to date.
- Use the Printers page to configure the printer for label printing.
Note: You should configure the label specifications only once per medication type, not once per printer.
- Display the Hospital Pharmacy Label Printer Routing page: On the Main Menu, click Settings
 > Clinicals. In the left menu,under Practice Links — Pharmacy, click Label Printer Routing.
 - Configure all routing rules to use the printer you just added:
- Click either Add new to add a new routing rule or edit to edit existing routing rules.
- Complete these fields:
- Medication Type — Select the medication type.
- Printer — Select the printer you added above.
- Ordering — Enter a number (1-3) to set the priority of the routing rule.
- Click Save.