 User Guide — Surgery Workflow for Nurses
athenaOne for Hospitals & Health Systems
Table of Contents
To enter a presurgical evaluation note
To reconcile home and surgical medications from the patient chart
To administer medications in the MAR
To initiate the discharge process
To create or edit discharge orders
Entering surgical notes
To enter a presurgical evaluation note
The presurgical evaluation note includes an evaluation checklist and free-text nursing notes, patient history, and a summary. You can complete the Presurgical Evaluation Note in three stages, either before the patient is checked in, or during a preoperative phone call, or during a preoperative visit. The information you record in the note is available in the patient's chart on the day of surgery.
- Display the surgery case: In the patient briefing, under Scheduled Surgeries, click the surgery name.
- Click Add Presurgical Eval Note in the green workflow menu.
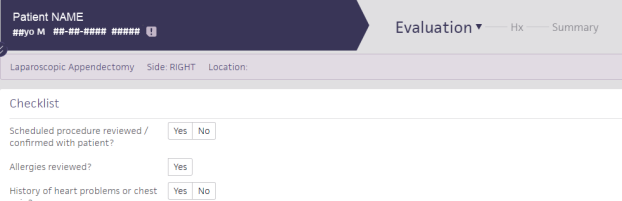
The Evaluation stage of the Presurgical Evaluation Note appears, with the checklist at the top.- Complete the questions in the checklist.
- Under Nursing Notes, enter a nursing note in the text box.
Tip: You can enter a period (".") followed by the shortcut name to search for previously saved content. To save your entry for later use, click the star iconto the right of the text box and enter a shortcut name.
- Click Next.
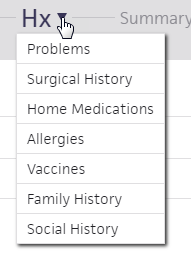
The Hx stage appears. In this stage, you can record a patient's medical history.- For each history section, click the plus icon
to document the patient's history, as necessary.
Tip: You can use the HX menu to jump directly to the history section you need.- Click Next.
The Summary stage appears.- Review the information recorded.
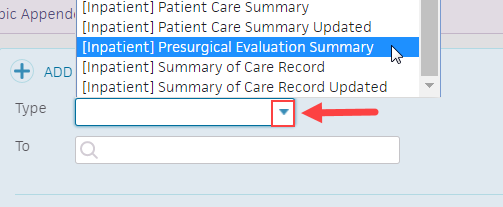
- In the Letters section at the top of the summary, click the plus icon
- Click the Type menu and select [Inpatient] Presurgical Evaluation Summary.
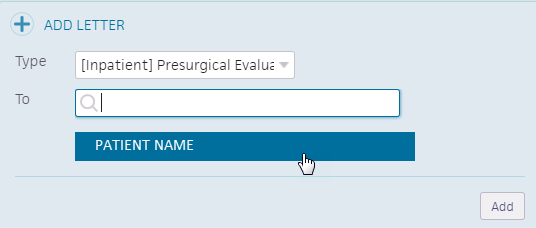
- Click inside the To text box and select the patient's name.
- Click Add.
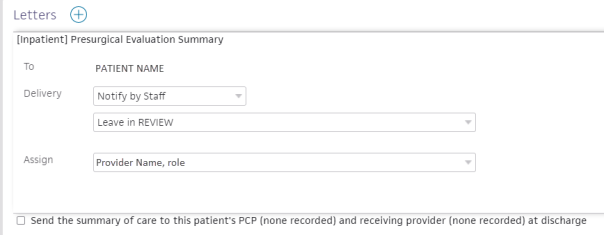
The Presurgical Evaluation Summary appears under Letters.Review and adjust delivery fields as needed
- Delivery — Click the second drop-down menu and select the method of delivery.
- Assign — Click the drop-down menu and select the staff member you want to assign the presurgical evaluation summary to.
You can click Delete to delete the Presurgical Evaluation Summary letter, and VIEW to view the Presurgical Evaluation Summary letter.
- Click Sign Note.
The presurgical evaluation note is attached to the surgical case.

To review outpatient presurgical clearance notes
If you perform a presurgical clearance visit in a non-surgery department, you can review this information on the day of surgery to verify previously recorded medical information. Any chart-level data, including medications and allergies, is visible in the chart tabs.
- Display the patient's chart, and click the Notes tab
 .
.
The Notes tab expands. - To the right of Current Stay, click OTHER to display the list of Other Stays and Visits.
- Under Other Stays and Visits, click the view more icon
 for the most recent office visit related to the surgery.
The summary of the visit appears. - Review the patient's presurgical notes.
To add a preoperative note
When the patient arrives for preoperative care, you can add a preoperative note to begin your documentation. The preoperative note includes history, assessment, plan, and sign-off sections.
Use the preoperative note navigation bar to access each section of the note:

athenaOne automatically saves your documentation as you record each step in the workflow. You can leave and return to a note without losing any information.
- Display the surgery case: In the patient briefing, under Scheduled Surgeries, click the surgery name.
- Click the arrow in the green workflow menu and select Add Pre-Op Note.
The Hx stage of the preoperative workflow appears. At this stage, you can record a patient's medical history. - For each history section, click the plus icon to add items to document patient history.
- Click Next. The Assess stage appears.
Record preoperative vitals
- Click the plus icon in the Preoperative Vitals chart to record the patient's vitals. The first set of vitals are baseline vitals.
- Time — Click the text box and enter the time.
Note: Enter "n" to autofill the text box with the current time. - BP — Enter the blood pressure and select the patient's position and body part in the drop-down menus.
- Blood Glucose — Enter the blood glucose level.
- EKG Rhythm — Click the menu and select the EKG rhythm.
- 02SAT — Enter the 02sat percentage, click the drop-down menu to select the oxygen delivery work, and enter the liters per minute.
- Pulse — Enter the beats per minute and click the drop-down menu to select the pulse quality.
- RR — Enter the recovery room.
- T — Enter the patient's temperature and click the drop-down menu to select where you recorded it.
- Wt — Enter the patient's weight.
- Refused — Check the box if the patient refused to let you record their weight.
- Out of Range — Check the box if the patient's weight is out of range.
- Ht — Enter the patient's height.
- Pain Scale — Click the menu and select the patient's pain scale.
- Click outside the Preoperative Vitals chart.
The patient's vitals appear in the first column of the Preoperative Vitals chart.
You can click the time in the first row of the Preoperative Vitals chart to edit that set of vitals.
You can click the plus icon in the second column of the Preoperative Vitals chart to add another set of vitals. - Under Preoperative Assessment, click the plus icon to search for and select the template you need.
- Click each section to expand it and select your findings.
Click All Normal if all sections appear normal
Click Clear to clear the observations you've selected.
Click the blue arrow next to Clear to expand all sections. - Click Next. The Plan stage appears.
Complete the checklist, procedure times, and nursing notes
- Under Checklist, click either Yes, No, or N/A for each safety reminder.
- Under Procedure Times, enter a procedure time for all procedures.
Note: Procedure times are visible in all nursing documentation. Other users can continue to document times. - Under Nursing Notes, enter anything not covered in the structured procedure documentation or templates.
Tip: You can enter a period (".") followed by the shortcut name to search for previously saved content. To save your entry for later use, click the star icon to the right of the text box and enter a shortcut name. - Click Next. The Sign-off stage appears.
- Review the pre-op note summary and click Sign Note.
Note: The timestamp appears just below the Sign Note button.
You can click the timestamp to update the date and time, provided that the date you enter is within 30 days of the current date. When you update a timestamp, the note is marked "Late entry."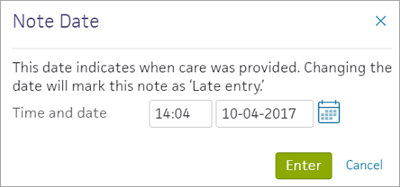
To add an intraoperative note
You can add an intraoperative note when you're ready to begin intraoperative documentation.
- Display the surgery case: In the patient briefing, under Scheduled Surgeries, click the surgery name.
- Click the arrow in the green workflow menu and select Add Intra-Op Note.
The Prep stage of the intraoperative workflow appears.Record staff and procedure times
- Under Time-out, click either Yes, No, or N/A for each item.
- Under Staff and Procedure Times, enter the names of staff members and the times they scrub in and out:
- Under Procedure, enter a procedure time for all procedures.
- Under Nursing Notes, enter a nursing note.
- Click Next. The Procedure stage appears.
Complete interoperative documentation
- Click the plus icon
- Search for and select the template you need.
- Click each section to expand it and select your findings.
Click All Normal if all sections appear normal
Click Clear to clear the observations you've selected.
Click the blue arrow next to Clear to expand all sections.Record interoperative vitals
- Click the plus icon
- Under Surgical Counts, click the plus icon
- Under Nursing Notes, add a nursing note.
- Click Next.
The Sign-off stage appears.- Review the intraoperative note summary and click Sign Note.
Note: The timestamp appears just below the Sign Note button.
You can click the timestamp to update the date and time, provided that the date you enter is within 30 days of the current date. When you update a timestamp, the note is marked "Late entry."
To add a postoperative note
You can add a postoperative note when you are ready to begin postoperative documentation.
- Display the surgery case: In the patient briefing, under Scheduled Surgeries, click the surgery name.
- Click the arrow in the green workflow menu and select Add Post-Op Note.
The Assess stage of the postoperative workflow appears.
Record postoperative vitals
- Click the plus icon in the Postoperative Vitals chart to record the patient's vitals.
Record nursing assessment
- Click the plus icon next to Nursing Assessments.
- Search for and select the nursing assessment template you need.
- Click each section to expand it and select your findings.
- Click All Normal if all sections appear normal.
- Click Clear to clear the observations you've selected.
- Click the blue arrow next to Clear to expand all sections.
- Under Procedure Times, update all procedure times, as necessary.
- Under Nursing Notes, add a nursing note.
- Click Next.
The Sign-off stage appears. - Review the postoperative summary and click Sign Note.
Note: The timestamp appears just below the Sign Note button.
You can click the timestamp to update the date and time, provided that the date you enter is within 30 days of the current date. When you update a timestamp, the note is marked "Late entry."
Forms and documents
To upload documents for a surgical case
You can upload and attach scanned documents to a patient's surgical case any time from when the surgery is booked to when the stay is closed. This allows you to attach documentation from outside athenaOne to a patient's surgical case.
- In the patient chart, click the Menu icon
and select Add document.
- Select the document to upload and click Open.
The Add Document window appears.
Note: athenaOne populates the Tie To Stay field automatically if the patient is already checked in for surgery.- Tie to Surgical Case — Click the menu and select the surgery the document is related to.
Use caution: Make sure you select the correct surgery.- Document Class — Click the drop-down menu and select the document class.
Additional fields appear.- Clinical Order Type — Enter the clinical order type.
- Observation Date And Time — Enter the time in the first text box and click the calendar icon
to select the date.
- Click Save.
The document appears in the Documents section of the patient's Surgical Case Workspace.
To print a consent form
You can print consent forms and other forms for your patient. The forms are pre-filled with relevant information about the patient and visit.
- On the patient Quickview, under the Hospital Visits heading, click view for the visit you need.
The Visit - Patient Access page appears.
- On the Registration tab, click Forms & Privacy.
- Check the boxes next to the documents to print.
- Click
Print selected documents.
Orders and medications
To enter medication orders
You can enter medication orders or order sets for medications for patients during perioperative care.
- Display the patient's Order Entry page: In the patient chart, click the arrow in the green workflow menu (at the upper right) and select Go to Orders. (The options available in the green workflow menu depend on your user role.)
- Click the plus icon
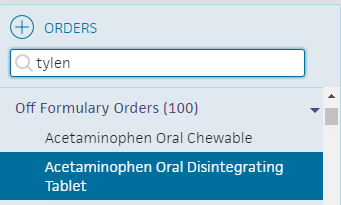
- Search for and select the type of medication to order. In the search results, relevant pharmacy formulary medications, as well as off-formulary meds appear.
- Click the new order form to expand the details.
- Ordering provider — Select the ordering provider, and then use the menu to the right to select how the order was given (verbal, phone, written, etc.).
- Priority — select the priority for this order:
- STAT: urgency to administer order.
- now: intended to be given within the next 30 minutes.
- routine: based on routine for that frequency in the facility. For example: twice a day.
- schedule - start first order by specific time.
Enter the sig
Note: To enter a free-text sig instead of using the structured fields, uncheck the Structured checkbox at the far right of the Sig field.
- Sig — Enter quantity, select units, and select duration from the available options.
Note: Dosage in mg allows you to set a schedule for it (for example, 10 mg every 8 hours) versus mg/hr., which allows for a continuous rate until discontinued.
Practices in Ohio and Nevada: If you practice in the state of Ohio or Nevada, new prescription orders for controlled substances and gabapentin include the Days supply field, which indicates the number of days for which a prescription should be dispensed.- PRN — Select this option for orders that will be administered as needed
Note: If PRN is checked, enter additional instructions in the Notes field.
If PRN is checked, the Priority selected for the order should be either routine or scheduled.First dose/Next dose — This field is calculated automatically, based on the Sig and Priority.
- If the Priority is STAT or now, this field is labeled Next dose.
- If the Priority is routine, this field is labeled First dose.
- If the Priority is scheduled, this field does not appear.
- Patient's own medication will be used — Check whether the patient's medication is to be used.
Signing orders
Note: Orders can be entered by a nurse, but must be signed by a physician, according to hospital and legal guidelines.
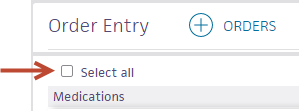
- To sign all orders for this patient, scroll to the top of the page and check Select all.
- To sign only selected orders, check the box for each order to sign.
- Click Sign Orders.
The new medication order appears in the MAR.
To reconcile home and surgical medications from the patient chart
When the patient arrives in surgery, you can reconcile home and ordered medications to ensure that the patient is administered the correct medications during their stay.
- In the patient briefing, click the Medications tab
 in the patient chart.
 - Click Reconcile home medications under Active Medications.
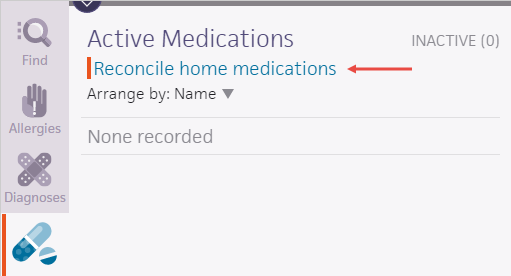
The Medication Reconciliation window appears.
Reconcile each medication listed in the Home Medications column
- Click the X icon
 to discontinue the medication for surgery.
 - Click the plus icon to substitute another medication for the medication (this action generates a new medication order).
- Click the arrow icon
 to indicate that the medication should continue for surgery.
Note: The arrow icon for medications ordered for surgery is automatically highlighted.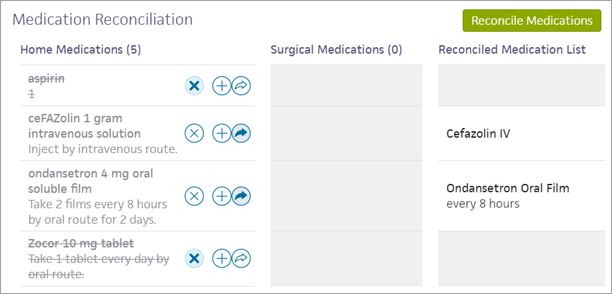
- Click Reconcile Medications.
Any new medication orders (generated by the reconciliation process) appear on the Order Entry page, and the red bar disappears from the Medications tab.
To administer medications in the MAR
You can use the medication administration record (MAR) to see what medications need to be administered to a patient and indicate when they are administered.
To administer a non-IV medication:
- Display the MAR: In the patient chart, click the arrow in the green workflow menu (at the upper right) and select Go to MAR. (The options available in the green workflow menu depend on your user role.)
- Verify that the correct patient is selected. The patient ID number is located in the patient banner, below the patient's name.
If you use a barcode scanner, click anywhere on the page and then scan the patient's wristband ID. If the barcode matches, you can continue.Administer the medication
Note: At the upper right corner of the MAR, you can click Due, PRN, or All to toggle the view. Medication tasks appear on the Due tab one hour before their scheduled time. If the medication is not administered, the task remains on the Due tab for 23 hours after the due time.
- Click the name of the medication to administer. The input form opens with the most current dosage time, and administer selected.
- Pain (appears for pain medications only) — Select the patient's pain scale.
- Products — Select the product to administer and enter the quantity.
You can click the plus iconto delete a product.
Scanning the medication barcode populates the Products field, including the quantity.
- For orders in mg or mL, the ordered amount is populated automatically on the first scan.
- For discrete units such as pills and capsules, scan the barcode for each unit ordered. For example, to fill an order for two tablets, scan the barcode twice.
- Administered — The field is populated automatically with the current date and time.
Note: An alert appears if you enter the wrong dose or administer the dose at the wrong time. You can select the override options if needed and enter a reason for the change in the text field.- Post-DST — Only check this box if you are administering the medication between 1:00 a.m.-1:59 a.m. on the Sunday in November that Daylight Savings Time (DST) ends.
- Note — Enter any notes concerning this medication administration.
- Make sure that only the medications you want to sign are selected and that the bars for those medications have turned green. If the High alert medication message appears, select the Requires validation from another nurse option.
- Click Sign.
If you use barcode scanning, scan the patient's wristband to sign the medication administration.
For high alert medications, the medication remains on the Due tab with a *Validation Required warning. A second nurse must then confirm that they checked the preparation and administration to verify that the medication was prepared correctly.

To administer an IV medication
Medications in the MAR can be marked as administered before they are signed by a physician or verified by a pharmacist.
- Display the patient's MAR: In the patient chart, click the arrow in the green workflow menu (at the upper right) and select Go to MAR. (The options available in the green workflow menu depend on your user role.)
- Verify that the correct patient is selected. The patient ID number is located in the patient banner, below the patient's name.
If you use a barcode scanner, click anywhere on the screen and then scan the patient's wristband ID. If the barcode matches, you can continue.
- Click the name of the intermittent IV medication to administer. The input form opens with Administer selected and the most current dosage due time selected.

- Amount administered — The amount administered is populated from the order.
- Site — Select the IV site from the menu and then indicate Left or Right.
- Administered at — This field defaults to the current date and time.
Note: An alert appears if you enter the wrong dose or administer the dose at the wrong time. You can select the override options if needed and enter a reason for the change in the text field. - Note — Enter any notes concerning this medication administration.
- Make sure that only the medications you want to sign are selected and that the bars for those medications have turned green. If the High alert medication message appears, select the Requires validation from another nurse option.

- Click Sign.
If you use barcode scanning, scan the patient's wristband to sign the medication administration.
For high alert medications, the medication remains on the Due tab with a *Validation Required warning. A second nurse must then confirm that they checked the preparation and administration to verify that the medication was prepared correctly.
To record surgical supply usage
You can record surgical supply usage to add supply charges to a patient's bill and record supplies used during a procedure. athenaOne populates the information from the preference card for the procedure for quick documentation.
- Display the Surgery Usage Worklist: On the Main Menu, click Patients, and then click Surgery Usage Worklist. The Surgery Usage Worklist appears in the Task Bar at the left, with the first patient's surgical usage information displayed in the Workspace.
- In the worklist, click the patient you need to display that patient's surgical usage information in the Workspace.
Autofill the preference card
- In the Workspace, under Items, click AUTOFILL to populate the Used and Returned columns with item quantities from the preference card.
Note: Preference cards may be created for each procedure a provider performs. Preference cards are automatically associated with procedures at scheduling. Items on the preference card are added from available hospital inventory items. See also: Preference Cards.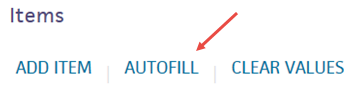
Review and edit usage items
- You can click in the Used and Returned columns to edit the item quantities.
- Click ADD ITEM if you want to add an item not on the preference card.
- Click Submit.
athenaOne adds charges for operative supplies to the patient visit.
To enter charges for surgery
You can enter charges for a surgery at any time after the surgery is scheduled. Doing so helps record charges both during and after the visit.
- Display the Hospital Activity Summary page: On the Main Menu, click Claims, and select Hospital Activity Summary.
- Under Visit Billing, click the total in the No Charges column.
The Visit Search bar appears on the left.
Filter the list of charges in the Task Bar
- Dept — Click the arrow and select the surgical department.
- Click Filter.
- Click Add charges for the desired patient to display the Charge Entry page in the Workspace.
Complete the charge entry fields
- Date of service — Click the calendar icon and select the date of service.
- Level of care — Click the menu and select the level of care.
- Rendering provider — Click the menu and select the rendering provider.
- Charge code — Enter the charge code.
- Description — Enter the charge code's description.
athenaOne populates the HCPCS code, Modifiers, Unit price, and Quantity fields automatically. - Click Save.
To discharge a patient
Any member of the care team can initiate the discharge process. Nurses must select the Ordering physician, and may enter the Final diagnoses, Condition, and Disposition if given a verbal order to do so by the ordering physician.
To initiate the discharge process

- Display the patient's Discharge tab: In the patient chart, click the arrow in the green workflow menu (at the upper right) and select Go to Discharge. (The options available in the green workflow menu depend on your user role.)
Record discharge order information
- Click Discharge Order.
- Ordering physician — Select the ordering physician. (This field appears for nurses only.)
- Final diagnosis — Search for and enter a final diagnosis.
- Condition — Enter the patient's condition the time of discharge.
- Disposition — Select the disposition of the patient after discharge.
To create or edit discharge orders

As part of the discharge process, nurses can enter diagnoses and orders, and reconcile medications if given a verbal order to do so by the ordering physician. Only physicians can sign orders.
- Display the patient's Discharge tab: In the patient chart, click the arrow in the green workflow menu (at the upper right) and select Go to Discharge. (The options available in the green workflow menu depend on your user role.)
- Click Post-Discharge Orders.
- Order Entry — Search for and select orders. If given a verbal order, a nurse can search for and select orders.
Tip: To order referrals, search for "referrals" and include summaries of care. You can search for "after your visit" to locate patient education orders.
Note: Some order types may require a diagnosis. -
To mark an order as not given, click Not Given when, for example, the patient refused the order, or a medication wasn't available. This action ensures that quality measures are not affected negatively.
You must then select a reason for not giving the order.
You can also include a note to the patient and an internal note.
Orders marked as Not Given are listed in the Medications Not Given section of the Discharge Summary, but not in the medication list or the Patient Portal. This ensures that the patient does not accidentally view an order or take a medication that was explicitly refused.
Reconcile the medications list
- If the Reconcile medications for discharge link is visible, click this link to review the patient's home and inpatient medications.
The patient's home medications are listed on the left, inpatient medications are listed in the center, and the discharge medication list appears on the right. - For each medication on the list, use the arrow icon to indication continue
 or use the X icon to discontinue upon discharge. The list of home medications marked continue produces the Discharge Home Medications list.
 - Click Reconcile Medications to create the Discharge Home Medications list.
(All medications in the list must be acted upon before the button appears green.) - Discharge Home Medications — Review the list of medications to be continued upon discharge. Click a medication to view or edit the details, or to remove it from the list.
Note: In the patient's chart, the medications flowsheet will reflect the changes made when medications are reconciled.
To create or edit the discharge instructions

The care team outlines future steps for the patient or next care facility to ensure the patient's well-being after discharge.
Note: Nurses can sign discharge instructions.
- Display the patient's Discharge tab: In the patient chart, click the arrow in the green workflow menu (at the upper right) and select Go to Discharge. (The options available in the green workflow menu depend on your user role.)
- Click Discharge Instructions.
- Nursing summary of care — Enter the nursing summary of care.
- Patient goals — Enter the patient goals.
- Patient instructions — Enter the patient instructions.
- Portal Registration — You can register the patient for the Patient Portal, if the patient consents.
Note: After discharge, patients registered for the Patient Portal can access their summary of care record on the My Health page of the Patient Portal. - Click Enter Instructions.
To review the discharge summary and close the stay

The care team summarizes for the patient why he or she was hospitalized and what was done.
The patient discharge instructions and the discharge summary documents are created automatically using information recorded during the hospital stay.
You can generate letters to go home with the patient, to send to another care provider, or to print a comprehensive discharge summary.
- Display the patient's Discharge tab: In the patient chart, click the arrow in the green workflow menu (at the upper right) and select Go to Discharge Plan. (The options available in the green workflow menu depend on your user role.) Alternatively, in the patient chart, click the Discharge chart tab at the left side of the page.
- Click Summary in the navigation bar at the top of the page.
- Letters — Click the Letters plus icon to display the Add Letter form, complete the fields provided, and select a delivery option.
If the patient has Patient Portal access, you can select Close and Email Patient. athenaOne may close certain Patient Care Summaries when you sign and approve them, so they do not appear in the Clinical Inbox unnecessarily.
Note: athenaOne automatically generates and sends the Summary of Care Record (SCR) via DIRECT to the Primary Care Physician (PCP) and Receiver Facility on record when you complete discharge and click Discharge Complete. The patient can access the Summary of Care record on the My Health page of the Patient Portal. - Click Done to complete the Discharge Plan.
Note: The discharge plan stays open until all steps are signed.
After discharge, patients registered for the Patient Portal can access their summary of care record on the My Health page of the Patient Portal. - After the patient leaves the hospital, on the patient briefing, enter the date and time that the patient left, and click Discharge Complete to close the stay. This removes the patient from the Patient List (or Tracking Board).

Note: If the patient has Patient Portal access, athenaOne automatically moves signed Patient Information orders and Patient Care Summaries from Review status to Notify by Portal status, and to Close status for other patient correspondence.
If the patient does not have Patient Portal access and the Paper option is selected in the Patient care summary and patient letter delivery preference field (under the Registration Information heading) on the Quickview, you should select Close manually.