Quickview
athenaOne for Hospitals & Health Systems
The Quickview represents the hub of the patient workflow for the individual patient. You can view a summary of patient registration, patient balance and appointment history, and insurance information. You can also perform the most common, patient-specific tasks.
With athenaOne for Hospitals, the features and headings in the Quickview vary with the department type: hospital or clinic. If you select Chart from the Clinicals option in the Patient Actions bar at the top of the Quickview, athenaOne displays the chart information relevant to your department.
With athenaCollector:
 In the text box at the top right of the Main Menu, enter the first three letters of the patient's last name, followed by a comma, followed by the first three letters of the patient's first name. Click the search icon. On the Find a Patient page, click Quickview for the patient you need.
On the Patient Actions Bar, click Registration, and then click Quickview.
With athenaClinicals:
In the patient chart, click the Menu icon ![]() and select Quickview
and select Quickview
With athenaOne for Hospitals:
In the patient chart, click the Menu icon ![]() in the upper right corner and select Quickview
in the upper right corner and select Quickview
You must have the Quickview (or Quickview no financials) role or permission to access the Quickview.
For athenaOne for Hospitals & Health Systems, you must have the Inpatient Clinicals: View Chart permission to access this page.
athenaOne does not send text messages or phone calls to the following pattern-based phone numbers:
-
(xxx)-111-1111
-
(xxx)-222-2222
-
(xxx)-333-3333
-
(xxx)-444-4444
-
(xxx)-555-5555
-
(xxx)-666-6666
-
(xxx)-777-7777
-
(xxx)-888-8888
-
(xxx)-999-9999
This block applies across all message types. If a patient has one of the above phone numbers in athenaOne — whether mobile, work or home — the outgoing text or call is blocked.
Note for athenaOne for Hospitals: The functionality and headings on the Quickview vary with the department type: hospital or clinic; not all the instructions in this section apply to a Hospital department.
You can set the Try NEW Appointment Schedule option from Quickview:
-
Update your preference for the Try NEW Appointment Schedule option on Quickview before clicking Schedule.
-
Easily access the Try NEW Appointment Schedule option from Quickview, which is a common entry point for scheduling an appointment.
-
Your scheduling preference is deferred to when you enable the Try NEW Appointment Schedule option at either the Quickview page or the legacy scheduling page.
Note: The Try NEW Appointment Schedule option on the Quickview only sets your scheduling preference; it does not open the scheduling workflow.
You can now update the Try NEW Appointment Schedule option from the Appointments section of a patient's Quickview page.
Your scheduling preference is updated when you switch to the legacy scheduling experience. The scheduling experience you had open last loads the next time you schedule.
The Try NEW Appointment Schedule option on the Quickview page:
Allows you to set your scheduling experience preference without first having to navigate to a patient's scheduling page.
Is synced with the one on the legacy scheduling page. Your preference is deferred to when you enable the option at either location.
Easily update your preference for the Try NEW Appointment Schedule option on Quickview before clicking Schedule.
Quickly get to Appointment Schedule from Quickview via the Try NEW Appointment Schedule option. Quickview is a common entry point for scheduling an appointment.
For more information on User Access and Permissions related to Appointment Schedule, see the User access and permissions section of User Guide — Appointment Schedule Calendar.
There are many entry points to the Appointment Schedule calendar. For more information, refer to the User Guide — Appointment Schedule Calendar topic in O-help.
The most common way:
-
On the Main Menu, click Calendar.
-
Under APPOINTMENTS, click View Calendar.
When you cancel an appointment that contains future orders, you can create an appointment tickler and attach the orders to the tickler. When you reschedule the appointment from this tickler, the orders are transferred to the new appointment.
- Display the patient's Quickview page:
 In the text box at the top right of the Main Menu, enter the first three letters of the patient's last name, followed by a comma, followed by the first three letters of the patient's first name. Click the search icon. On the Find a Patient page, click Quickview for the patient you need.
 - Scroll down to the Appointments heading and click cancel or reschedule next to the appointment to cancel.
The Cancel/Reschedule page appears. - Reason for cancellation — Select a cancellation reason from the menu.
- Click Cancel Appointment.
A message box informs you that orders are associated with this appointment (the orders are listed in the message box). You can cancel the appointment or cancel it and create a tickler. - To cancel the appointment and create a tickler that includes the orders, click Cancel Appointment and Create Tickler.
The Add Appointment Tickler page appears. - To cancel the appointment without creating a tickler, click Cancel Appointment.
The orders are moved to the provider or department row in the Clinical Inbox that is associated with the appointment (see Future Orders Tab).
- Display the patient's Quickview page:
 In the text box at the top right of the Main Menu, enter the first three letters of the patient's last name, followed by a comma, followed by the first three letters of the patient's first name. Click the search icon. On the Find a Patient page, click Quickview for the patient you need.
 - Scroll down to the Appointments heading and click cancel or reschedule next to the appointment to reschedule.
- Reason for Cancellation — Select a cancellation reason.
- Click reschedule selected appointment(s).
Note: If you do not select a Reason for Cancellation, athenaOne prompts you to do so. - Schedule the appointment as you normally would.
- Click Reschedule Appointment(s).
The original appointment details appear next to the new appointment details. - Click Save Information.
Note: You can also use this functionality for recurring appointments. You can reschedule one, some, or all instances of a recurring appointment.
You can print the Quickview to share patient notes and basic demographic information for referrals and lab orders or to share insurance and financial information for legal or financial purposes.
Note: Take the appropriate precautions when printing or sharing protected health information (PHI).
- Display the patient's Quickview
page:
 In the text box at the top right of the Main Menu, enter the first three letters of the patient's last name, followed by a comma, followed by the first three letters of the patient's first name. Click the search icon. On the Find a Patient page, click Quickview for the patient you need.
 - At the bottom of the page, click the Print button.
A print version of the Quickview appears in a new window. - Select the printer and then click Print.
- Display the patient Quickview: In the patient chart, click the Menu icon
 and select Quickview.
 - On the Patient Actions Bar, click Clinicals, and then click Print Forms.
- Check the box next to the documents that you want to print.
- Click Print [#] selected.
Note: athenaOne prepares the PDF document; the print status icon shows you the progress of the print job. For more information about the print job statuses for success, failure, and errors, see Printing athenaOne Pages.
Note: Your practice must have the athenaClinicals feature enabled, and you must have the necessary Clinicals user permissions to view the patient chart. There are two ways to access the chart:
-
 In the text box at the top right of the Main Menu, enter the first three letters of the patient's last name, followed by a comma, followed by the first three letters of the patient's first name. Click the search icon. In the search results, click chart for the patient you need.
OR
- On the Patient Actions Bar, click Clinicals, and then click Chart. The patient chart appears.
On the Quickview, you can click the Care Team Members link (in the Identification/Provider section) to add care team members, remove care team members, and add notes that apply to the care team as a whole. Care team members can be people who work in your organization and people external to your organization. The changes you make on the Quickview appear in the Care team section in the patient banner of the chart.
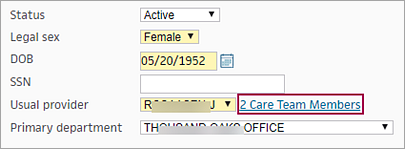
Note: If no care team members have been configured, the link is 0 Care Team Members.
To configure care team members from the Quickview:
- Display the patient's Quickview page.
- Scroll down to the Identification/Provider section and click the Show Care Team Members link next to Usual provider. The Patient's Care Team window opens.
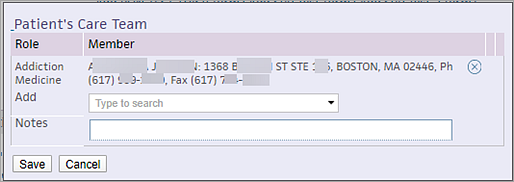
Note: In this example, one care team member is already configured. - Add — Click in the field to display the list of care team roles
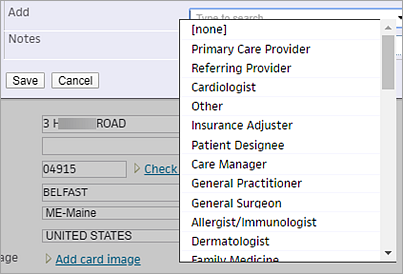
- Click the appropriate category in the list. The RECEIVER link appears next to your selection.
- Click RECEIVER to find the care team member in the category you selected.
A search window opens. - Search — Enter the name of the provider you want to add to the care team.
A list of matching providers appears. - Select the provider from the matching list.
The provider appears in the list of care team members. - If you cannot find the provider you are looking for:
- Click the Add new provider link (lower left side of the selection box).
- In the window that opens, enter the provider's name, address, and phone and fax numbers.
- Click Save.
- Notes — You can add a note about the care team or the patient.
When you add a note, the note applies to the entire care team. - Click Save.
Front desk staff should check the patient's prescription eligibility if it has not yet been checked. You can check a patient's prescription eligibility once per 24-hour period, unless an error is received.
Note: The patient's prescription eligibility information also appears on the Check-in page.
- On the Quickview, locate the Prescription field and click check now.
The Prescription Eligibility Detail page appears. If the eligibility check is successful, the patient's prescription eligibility details appear. - Click the expand all link to see the prescription coverage details, or click collapse all to hide them.
- Display the Quickview again.
- If the eligibility check was successful, the check now link is replaced with a details link. You can click the details link to see the results of the most recent eligibility check.
- If you received an error, a check again link appears next to the error message.
Note: This functionality applies only to Enterprise organizations.
- Display the patient's Quickview
page:
 In the text box at the top right of the Main Menu, enter the first three letters of the patient's last name, followed by a comma, followed by the first three letters of the patient's first name. Click the search icon. On the Find a Patient page, click Quickview for the patient you need.
 - The eligibility information is shown in the Insurances section, even if the eligibility check was initiated electronically for a different group in the same Enterprise organization.
Several athenaOne workflows support insurance card capture both pre-visit as well as post-visit. For example, insurance card capture is available during Enhanced Self Check-in and in Patient Portal Insurance Management.
- Receiving and reviewing patient-submitted insurance information before the day of their appointment enables your practice staff to verify eligibility and helps reduce time spent at the front desk when the patient arrives.
- Practice staff might also need to verify patient insurance card information after their visit, such as when working on claim holds and denials.
-
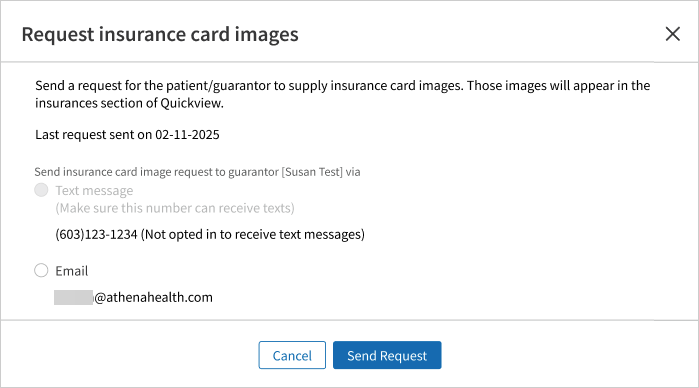
On a patient's Quickview page > in the Insurances section: click Request card images.
The Request insurance card images popup window appears.
Tip:
- To send a text message:
- Your practice must have athenaCommunicator enabled.
- Ensure you've captured the patient's mobile phone number and have obtained the patient's consent to communicate via text
- To send email, ensure you've captured the patient's email address
- To send a text message:
-
athenaOne displays the patient's/guarantor's text message and email information and preferences:
-
Select how you want to send the request — Select either Text message or Email (you cannot select both).
- Text message — The patient's/guarantor's mobile phone number from Registration.
If the patient has not opted in to receive text messages, a message displays and this option cannot be selected. - Email — The patient's/guarantor's email address from Registration.
If the patient has not provided an email address, a message displays and this option cannot be selected.
- Text message — The patient's/guarantor's mobile phone number from Registration.
- Click Send Request. A confirmation message appears, informing you if athenaOne sent the request successfully or was unable to send.
-
-
The patient/guarantor receives the request.
-
Use your existing workflows for reviewing patient-submitted card images.
You can access patient-submitted images from a few different workflows where you might view a patient's insurances.
For example: -
Once the request is sent, you can use Communicator > Patient Communication History to see notifications sent to the patient, including any texts or emails related to insurance card image requests.
You can search for a policy using one of the following options:
- Policy Auto-Match
- Policy Lookup tool
- Your practice's Most Used Standard Policies list
- Display the patient's Quickview page:
 In the text box at the top right of the Main Menu, enter the first three letters of the patient's last name, followed by a comma, followed by the first three letters of the patient's first name. Click the search icon. On the Find a Patient page, click Quickview for the patient you need.
 -
Scroll down to the Insurances area and click add new.
Note: For insurance categories (Primary, Secondary, etc.) that have no existing insurance packages, select from the options:
- Add with card image — You can use patient-submitted card images or upload an image.
- If patient-submitted insurance card images are available, the Use card images from patient to add new insurance window appears. You can use the images or choose to upload new images.
- If no patient-submitted insurance card images are available, the Add Insurance Card Image page appears and you can upload images.
- Add without card image — You can use the Policy Lookup page to manually search for an insurance policy.

- Add with card image — You can use patient-submitted card images or upload an image.
-
If your organization has Enhanced Patient Self Check-In with Insurance Card Capture enabled, and the patient submitted their insurance card images, the Use card images to add new insurance? pop-up window appears.
Otherwise the Add insurance by uploading card image? pop-up window appears.
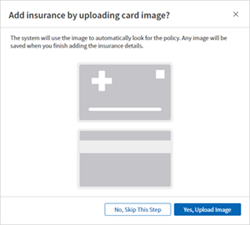
Note: You can also access the card images from the Eligibility and Phone List or the Check-in page.
-
Use the images provided by the patient or upload your own images.
-
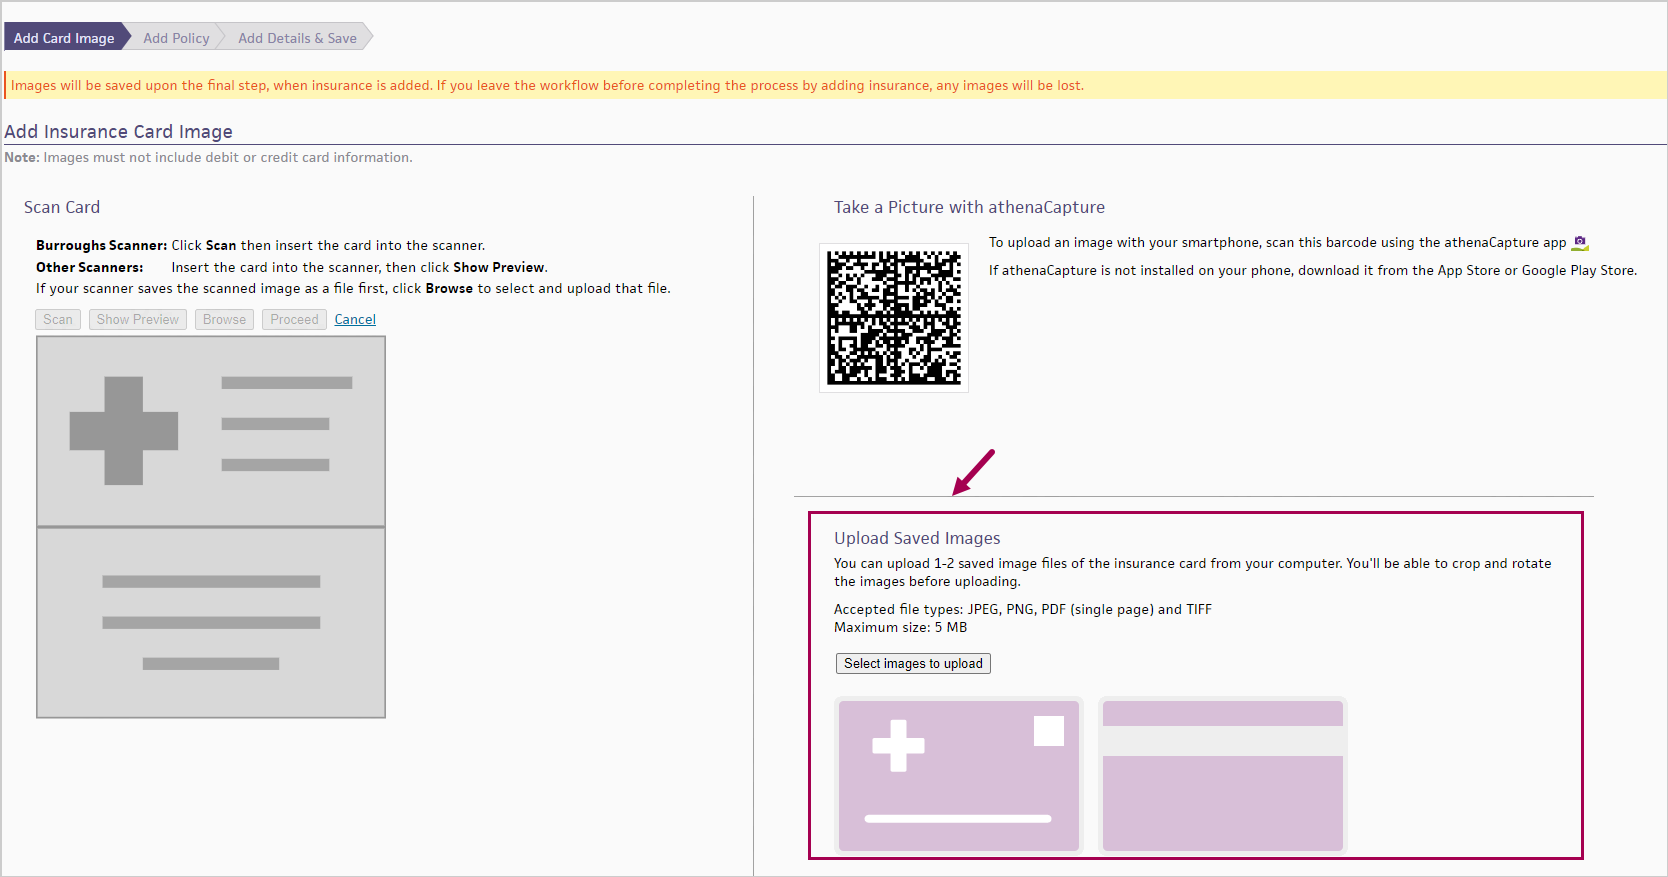
The Add Insurance Card Image page appears.
- Follow the instructions to Scan Card or Take a Picture with athenaCapture.
-
In the Upload Saved Images section, click Select images to upload.
Tip: Click the image to see an expanded view.
-
The Upload Saved Images window appears.
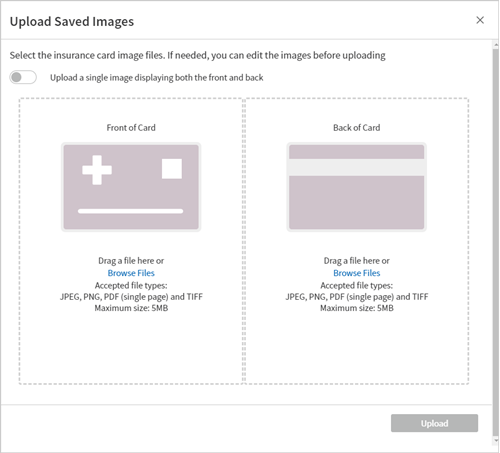
PDF technology powered by PDFTron SDK copyright © PDFTron™ Systems Inc., 2001-2020, and distributed by athenahealth, Inc. under license. All rights reserved.
- Select the card image file from your computer.
- You can upload 1-2 saved image files.
- Accepted file types: JPEG, PNG, PDF (single page) and TIFF
- Maximum size: 5 MB
If needed, click the edit icon
 to edit the image before uploading. Use the options at the top to rotate, crop, zoom out, or zoom in as needed. Then click Done with edits and Upload.
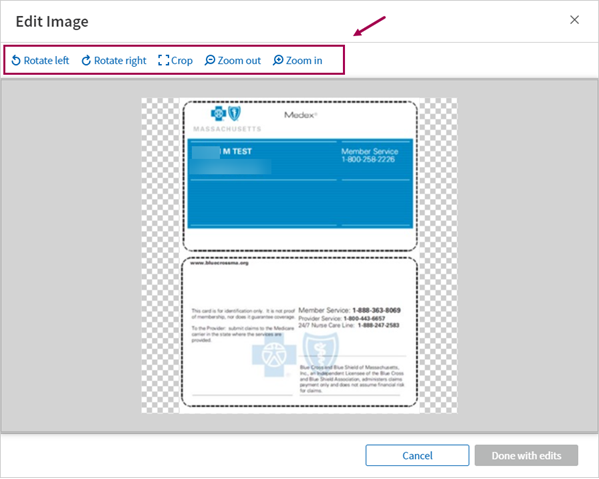
Note: For now, the additional image file types and image editing are only available for Front Desk insurance card image uploads and for users adding a new insurance. In a future release, these enhancements will be also available for patient-submitted insurance card images and for users adding images to existing insurance policies. - Images will be saved upon the final step, when insurance is added. If you leave the workflow before completing the process by adding insurance, any images will be lost. (This alert appears at the top of page as a reminder.)
A progress indicator also appears at the top of the page to help you track where you are in the workflow.
- Click Proceed. athenaOne processes the card image and searches for matching insurance policies.
-
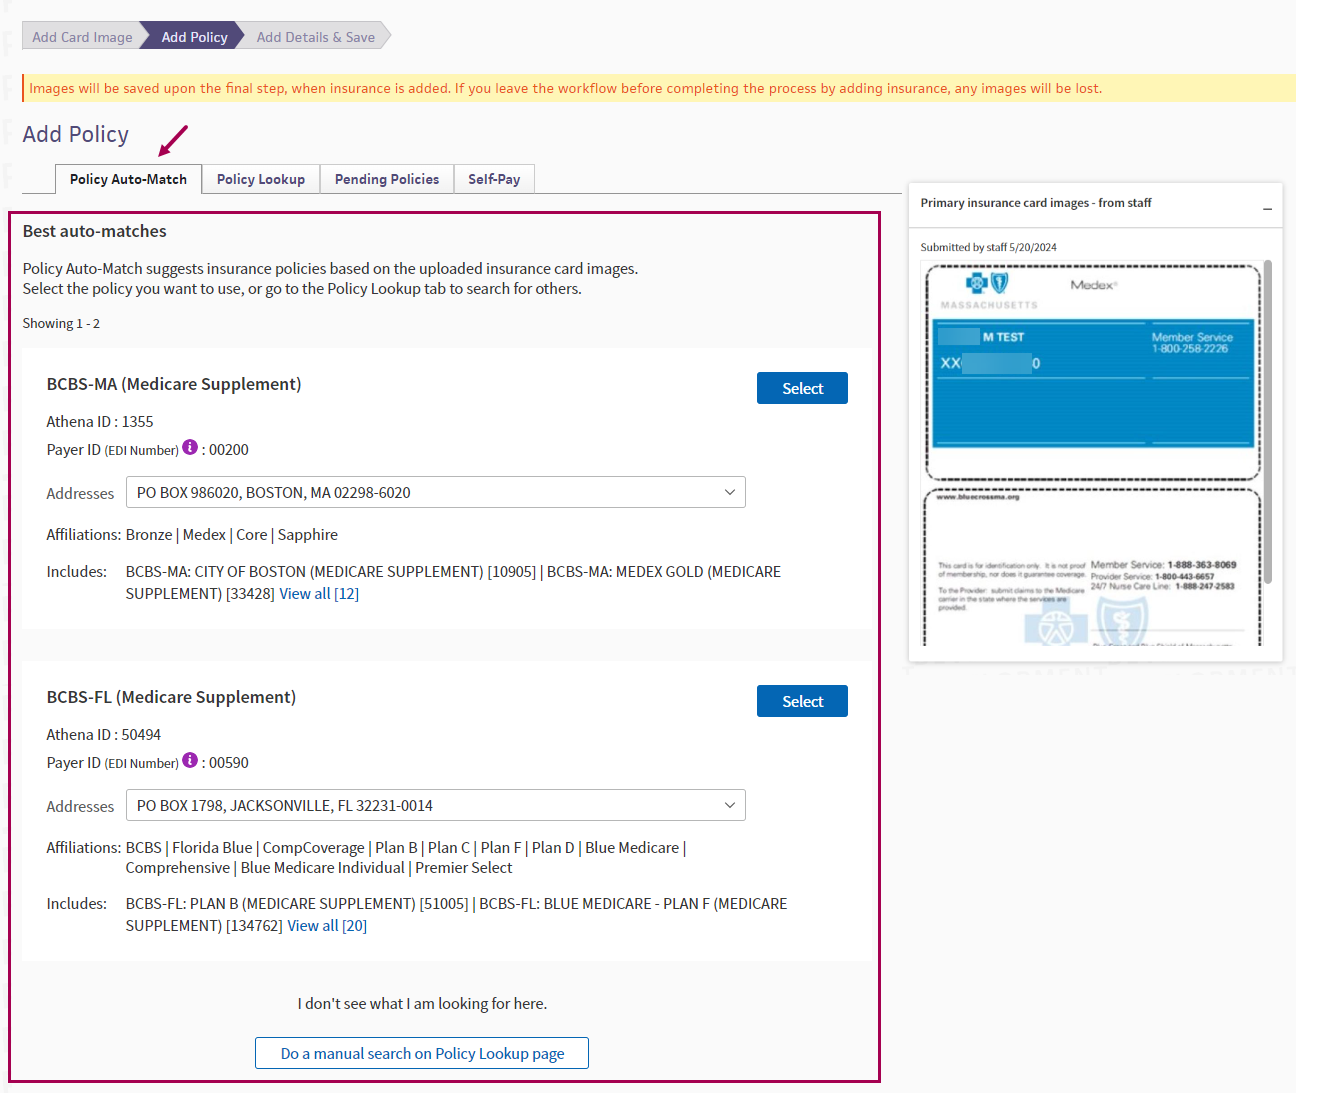
The Add Policy page appears.
-
If there's a best match, athenaOne automatically selects the best match insurance policy for you to review.
Make changes if needed, fill in required fields, then click Add Policy.
If you decide not to use the automatically selected policy, click Change Insurance Selection. The Policy Auto-Match page appears.
-
The Policy Auto-Match tab shows up to three suggested policies for selection, based on data from the insurance card images.
- Suggested policies will only include standard policies, not case policies.
- Suggested policies will only include policies that have an eligibility class that matches from the eligibility check.
-
The Payer ID (EDI Number) appears with insurance package details on the Add Policy page, for standard policies and case policies. The Payer ID is used for electronic claim submission. Some insurance cards include Payer ID, so this may help you identify the correct insurance package for a patient more easily.
Note: Payer ID is not included in a search filter because the Payer ID in athenaOne may not always match what's on the patient's insurance card. This can happen when third-party companies (for example, a clearinghouse) are involved in submitting claims to payers.
-
You'll see the same insurance policy information you would see if you were using Policy Lookup, including the ability to view the drop-down list of additional addresses, should you need to change from the default address.
-
The Insurance card images pop-up window remains on the side so you can reference the card details as needed. This same window will appear on subsequent athenaOne screens so you have continued access to the card image and the information on it as you add the insurance policy.
Tip: Click the image to see an expanded view.
-
Review the suggested policies and determine the best match. Click Select next to the policy you want to use.
- The Add Policy Details page appears.
- Member ID will be prefilled based on Optical Character Recognition (OCR) from the card images.
- Review and fill in required fields, then click Add Policy.
-
athenaOne saves the policy information and the card images to the patient's registration.
- When you return to the patient's Quickview page, the new policy appears in the Insurances section.
- Insurance name and Member ID will be prefilled based on Optical Character Recognition (OCR) from the card images.
If no auto-match policies were suggested, or if you decide not to select any of the suggested policies, you can always use the Policy Lookup page to manually search for an insurance policy.
Note: You can also add an insurance package using the same procedure from the Check-in page.
- Display the patient's Quickview page:
 In the text box at the top right of the Main Menu, enter the first three letters of the patient's last name, followed by a comma, followed by the first three letters of the patient's first name. Click the search icon. On the Find a Patient page, click Quickview for the patient you need.
 -
Scroll down to the Insurances area and click add new.
- Note: For insurance categories (Primary, Secondary, etc.) that have no existing insurance packages, select Add without card image.
The Add Policy page appears with the Standard policies option selected by default.
Note: You can also add a reference policy by clicking Add reference policy to the right of the Insurances heading. A reference policy is used for unique scenarios in place of a patient's usual insurance policies (see the description of reference policies in the Field Reference of the Quickview).
- Insurance names — Enter the name of the insurance company (for example, Aetna, BCBS, Medicare) and any other keywords from the patient's insurance card, for example, employer name, group name, or other affiliations.
Note: Enter as many keywords from the insurance card as possible. - Member ID — Enter the patient's insurance member ID as it appears on the insurance card.
- Click Search.
Note: If more than one package is listed in the search results, you can sort the search results by clicking Best match or Recently used. -
The Payer ID (EDI Number) appears with insurance package details on the Add Policy page, for standard policies and case policies. The Payer ID is used for electronic claim submission. Some insurance cards include Payer ID, so this may help you identify the correct insurance package for a patient more easily.
Note: Payer ID is not included in a search filter because the Payer ID in athenaOne may not always match what's on the patient's insurance card. This can happen when third-party companies (for example, a clearinghouse) are involved in submitting claims to payers.
- If a search result includes more than one address, you can click View all to see the list of addresses associated with the insurance package. The number of addresses included appears in brackets.

- To filter the results further, use the Filters box on the left side of the page and enter one of these search filters:
- Insurance address — Enter the address of the insurance company as it appears on the insurance card. As you type, athenaOne shows you matching results.
- Insurance phone — Enter the phone number of the insurance company as it appears on the insurance card.
- Product type — Select a product type (EPO, HMO, Indemnity, POS, PPO, etc.).
- Select the matching insurance package (click the Select button to the right of the package).
The Add Policy Details page appears.
Note: If you cannot find the insurance package, select the I've entered all available information and can't find a match option at the bottom of the page, and then click Request New Insurance Package. The Insurance Package Requests page appears. - Review the policy information on the Add Policy Details page and update it as necessary.
-
Click Add Policy.
The new insurance policy appears on the patient's Quickview page and in the insurance lists on the Check-in, Charge Entry, and Claim Edit pages.
After you enter a filter, the search resumes automatically and displays matching insurance packages.
Note: In some cases, a claim rule prevents the search from showing more possible results. You can click Show rules details to display the rules and then click ignore this rule to override the rule and expand the search.

Note: You can also add an insurance package using the same procedure from the Check-in page.
- Display the patient's Quickview page
 In the text box at the top right of the Main Menu, enter the first three letters of the patient's last name, followed by a comma, followed by the first three letters of the patient's first name. Click the search icon. On the Find a Patient page, click Quickview for the patient you need.
 -
Scroll down to the Insurances area and click add new.
- Note: For insurance categories (Primary, Secondary, etc.) that have no existing insurance packages, select Add without card image.
The Add Policy page appears with the Standard policies option selected by default.
- In the Most Used Standard Policies list, click the patient's insurance package.
- Member ID — Enter the patient's insurance member ID in the window that appears.
- Click Add Insurance.
athenaOne performs an electronic eligibility check based on the information provided. The results of the eligibility check and the insurance search appear.
Note: Although you can click Skip eligibility check, we recommend that you not skip the eligibility check. - If athenaOne encounters no problems with the insurance package you selected, the Add Policy Details page appears. Review the policy information and update it as necessary. Then click Add Policy.
- If athenaOne locates additional information about the insurance from the eligibility check or member ID, the results are filtered further, as described in the yellow box. This box also displays an explanation of any problems encountered during the eligibility check. You can click View details for more eligibility information.
- In the Filters box on the left side of the page, enter one of these search filters:
- Insurance address — Enter the address of the insurance company as it appears on the insurance card. As you type, athenaOne shows you matching results.
- Insurance phone — Enter the phone number of the insurance company as it appears on the insurance card.
- Product type — Select a product type (EPO, HMO, Indemnity, POS, PPO, etc.).
- Select the matching insurance package.
The Add Policy Details page appears.
Note: If you cannot find the insurance package, select the I've entered all available information and can't find a match option at the bottom of the page, and then click Request New Insurance Package. The Insurance Package Requests page appears. - Review the policy information on the Add Policy Details page and update it as necessary.
- Click Add Policy.
After you enter a filter, the search resumes automatically and displays matching insurance packages.
Insurance Revalidation is an opt-in feature. To enable it for your organization, contact the CSC or your onboarding project team. On the Main Menu, click Support > Success Community > Contact Client Support Center.
-
Under the Insurances heading, click Add card image next to the Insurance Card Image field.
The Add Insurance Card Image page appears.
-
Upload the card image.
-
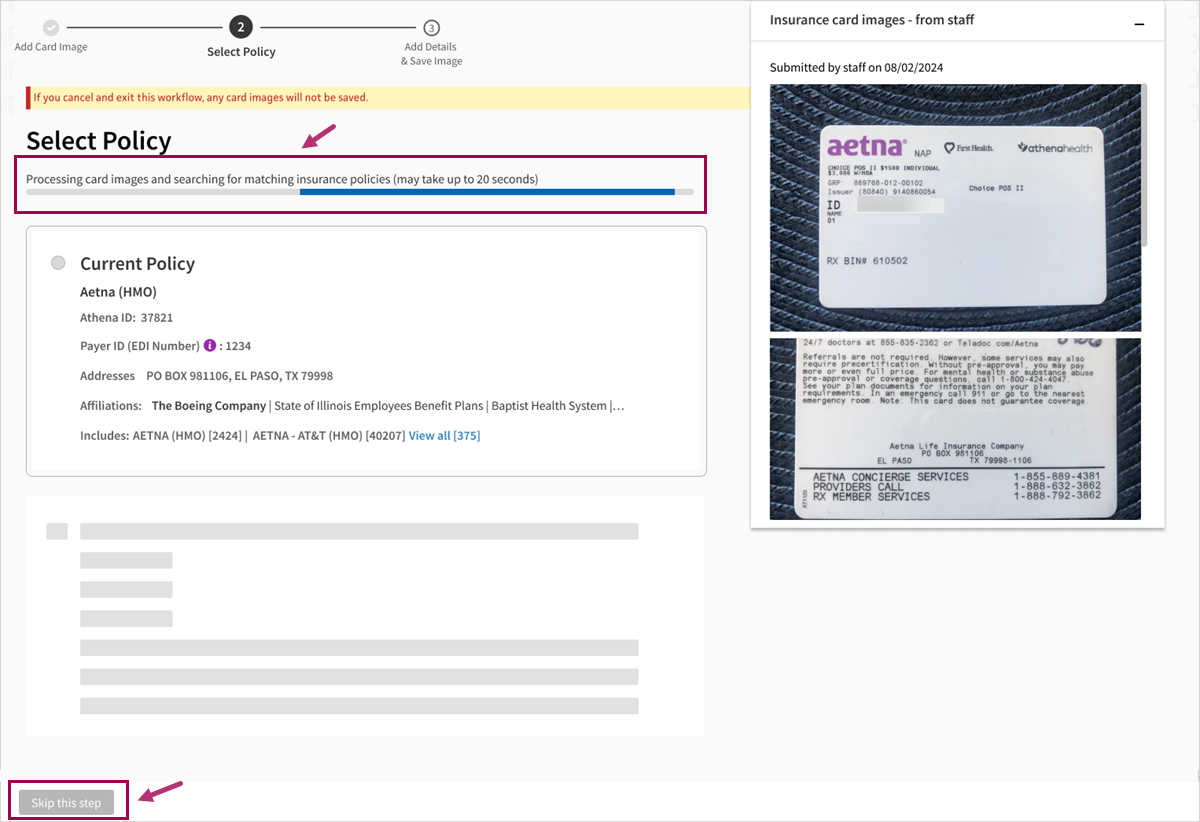
athenaOne processes the card image and searches for matching insurance policies.
Tip: Click the image to see an expanded view.
Note:
- For Front Desk uploaded images, this processing happens real-time and can take up to 20 seconds
- You have the option to Skip this step.
-
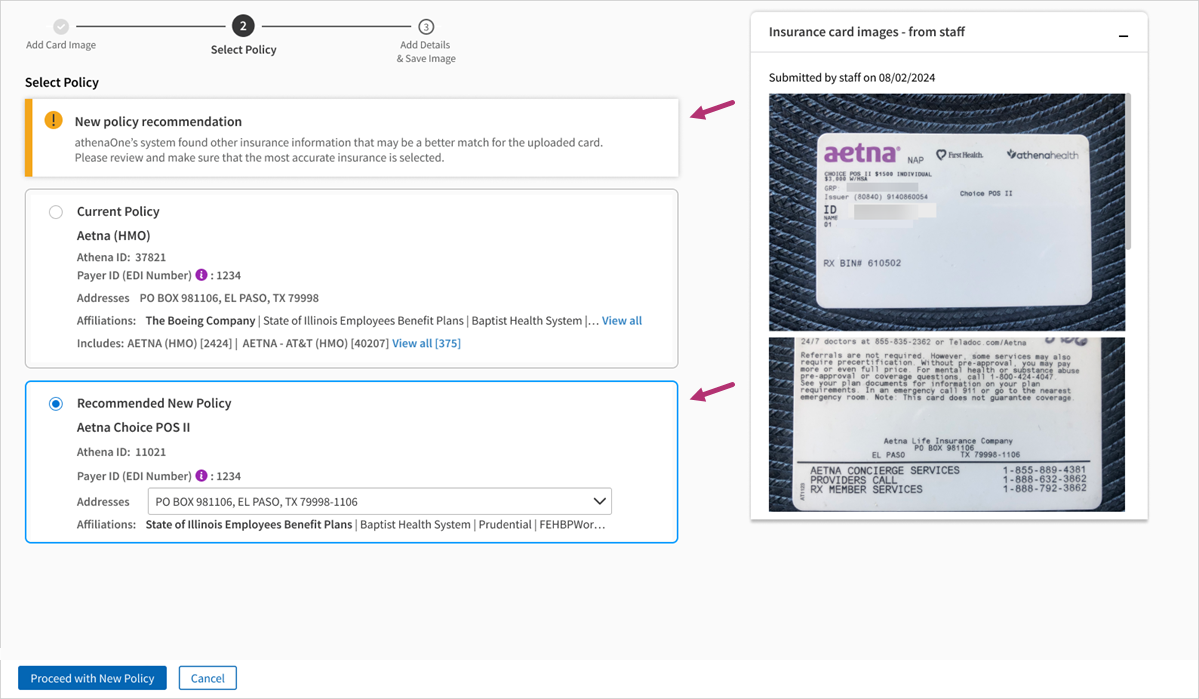
athenaOne displays the Select Policy page, with details for Current Policy and Recommended New Policy (if any are matched) based on the uploaded card.
Tip: Click the image to see an expanded view.
-
If the recommended policy is a better match, select Proceed with New Policy.
- The Add Policy Details page appears, with some information pre-filled from the card image.
- Complete the required fields.
- Click Add Policy.
(If you select Cancel for the recommended new policy, a confirmation window appears, you exit the workflow and the card images will not be used. )
- If the patient has existing appointments, athenaOne displays the appointments and asks if you want to apply the insurance updates to those appointments.
- If the patient has open claims, athenaOne displays the claims and asks if you want to apply the insurance updates to those claims.
- If the patient has active referrals/authorizations, athenaOne displays the referrals/ authorizations and asks if you want to transfer them to the new insurance.
-
When you return to the patient's Quickview page, the new policy appears in the Insurances section.
- Insurance name and Member ID will be prefilled based on Optical Character Recognition (OCR) from the card images.
If no auto-match policies were suggested, or if you decide not to select any of the suggested policies, you can always use the Policy Lookup page to manually search for an insurance policy.
-
Go to the Quickview for the patient.
-
Under the Insurances heading, you will see Insurance card images - from patient. Click View details and select the images to use.
-
At the field Add card images from patient to this insurance? — Click Yes, add these images.
-
athenaOne retrieves the card image and the previously saved matching policy results.
Note: You have the option to Skip this step.
-
athenaOne displays the Select Policy page, with details for Current Policy and Recommended New Policy (if any are matched) based on the uploaded card.
Tip: Click the image to see an expanded view.
-
athenaOne displays the Select Policy page, with details for Current Policy and Recommended New Policy (if any are matched) based on the uploaded card.
Tip: Click the image to see an expanded view.
-
If the recommended policy is a better match, select Proceed with New Policy.
- The Add Policy Details page appears, with some information pre-filled from the card image.
- Complete the required fields.
- Click Add Policy.
(If you select Cancel for the recommended new policy, a confirmation window appears, you exit the workflow and the card images will not be used. )
- If the patient has existing appointments, athenaOne displays the appointments and asks if you want to apply the insurance updates to those appointments.
- If the patient has open claims, athenaOne displays the claims and asks if you want to apply the insurance updates to those claims.
- If the patient has active referrals/authorizations, athenaOne displays the referrals/ authorizations and asks if you want to transfer them to the new insurance.
-
When you return to the patient's Quickview page, the new policy appears in the Insurances section.
- Insurance name and Member ID will be prefilled based on Optical Character Recognition (OCR) from the card images.
If no auto-match policies were suggested, or if you decide not to select any of the suggested policies, you can always use the Policy Lookup page to manually search for an insurance policy.
- Display the Deactivate Insurance Policy page: On the Quickview, under the Insurances heading, click Deactivate this policy.
- Review the package information to verify that this is the package you want to deactivate.
- Enter the reason for deactivating this insurance policy (for example, "changed employer") in the Deactivation reason field.
- Click Deactivate Insurance.
Note: Once deactivated, you can still click the View cancelled insurances link to view the cancelled policy, including the scanned insurance card image, the date it was deactivated, who did it, and the note that the user entered when that person deactivated the package. athenahealth recommends that you immediately add the new policy for the patient, if available, and correct the insurance selection on all affected claims.
To add a cancelled insurance, the patient must have at least one open position in the Insurances section. If the patient already has primary, secondary, and tertiary insurances, you cannot add back a cancelled insurance policy.
Note: You cannot add cancelled payment plans or prepayment plans back to the patient's Quickview page.
- Display the patient's Quickview page:
 In the text box at the top right of the Main Menu, enter the first three letters of the patient's last name, followed by a comma, followed by the first three letters of the patient's first name. Click the search icon. On the Find a Patient page, click Quickview for the patient you need.
 - Click View
cancelled insurances in the Insurances section.
The Cancelled Patient Insurances page appears, showing each cancelled insurance policy, with the most recently cancelled insurance at the top. - Select
a cancelled insurance policy and click Add as
New Insurance Policy.
A message appears, stating that the reactivated insurance policy will be added to the first available position in the Insurances section of the patient's Quickview page. For example, if the patient already has a primary insurance, the reactivated policy will become the secondary insurance. - Click OK
to continue, or Cancel to return to the
Cancelled Patient Insurances page.
Note: The original position of the cancelled policy is not restored when the cancelled policy is reactivated, so always check to make sure that all policies are positioned correctly on the patient's Quickview page after you reactivate a cancelled insurance policy.
If your athenaEnterprise organization is configured for insurance synchronization, adding a cancelled insurance as a new policy means that the reactivated insurance policy is added in all provider groups. If a copy of the patient in one provider group already has three insurances, however, the reactivated policy can only be added as a new insurance in the provider groups where the patient has an open position in the Insurances section.
- Display the patient's Quickview page:
 In the text box at the top right of the Main Menu, enter the first three letters of the patient's last name, followed by a comma, followed by the first three letters of the patient's first name. Click the search icon. On the Find a Patient page, click Quickview for the patient you need.
 - On the Quickview page, scroll down to the Insurances heading.
- Click the Change policy order link to the right of the Insurances heading.
The Change Insurance Policy Order page appears. - Drag and drop the patient's insurance packages to change the policy order.
Note: The Change Insurance Policy Order page displays all family members who have the same insurance policies. You can select family members to apply the new policy order to them, as well. - Click Save. The Quickview page reappears, with the new insurance policy order in the Insurances section.
If your practice is a federally qualified health center (FQHC), you can use the following fields on the Quickview, Patient Registration, or Check-in page to collect data and calculate the federal poverty level of patients. This information also improves data collection for UDS reporting.
Note: The School-based health center patient and Public housing patient fields are not used in UDS reporting. However, you can designate a department as a school-based site or as a public housing service delivery site for UDS reporting. See To configure a department for UDS reporting.
- Family size
- Income
- Income level
- Agricultural worker
- Homeless status
- School-based health center patient
- Veteran status
- Public housing patient
Note: The data in the Family size, Income, and Income level fields is masked to protect patient privacy and avoid disclosure of sensitive demographic information. To edit these fields, click Edit or View.
Note: The UDS Financials section appears on Quickview and Check-In.
You can collect Federal Poverty Level data for UDS reporting and review a patient's UDS Federal Poverty Level history in a Federal Poverty Level — Calculation section.
-
Better collect household size and income on Quickview and Check-in.
-
Accurately see the Federal Poverty Level for the patient based on household size and income using guidelines in effect at the time of collection (while viewing history).
-
Quickly see the reporting expiration date for the collected information.
-
Easily see a patient's UDS Table 4 reporting history for 2023 and beyond.
You collect household size and income information in the Federal Poverty Level — Calculation box of the UDS Financials section.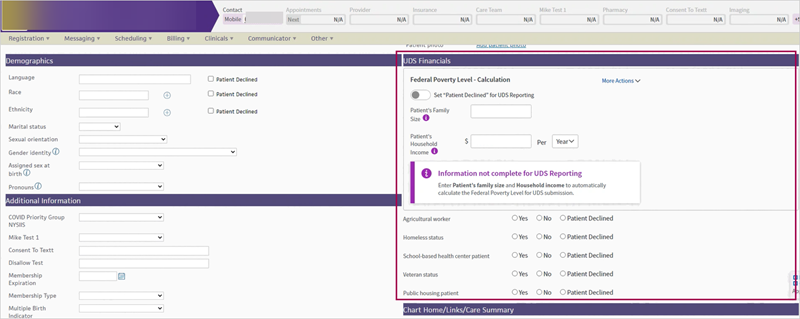
In the Federal Poverty Level — Calculation box, you can enter Patient's Family Size and Patient's Household Income for athenaOne to automatically calculate the Federal Poverty Level for UDS submission.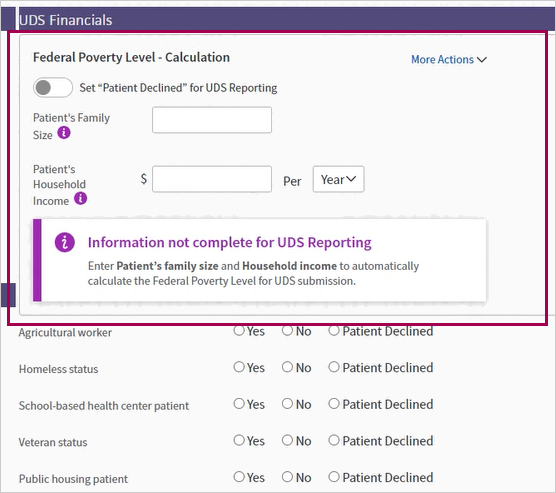
Note: The Health Resources and Services Administration (HRSA) requires that patient Federal Poverty Level data be collected within 12 months of the last calendar year visit or else be reported as "unknown" on UDS Table 4.
Does your practice use data differently than other practices and require a manual experience more similar to the legacy Financial section?
If your practice wants to manually calculate the range of the Federal Poverty Level (FPL), and then only enter that range, you can request the range version of this feature.
See Manually enter FPL range— setting required for more information.
This feature provides the following benefits:
-
Provides more accurate accounting of patients whose incomes are not collected
-
Provides more accurate UDS reporting
-
Reduces time entering income data
-
Increases satisfaction with UDS Federal Poverty Level data collection workflow
After completing the Patient's Family Size and Patient's Household Income fields:
-
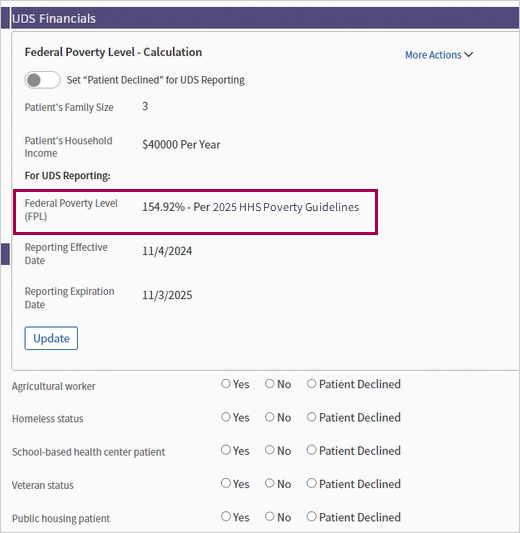
athenaOne calculates the patient's Federal Poverty Level. For more information completing the fields in the Federal Poverty Level — Calculation box, see the Complete Federal Poverty Level — Calculation workflow section of this release note.
-
You can review a patient's Federal Poverty Level history, under More actions. For more information, see the Complete More Actions section of this release note.
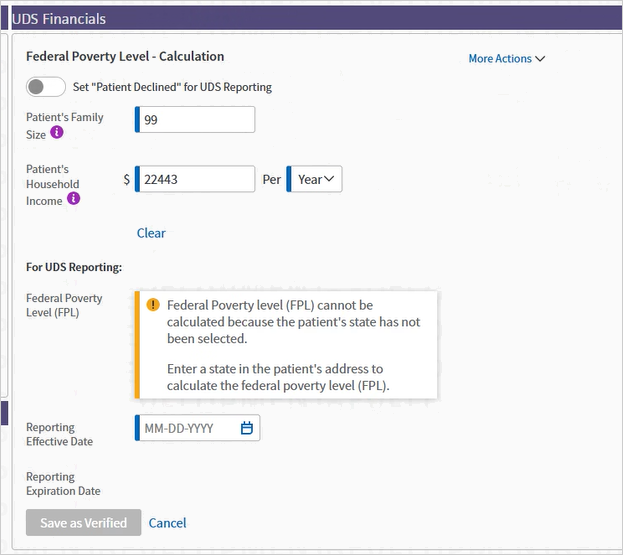
A patient must have an address with state specified on file to calculate Federal Poverty Level; if there is no state entered an alert appears informing you to enter address information.
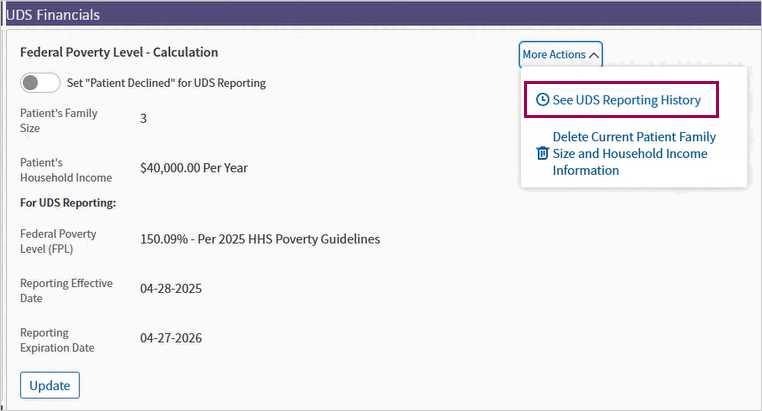
In UDS Financials section, you can:
- Collect household size and income on Quickview and Check-in
- See the reporting effective and expiration date for the collected information
- See a patient's UDS Table 4 reporting history for 2023 and beyond.
- See an historical view of the patient's Federal Poverty Level and which UDS guidelines were in effect at the time of collection.
- Delete previously entered income
You can click the Set "Patient Declined" for UDS Reporting option in the Federal Poverty Level — Calculation box.
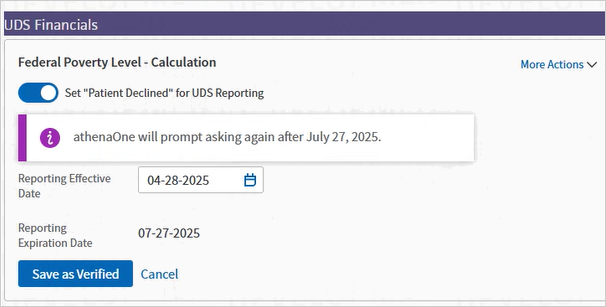
Note: When the patient declines UDS reporting, athenaOne tells you when you will be prompted to collect patient financials again. The reminder occurs three months from the date that the patient declined UDS reporting. If you would like to change the length of time, contact athenahealth Support or your Onboarding project team.
The prompt can be customized to appear any amount of time less than a year and can be set to a number of days, weeks, or months depending on when you want practice staff to ask again.
If you enter a 0 in the income field, the same alert appears.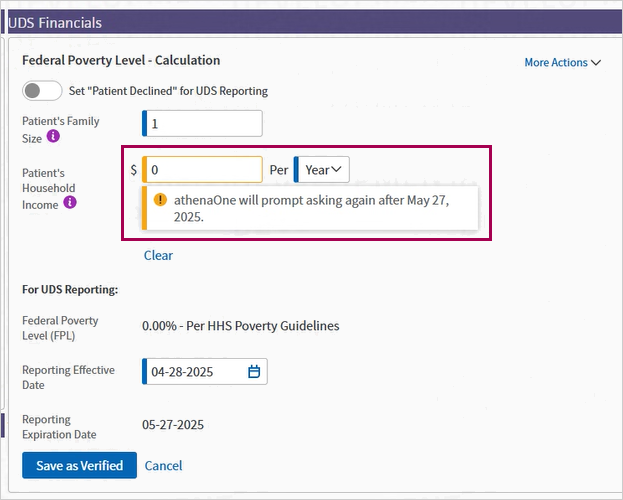
-
The history component of the app will only show one row per program year, rather than every update to patient Federal Poverty Level data. However, users can still see an audit history of all updates in the Patient Registration audit.
-
The legacy Federal Poverty Level fields on the Full Registration page will become read-only
-
The ability to upload documentation, editing the previous year's data, and leaving notes within the audit history will be available soon.
To access the Quickview, you must have the Quickview (or Quickview no financials) role or permission.
The reminder to collect this information again occurs three months from the date that the patient declined UDS reporting. If you would like to change the length of time, contact athenahealth Support or your Onboarding project team.
Your practice can request the range version of this feature by requesting that the Population Demographics - Federal Poverty Level Fields setting be enabled. Contact athenahealth Support or your Onboarding project team.
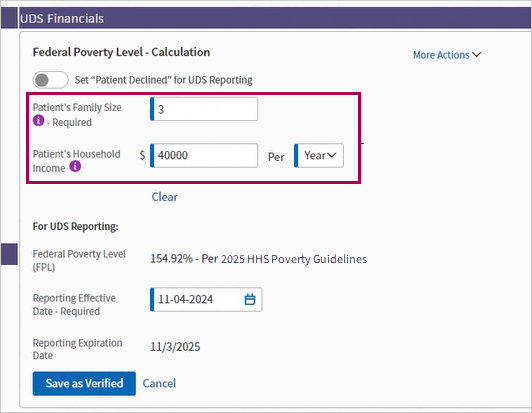
From the Federal Poverty Level — Calculation box in the UDS Financials section:
Federal Poverty Level — Calculation
-
Patient's Family Size — Enter the size of the patient's household.
-
Patient's Household Income — Enter the income of the patient's household.
-
Per — Choose the rate at which the household receives the income. You can select:
-
Year
-
Month
-
2 Weeks
-
Week
-
For UDS Reporting
-
Federal Poverty Level (FPL) — athenaOne automatically fills this field based on the information you added in the Patient's Family Size, Patient's Household Income, and Per fields. Once you complete those fields, the Federal Poverty Level value appears automatically.
-
Reporting Effective Date — Enter a date or choose one using the calendar icon.
-
Reporting Expiration Date — The expiration date automatically fills in as one year from the effective date.
-
Click Save as Verified.
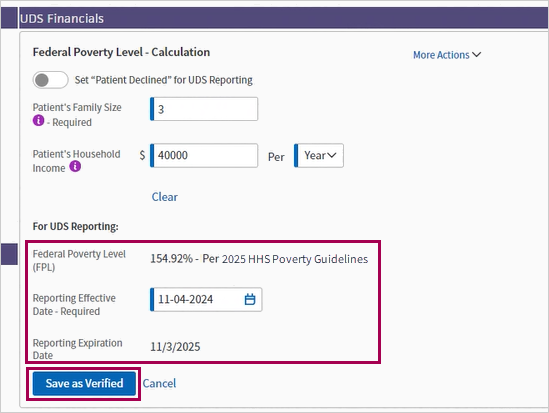
Once you click Save as Verified, the Federal Poverty Level — Calculation box reloads and is then read-only. Click Update to edit the information.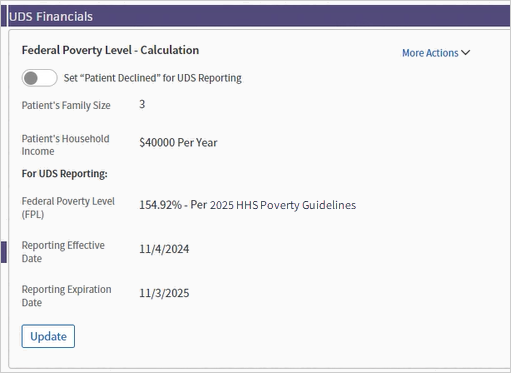
Whenever you return to the Federal Poverty Level — Calculation box, you can see the reporting effective and expiration dates right with the other Federal Poverty Level information.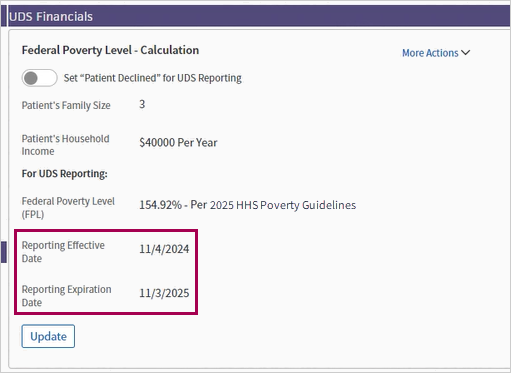
Under More Actions, you can click See UDS Reporting History to review a patient's UDS Table 4 reporting history for 2023 and beyond.
The UDS Financial Reporting History window appears over the Quickview or Check-in pages where you can easily see the Federal Poverty Level for the patient based on household size and income using guidelines in effect at the time of collection.
From the UDS Reporting History window, in the Poverty Level Guideline Used column, you can see the guidelines used for calculating the patient's Federal Poverty Level represented as the yearly version used at the time of collection (for example the year 2024).
The user, be it a practice user or an athenahealth user, appears in the Last Saved By column.

To delete previously entered income:
- Click More Actions.
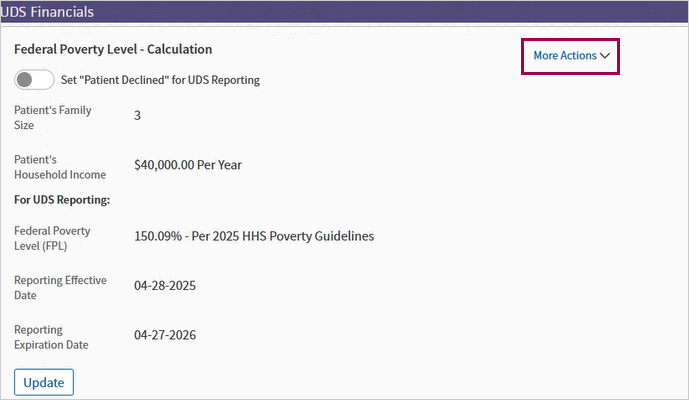
- click Delete Current Patient Family Size and Household Income Information. A pop-up window appears where you're asked if you want to proceed.
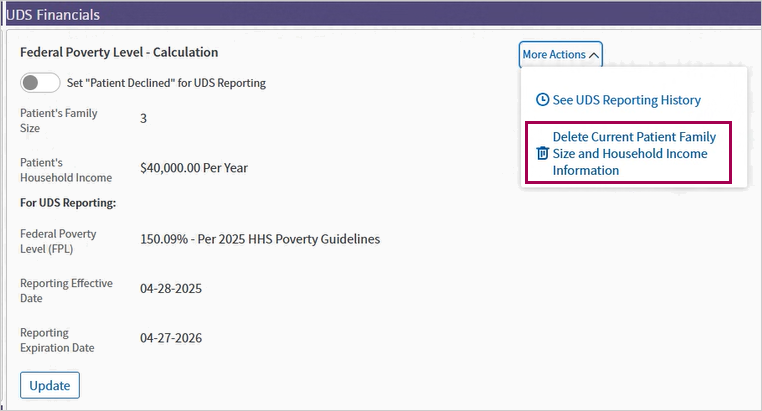
-
Click OK to delete previously entered information.

-
View the alert that appears informing you that information for UDS reporting is not complete.
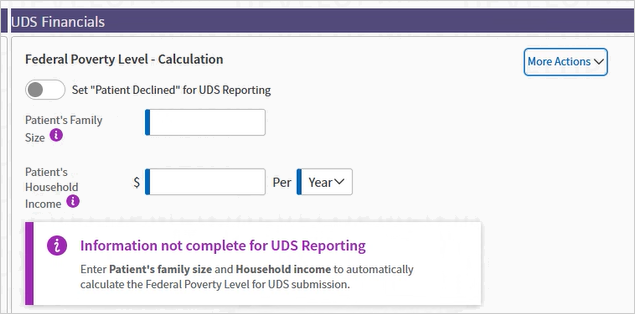
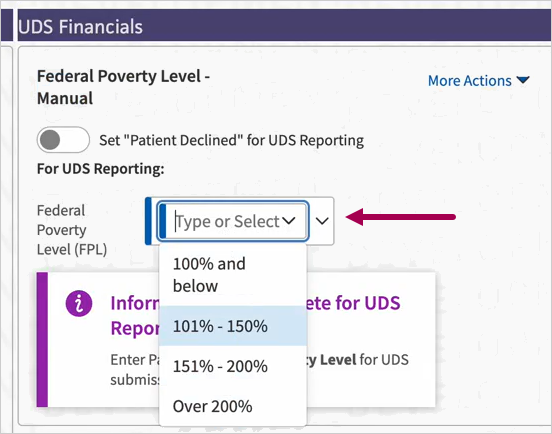
Your practice may use data differently than other practices. If your practice wants to manually calculate the range of the Federal Poverty Level (FPL) and then only enter that range.
Your practice can request the range version of this feature by requesting that the Population Demographics - Federal Poverty Level Fields setting be enabled.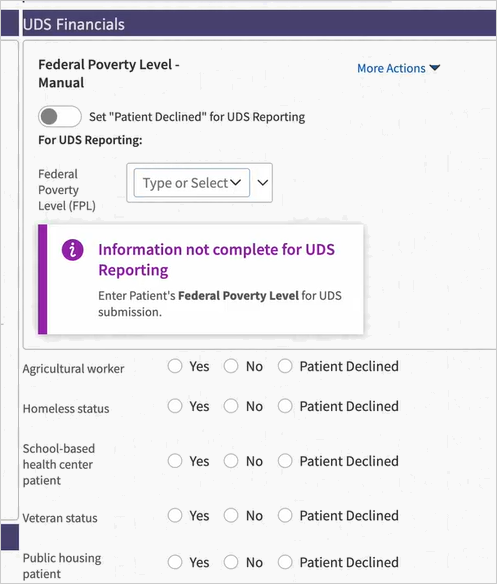
- Federal Poverty Level (FPL) — You can enter a date manually or click the calendar date icon to select a date.
-
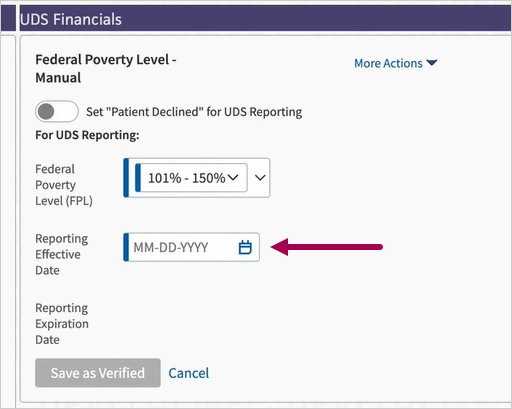
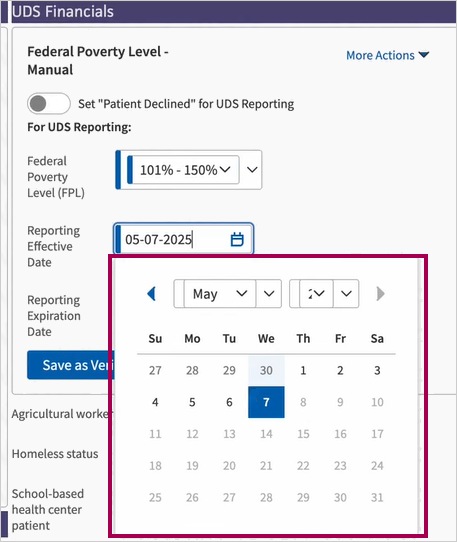
Reporting Effective Date — You can:
-
Enter a date manually
-
Click the calendar icon to select a date
-
-
Reporting Expiration Date — athenaOne fills this field automatically as one year from the Reporting Effective Date.
-
Click Save as Verified.
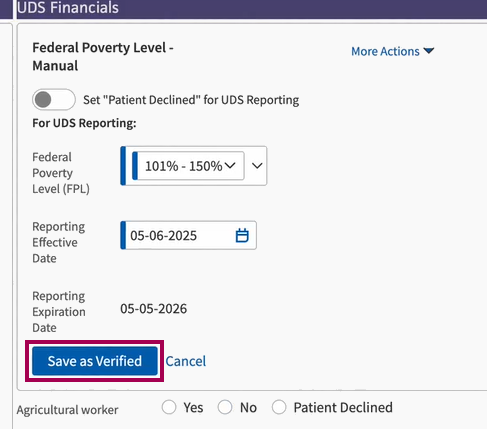
The UDS Financials section is read-only once you click Save as Verified. Click Update to edit the fields.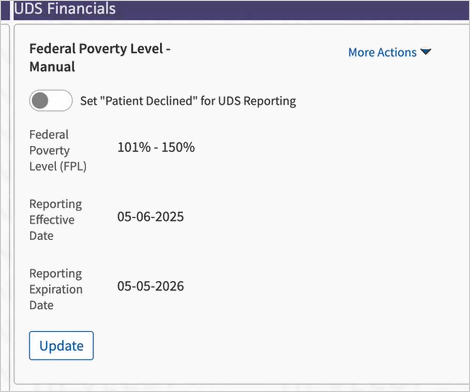
To update the FPL range, click Update.
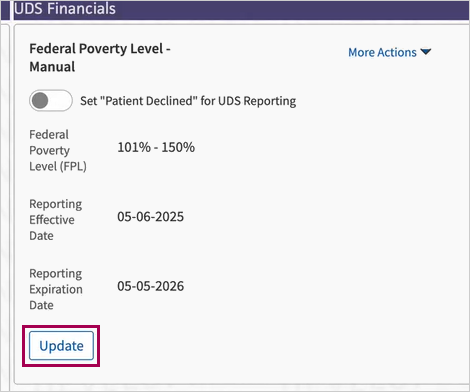
You can edit the Federal Poverty Level (FPL) and Reporting Expiration Date fields. athenaOne fills the Reporting Expiration Date field automatically as one year from the Reporting Effective Date.
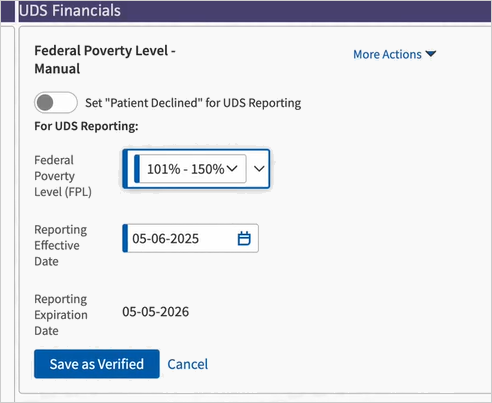
Click Save as Verified to submit the update.
Click More Actions to:
-
See UDS reporting history
-
Delete Patient Family Size and Household Income Information
-
Click More Actions.
-
Click See UDS reporting history.
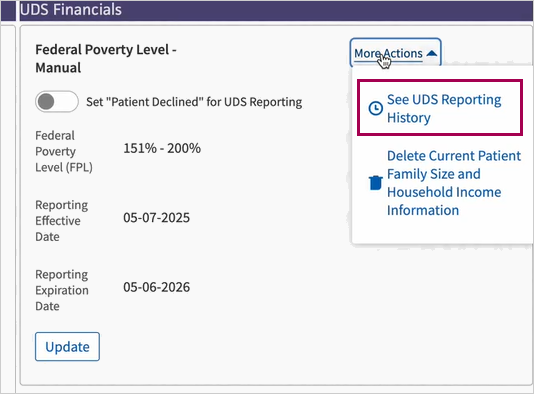
-
View the UDS reporting history.

-
Click More Actions.
-
Click Delete Patient Family Size and Household Income Information.
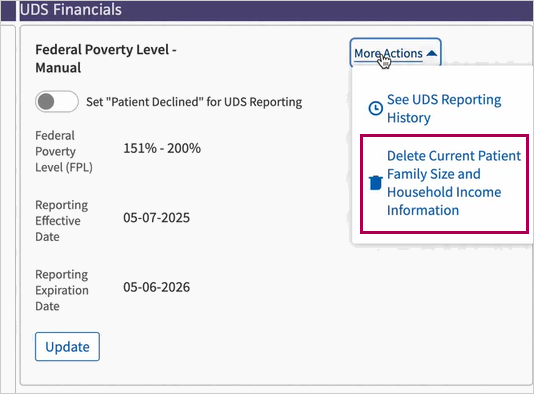
-
Confirm the UDS Financials section only displays the empty Federal Poverty Level (FPL) field.
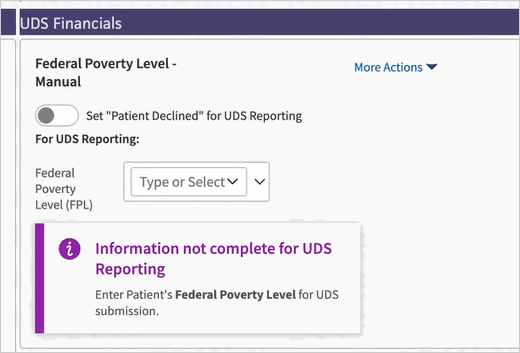
You can click the Set "Patient Declined" for UDS Reporting option in the Federal Poverty Level — Calculation box.

Note: When the patient declines UDS reporting, athenaOne tells you when you will be prompted to collect patient financials again. The reminder occurs three months from the date that the patient declined UDS reporting. If you would like to change the length of time, contact athenahealth Support or your Onboarding project team.
The prompt can be customized to appear any amount of time less than a year and can be set to a number of days, weeks, or months depending on when you want practice staff to ask again.
The Health Resources and Services Administration (HRSA) Uniform Data System (UDS) report requires community health centers with 330g and 330h grants to provide specific values for homeless and agricultural worker status. You can require more specific values for the Agricultural worker and Homeless status fields and you can make these fields required during check-in.
Note: To set the level of specificity for these fields or to make them required during check-in, please contact the CSC from athenaOne > Support > Success Community > Contact Client Support Center.
In the total homeless count for UDS Table 4, athenaOne includes all patients whose homeless status is Yes (you can edit a patient's homeless status on the Quickview, Patient Registration, and Check-in pages). athenaOne includes patients in the total homeless count using their first recorded year of homeless status, even if their status changes later. For example, if a patient is homeless on January 1, 2021, and receives housing by the time they visit on February 1, 2021, the patient is still included in the yearly total homeless count.
The Patient Demographics report type in the Report Builder provides the following display columns and filters (in the Patient category). You can use these display columns and filters to create your own reports instead of requesting custom reports or running a full UDS Table 4 report for this information.
- Agricultural Worker
- Agricultural Worker Type
- Family Size
- Homeless Status
- Homeless Type
- Income
- Income Level
- Patient Gender Identity
- Patient Sexual Orientation
- Public Housing Patient
- School-Based Health Center Patient
- Veteran Status
- Display the patient's Quickview page.
- Scroll down to the Insurances area and click add new.
The Add Policy page appears with the Policy Lookup tab selected by default. - Click the Self-Pay tab, or click Self Pay in the Favorites list.
- Click Select next to Sliding Fee Schedule - Discount.
The Add Cash Policy Details page appears. - Sliding fee program — Select a poverty-based sliding fee program from the menu.
Additional fields appear. - Family size — Enter the number of people in the patient's family.
- Income — Enter the family's income as a whole dollar amount (without a dollar sign or commas), and select the time frame for the income.
Note: athenaOne converts the income to an annual amount before it performs a lookup in the HHS Poverty Guidelines table. -
Click Calculate plan to the right of the Income field.
The sliding fee plan is displayed.
Note: When you select a poverty-based sliding fee plan, athenaOne calculates the correct plan according to the most recently uploaded HHS Poverty Guidelines. athenaOne continues to use the selected plan for the patient until someone selects a new plan, the plan is deactivated, or the expiration date is reached. - Effective date — Enter or select the effective date for the sliding fee plan.
Leave this field blank to make the policy effective immediately, until you delete or modify it. - Expiration date — Enter or select the expiration date (if available).
- Notes — Enter any notes about the plan and the patient.
- Click Add Cash Plan.
- Display the patient's Quickview page.
- Scroll down to the Insurances area and click add new.
The Add Policy page appears with the Policy Lookup tab selected by default. - Click the Self-Pay tab, or click Self Pay in the Favorites list.
- Click Select next to Sliding Fee Schedule - Discount.
The Add Cash Policy Details page appears. - Sliding fee program — Select a non-poverty-based sliding fee program from the menu.
Additional fields appear. - Sliding fee plan — Select a non-poverty-based sliding fee plan from the menu.
- Effective date — Enter the effective date for the sliding fee plan.
- Expiration date — Enter the expiration date for the sliding fee plan.
- Notes — Enter any notes about the plan and the patient.
- Click Add Cash Plan.
- Display the patient's Quickview page:
 In the text box at the top right of the Main Menu, enter the first three letters of the patient's last name, followed by a comma, followed by the first three letters of the patient's first name. Click the search icon. On the Find a Patient page, click Quickview for the patient you need.
 - Cash — Click Update this cash plan.
The Update Cash Policy Details page appears. For security reasons, asterisks appear in the Family size and Income fields. - Family size — Click edit.
Note: For security reasons, the amounts you previously entered in the Family size and Income fields do not appear. To view these amounts, you must create a custom report. - Enter new data in each field, as necessary.
- Click Update Cash Plan.
You can attach scanned documents, such as application packets, financial aid paperwork, and required proof-of-income documentation, to a sliding fee plan.
Note: We encourage you to remove sensitive information, such as Social Security numbers and employee ID numbers, from the scanned document before you attach it to a sliding fee plan.
- Display the patient's Quickview or Check-in page.
- Under the Insurances heading, locate the patient's sliding fee plan.
- Click Add/update documentation under the sliding fee plan information.
- Click Choose File.
- Locate the scanned file and select it.
You can attach a .tif, .jpg, .bmp, .gif, .png, .dcm, or .pdf file; the maximum file size is 50 MB. - Click Add Document.
Note: You must have the Communicator permission.
- Display the patient's Quickview page.
- On the Patient Actions Bar, click Communicator, and then click Log in to Portal as Patient.
A message alerts you that you are logging on to the Patient Portal as the patient. - Click OK.
A read-only view of the patient's Patient Portal page appears. Any changes you make will not be saved.
Patients can set their own contact preferences on the Patient Portal by selecting the Notification settings option from the patient profile menu.
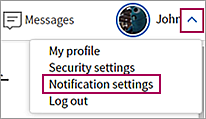
To receive text messages from your practice, the patient can select Include text messaging as a contact option and accept the Terms of Use for text messaging on this page.
After agreeing to receive text messages, patients can go to the Notification settings tab of the My profile page to select and deselect the types of text messages to receive from the practice: health notifications, appointment reminders, updates and announcements, and billing information.
Note: Patients are charged standard message and data rates for text messages from your practice.
Practice staff can select Phone and Email contact preferences on behalf of the patient using the checkboxes under the Communicator Automated Messaging Preferences heading on the Privacy Information page.
Note: Practice staff can select text message contact preferences on behalf of the patient only if the Consent to text option is set to Yes. The Consent to text option appears on the Check-in, Quickview, and Patient Registration pages.
To set email, phone, and text preferences for a patient:
- Display the Privacy Information page: On the Quickview, click Manage Privacy (under the Privacy heading).
Under the Communicator Automated Messaging Preferences heading
- Health Notifications — Select the preferred methods of communication for lab results and other health notifications (used by the ResultsCall and Order Reminders services).
- Appointments — Select the preferred methods of communication for appointment related messages (used by the ReminderCall service).
Note: Appointment reminder emails include the provider's Display Name (from the Providers page) and the department's Communicator Display Name (from the Departments page). If the Communicator Display Name field is blank, the email does not include a department. - Announcements — Select the preferred methods of communication for general messages (used by the GroupCall and Automated Wellness Outreach services).
- Billing — Select the preferred methods of communication for billing related messages (used by the Self-Pay Reminders and Guest Payments services).
- Click Save.
For more information, see Patient Record Sharing.
By default, athenahealth excludes patients younger than 18 from participation in patient record sharing. You can share records for minor patients by setting the Patient Record Sharing option to Yes on a case-by-case basis.
Note: You can change the age range for minor patients excluded from patient record sharing (you cannot automatically exclude patients older than 17). For more information, see Patient record sharing for minors.
- On the patient's Quickview or during the Check-in stage of an appointment, scroll down to the Privacy section of the page.
- Notices on file — Check the Privacy Notice box to indicate that the patient or the patient's guardian received and consented to your privacy policies.
- If the patient is 18 or older, the Patient Record Sharing option is automatically set to Yes.
- If the patient is a minor child, the Patient Record Sharing option is not set.
- Confirm that the patient or the minor patient's guardian consents to sharing patient information.
- If a patient 18 or older decides not to share his health data, set the Patient Record Sharing option to No.
- If the patient is a minor child, set the Patient Record Sharing option to Yes or No.
- Click Save.
- Display the patient's Quickview
page:
 In the text box at the top right of the Main Menu, enter the first three letters of the patient's last name, followed by a comma, followed by the first three letters of the patient's first name. Click the search icon. On the Find a Patient page, click Quickview for the patient you need.
 - Enter the note in the
Patient notes field at the top of the page.
You can enter up to 4000 characters. The field displays at least two lines of text and resizes itself based on your input; if it contains more than six lines of text, a scroll bar appears. - Click Save Changes.
You can create custom messages that print on statements for an individual patient. For example, you can create a patient note to notify the patient about a new, customized payment plan, or to remind a patient of a billing-related agreement policy. To enter a patient statement note, display the Patient Registration page: On the Patient Actions Bar, click Registration, and then click Full Registration. Enter the text of the note in the Statement note field. This field is limited to 75 characters.
Tip: You can create custom messages that are printed on statements for your entire practice using the Practice Statement Note page. These messages are printed for all patients on a statement run for your practice. You can use this function as a communication tool. For example, you can create a practice statement note to notify patients that a new doctor has joined the practice or when the flu clinic is scheduled for the upcoming year.
- Display the patient's Quickview
page:
 In the text box at the top right of the Main Menu, enter the first three letters of the patient's last name, followed by a comma, followed by the first three letters of the patient's first name. Click the search icon. On the Find a Patient page, click Quickview for the patient you need.
 - Under the Appointments heading, click Add note for the appointment. The Add Appointment Note page appears.
- On the Add Appointment Note page, enter the text of the appointment note in the Note field.
- Click Add. The Quickview page reappears with the appointment note displayed with that appointment.
- You can create an appointment tickler as follows:
- From the Checkout stage Patient tab, under the Scheduling heading, click the Create Appointment Tickler link.
- On the patient's Quickview page, scroll down to the Appointments heading. Next to the Appointments heading, click the Create appointment tickler link. The Add/Update Appointment Tickler page appears.
- Department — Select the department of the appointment.
- Type — Select the appointment type.
- Desired Provider — Select the desired provider for this appointment.
- Approximate Desired Appointment Date — Enter or select the approximate date of the desired appointment. This date should be in the future.
- Notes — If available, enter the reason for the appointment and any notes about the appointment.
- Click Save. The previous page reappears. The appointment tickler appears on the Quickview page, displayed under the Appointments heading.
- Display the patient's Quickview
page:
 In the text box at the top right of the Main Menu, enter the first three letters of the patient's last name, followed by a comma, followed by the first three letters of the patient's first name. Click the search icon. On the Find a Patient page, click Quickview for the patient you need.
 - Under the Appointments heading, click Schedule next to Tickler.
The appointment calendar appears.
Note: For appointment ticklers with associated return to office (RTO) orders, athenaOne automatically links the order to the appointment that you create from the tickler. When the patient returns to the office for the appointment, the order appears in the patient encounter automatically. - Click the date for which you want to schedule an appointment.
The appointment schedule for the selected date appears. - Click the checkbox next to the desired time.
- Appointment Type(s) — Select the type of appointment.
- Click Schedule Appointment(s).
- Display the Quickview page: On the Patient Actions Bar, click Registration, and then click Quickview.
- Scroll down to the Appointments heading.
- Click Print upcoming appointments.
Select the upcoming appointment reminders to print. You can select up to 10 appointments. - Click Print. The printout includes the department address and phone number information, as well as the appointment details.
For more information about the AWO feature, see Automated Wellness Outreach.
When a patient receives an automated wellness outreach message and calls you to schedule an appointment, you can review information about the AWO message that the patient received on the Quickview page.
Note: Automated wellness outreach messages appear on the Quickview page for 14 days only.
- Display the patient's Quickview
page:
 In the text box at the top right of the Main Menu, enter the first three letters of the patient's last name, followed by a comma, followed by the first three letters of the patient's first name. Click the search icon. On the Find a Patient page, click Quickview for the patient you need.
 - Under the Appointments heading, locate the Automated Wellness field.
This field displays information about the message date and time, the care gap that the patient was contacted about, the department, and the attributing provider.
- To schedule the appointment from the Quickview, click the Schedule link.
- Display the patient's Quickview
page:
 In the text box at the top right of the Main Menu, enter the first three letters of the patient's last name, followed by a comma, followed by the first three letters of the patient's first name. Click the search icon. On the Find a Patient page, click Quickview for the patient you need.
 - Patient notes — Enter the appropriate note. The note that you enter here also appears in the Patient notes field on the Check-in and Patient Registration pages.
Before you can delete a patient record, you must void all outstanding charges and payments; delete or close any associated encounters and documents; and cancel all pending appointments and remove them from the No Show worklist.
Important: Use extreme caution. The delete is permanent: there is no "undelete" option.
- Display the Quickview page for the patient record that you want to delete.
- On the Quickview, click the Delete/Merge
Patient button (at the bottom of the page).
The Merge/Delete Patient page appears.
Note: If the patient has outstanding charges or payments, open encounters or documents, or any pending appointments, you cannot delete the record. - Review the text displayed about this patient to verify that the current record is the one that you want to delete.
- Click Delete Patient.
Note: For athenaEnterprise clients, deleting a patient deletes the record from the local provider group only.
Note: Claims denied for eligibility related reasons (for example, service not covered, wrong insurer, patient demographic issues) take 20 to 50 days longer to pay than "clean" claims, so eligibility checking is critical to your cash flow.
On the Quickview page, click the Perform eligibility check link in the Insurances section at the bottom of the page. athenaOne executes an electronic eligibility check and assumes the current date is the date of service.
The Payer-Provided Eligibility Details page appears with the current results.
Tip: You can view the results of all eligibility checks run for prior dates of service for the patient's insurance package using the Eligibility History tab on the Payer-Provided Eligibility Details page.
- Display the Update Policy Details page: On the Quickview, under the Insurances heading, click Update this policy.
At the top of the page, you can see the patient's current eligibility status and the date that the status was last checked. - Scroll down to the Eligibility area.
- Take action on eligibility status — Click the Check at prior date of service option.
The Date of service field appears.
Note: Some payers do not support eligibility checks for prior dates of service. - Date of service — Select one of the patient's previous dates of service. You can select a date of service for which there is an open claim or a date of service with no open claims.
-
Click Update & Perform Eligibility Check.
The results of the eligibility check appear.Important: When you manually check eligibility, wait 20 seconds for a response from the payer (or an error message) before you attempt to check eligibility again.
 To perform a custom eligibility check for a patient's policy
-
Display the Quickview page for a patient.
-
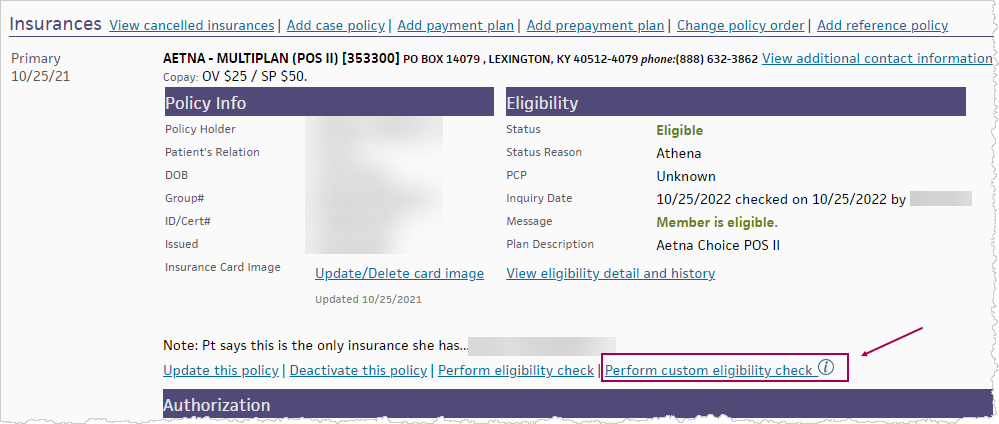
In the Insurances section, for a specific policy, click the Perform custom eligibility check link.
- This link is only available if you're using the enhanced Payer-Provided Eligibility Details page (released in Summer 2023).
- If you were using the enhanced page and then chose Go to: Old eligibility page, this link will not be visible.
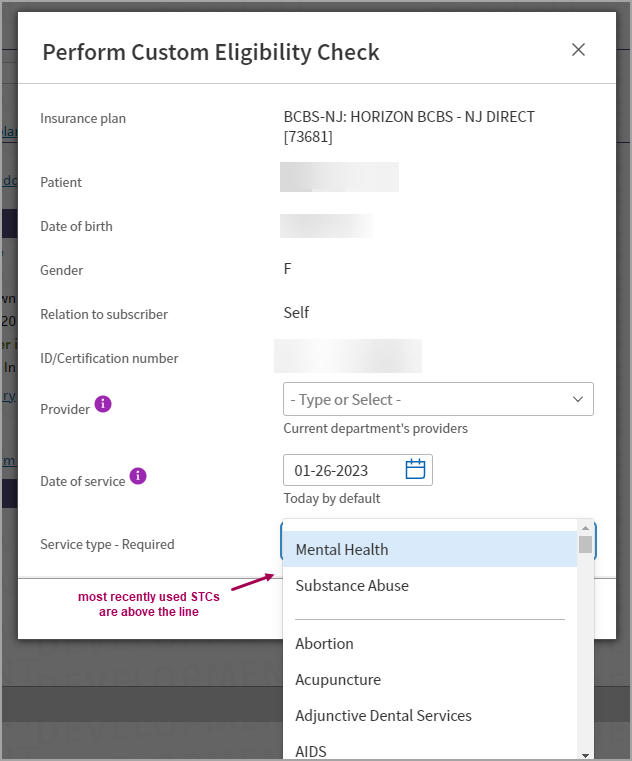
The Perform Custom Eligibility Check window appears.
-
Select the details for the custom eligibility check:
- Provider — (optional) - Select a Provider.
- This list only shows the Providers within the department that you're currently logged into.
- To select a provider from another department, log into that department. If you don't select a provider, the system will choose one based on the patient's previous appointment and claims.
- Date of Service — (Today's date defaults) Select a Date of Service.
- Most payers will accept a prior or future date, but payer rules vary. Some payers may not return benefit details for dates before the current year or in the future.
- Service Type — Select a Service Type Code (STC) from the list. The most recently used STCs appear above the line in the menu.
STCs are industry standard codes that payers and clearinghouses use to specify what eligibility is being requested.
- Provider — (optional) - Select a Provider.
-
Click Check Eligibility.
-
If the STC requested does not match the STC returned:
- A message appears: "Payer Returned Different Benefits", with details of the STC(s) requested and the STC(s) returned.
-
Click View Benefits to see the returned benefits
or
-
Click Perform New Check to run a new custom check
- The Payer-Provided Eligibility Details page appears, displaying the Service Types tab with the payer's response for the STC(s) you requested.
Important: When you manually check eligibility, wait 20 seconds for a response from the payer (or an error message) before you attempt to check eligibility again.
You can update a patient's chronic care management status on the Quickview, Check-in, or Checkout page. You must manually update a patient's chronic care management status; athenaOne does not automatically determine this status.
- On the Quickview and Check-in pages, the Chronic Care Management field appears under Insurances.
- On the Checkout page, the Chronic Care Management field appears on the Patient tab under Miscellaneous.
Note: The Chronic Care Management field appears only if the patient has Medicare Part B or Medicare Advantage (Medicare Part B requires that patient consent be documented in the EHR). However, payers other than Medicare pay for CCM services.
To update the Chronic Care Management field:
- On the Quickview or Check-in page, click Update status/view history to the right of the Chronic Care Management field (this field is in the Insurances section, under Eligibility).
On the Checkout page, click the enrollment status under the Chronic Care Management field.
The Chronic Care Management History page appears. This page allows you to modify a patient's CCM status and displays an audit history of all changes made to this field. - Click the Enrollment status menu and select a status: Not Enrolled, Enrolled, Enrolled Elsewhere, Declined, Unenrolled, or Ineligible.
- If you select Enrolled from the menu, the Effective date and Expiration date fields appear. We recommend that you enter the effective and expiration dates, but these dates are not required.
- Effective date — Enter the effective date for CCM enrollment (or click the calendar icon to select the date).
- Expiration date — Enter the expiration date for CCM enrollment (or click the calendar icon to select the date).
- Click Change Status.
The new status appears in the Enrollment status field, and the audit history is updated. - Click back to return to the Quickview, Check-in, or Checkout page.
This table describes the enrollment statuses available on the Chronic Care Management History page.
| Status | Description |
| Not Enrolled | Patient has never enrolled for chronic care management services. |
| Enrolled |
Patient agreed to receive chronic care management services and provided written consent to the practice. Per CMS guidelines,
|
| Enrolled Elsewhere | Patient informed the practice that he or she is enrolled for CCM services with a provider outside this practice. |
| Declined | Patient declined enrollment for CCM services. |
| Unenrolled |
Patient elected to stop CCM services. Per CMS, the enrollment consent is valid through the end of the calendar month in which the patient unenrolls. Note: When a patient's Medicare insurance is cancelled or changed, the CCM enrollment status is automatically updated to Unenrolled. If the patient's Medicare insurance is subsequently reactivated, you must update the CCM enrollment status if the patient continues to receive CCM services. |
| Ineligible | Patient is part of another CMS/payer initiative that precludes separate reimbursement for chronic care management services. |
The Patient Actions Bar is available at the top of the Quickview page and other patient-specific pages.

You can click the options on the Patient Actions Bar to display a list of patient functions, allowing you quick access to the pages of a single patient account. The list of options available from the Patient Actions Bar depends on your user access level and your practice's service level.
As long as a patient ID appears in the Find patient field, you can click the search icon to return to the patient's Quickview page. The patient ID remains in the Find patient field until you switch to a new patient.
When you update the name, address, SSN, DOB, or legal sex on the Patient Registration, Quickview, or Check-in page, the new information must be reconciled with information on the Update Policy Details page.
Address, SSN, DOB, and Legal sex fields
If you update the Address, ZIP code, City, State, SSN, DOB, or Legal sex field on the Patient Registration, Quickview, or Check-in page, athenaOne automatically updates all insurance policies (where the Patient's relationship to policy holder is Self on the Update Policy Details page) with the new information.
Name fields for the guarantor (policy holder)
Some payers require that the name of the policy holder on a claim exactly match the name in the payer's system. Therefore, if you make a change to the patient's name on the Patient Registration, Quickview, or Check-in page (Legal last name, Legal first name, or Middle name, suffix), a warning message may appear:
"There are insurance policies for this patient that may need to be updated. Click "update this policy" from the patient Quickview page to make changes."
If this warning message appears, click OK, then make sure that the information in the insurance policy is correct and make changes if necessary.
The medical group pay-to address is displayed at the bottom of the Quickview.

In addition to the pay-to address, this line displays your username and the date and time that the patient record was accessed.
To manage pay-to addresses for your practice and to view their affiliated medical groups, see the Pay-To Address Admin page.
You can add a note to an appointment as follows:
- When you schedule the appointment — On the Schedule Appointment page, enter a text note in the Notes/Reason field. The note appears on appointment schedules, on the Quickview page, and when you edit the appointment.
- After you schedule an appointment — On the Quickview page, under the Appointments heading, click the Add note link for the appointment.
- At check-in time — On the Check-in page, add any notes for this appointment in the Notes/Reason field.
A patient's Medicare suffix can change from time to time due to a change in circumstances. For example, when a patient who was previously covered under a spouse's policy reaches age 65 and receives his/her own policy, the patient's suffix changes as well. This change can happen without the patient's knowledge. If this occurs, an old Medicare member ID image may still be on file with your practice.
When an eligibility request is sent to Medicare, the response shows the most recent member ID that Medicare has on file for the patient. If the old member ID is sent in the eligibility transaction, an "Unverified" eligibility status is returned.
To address this issue, athenaOne will resend these unverified responses with the new member ID and fetch an eligible response from the payer; athenaOne then update the patient's policy with the updated member ID automatically. The updated member ID is the one that should be used to bill the claim.
Note: There is a short time lapse in which an unverified response will be seen before the new eligibility check is automatically sent.
Authorizations and referrals are attached to specific patient insurance policies; multiple authorizations and referrals can be added to a policy. Authorizations and referrals are identified using an authorization or referral number. athenaOne handles authorizations and referrals in the same way. (The authorization or referral number appears in CMS-1500 block 23.)
You can add, update, and delete authorizations on the Quickview and Check-in pages (see the Insurance Authorization page for instructions).
Note: As a best practice, add a new incoming authorization when you schedule the patient's appointment.
After you create an authorization, the authorization appears on the Quickview and Check-in pages (under the Insurances heading). Only active authorizations with a present or future effective date appear on the Quickview and Check-in pages. To see expired and deleted authorizations for a patient, click View all in the Authorization section (under the Insurances heading) on the Quickview or Check-in page.

The Authorization/Referrals page appears. This page displays all authorizations, including deleted and expired authorizations, for the patient.
Exception: If your organization subscribes to the athenaOne® Authorization Management service, cancelled and expired authorizations also appear in the Authorization list on the Quickview and Check-in pages. You can click Update next to the authorization to display the authorization task in the patient chart.
You can select an authorization from the Authorization menu that appears on the Schedule Appointment, Check-in, and Claim Edit pages, and you can also add a new authorization on those pages.
Note: Authorization Management now shows authorizations with a Not Required status on the Quickview.
On Quickview and Check-In, you can now send digital forms to patients on-demand through an easy and time-saving new workflow. You can send these requests via email or SMS text message.
You can send any privacy and consent forms in the Notices on file section for patient digital signature.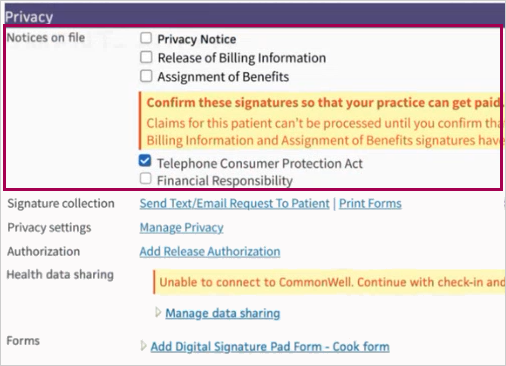
Once the patient signs and submits the forms, the corresponding boxes under Notices on File are automatically checked in the following areas:
-
Quickview
-
Check-In
-
Full Registration
You can print blank forms from the Privacy section of Quickview and Check-in to provide to patients for signing in-person.
Important
To prevent a patient's claim from being put on hold, athenaOne needs both Release of Billing Information and Assignment of Benefits checkboxes to be checked. If you only associate the form to one checkbox and not the other, the claim will be put on hold. You must associate the form to both checkboxes, for more information see To prevent patient claims from being put on hold.
In the Privacy section of Quickview and Check-In, we added headers to better organize the links for:
-
Signature collection — Send Text/Email Request To Patient | Print Forms
-
Privacy settings — Manage Privacy
-
Authorization — Add Release Authorization
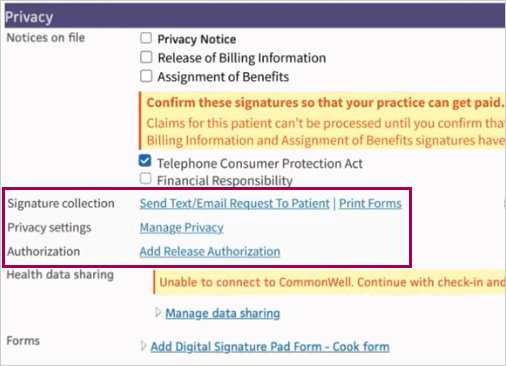
Note
The Manage Privacy and Add Release Authorization links were already in place. We have added headers to distinguish them from the new Send Text/Email Request To Patient and Print Forms links for better clarity.
You can now click
-
Send Text/Email Request To Patient to start the workflow for sending patients digital forms to sign
-
Print Forms to print a form
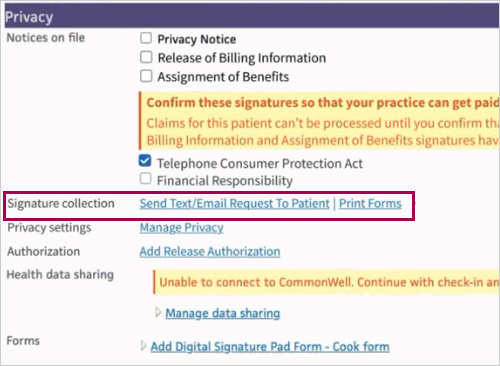
Note
The Send Text/Email Request To Patient button appears when at least one form under Notices on file is not checked or if either the Release of Billing Information or Assignment of Benefits forms have expired.
To digitally send form signature requests to patients, you must create forms with “Acknowledgements & Consents” form elements and “Consent” document subclass using the Digital Patient Form section in Enhanced Self Check-in page.
The body paragraph should not include any of these appointment-specific Dynamic Variables:
- Provider NPI
- Provider TIN
-
Department-address
-
Department-city
-
Department-fax
-
Department-name
-
Department-phone
-
Department-state
-
Department-todays date
-
Department-zip
-
Medical Group Name
-
Medical Group TIN
-
Date of Service
-
Primary Insurance Name (Appointment)
-
Primary Insurance ID / Member ID (Appointment)
-
Primary Insurance Group Number (Appointment)
Currently, we do not support sending on-demand request for Digital Patient Forms with appointment-specific Dynamic Variables.
For more information, see the Digital Patient Forms section of the User Guide — Enhanced Self Check-In topic. If you have set up forms previously using Digital Patient Forms, no further action is needed.
Important
To prevent a patient's claim from being put on hold, athenaOne needs both Release of Billing Information and Assignment of Benefits checkboxes to be checked. If you only associate the form to one checkbox and not the other, the claim will be put on hold. You must associate the form to both checkboxes.
You must set up forms to collect signatures for Release of Billing Information and Assignment of Benefits. You must ensure this association is done in Digital Patient Forms:
-
Select Acknowledgements & Consents under Add Form Elements.
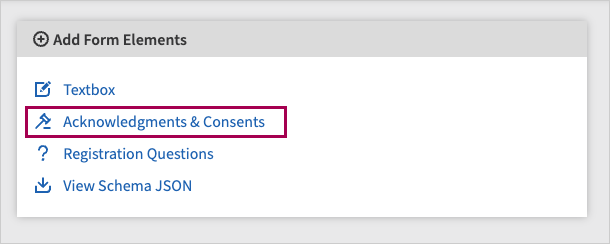
-
Associate the forms with the appropriate acknowledgement checkboxes in Quickview.
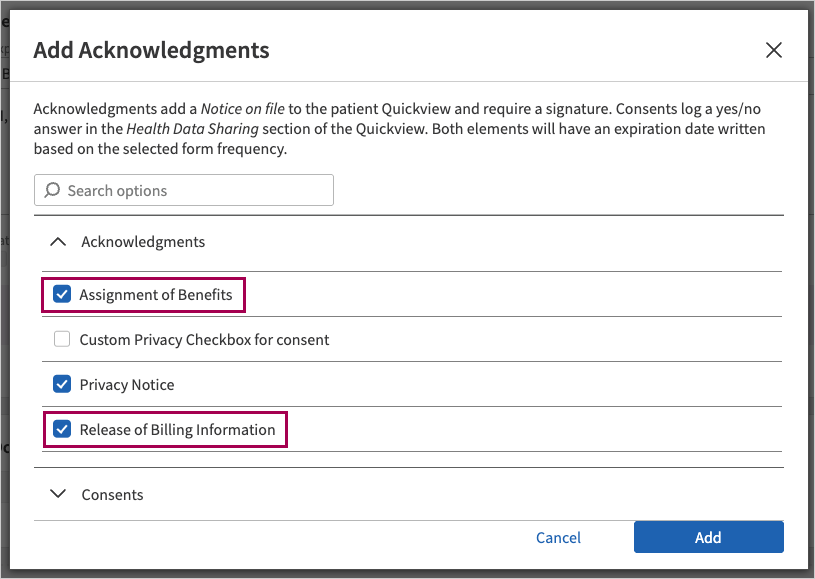
Important
If you send the patient the digital request while you're checking in the patient in athenaOne, you should inform the patient that they can sign the form on their own time and when you're done with Check-in. If the patient signs the form while you're still in the Check-in stage (meaning before you click Done with Check-in), athenaOne can't record the patient's responses and check the checkboxes.
From Quickview or Check-In:
-
Click Send Text/Email Request To Patient. The Send forms window appears.
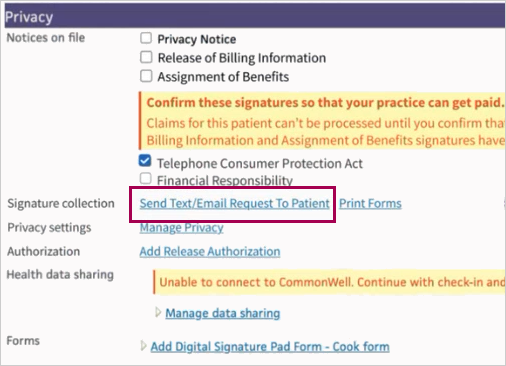
-
Choose delivery method, either Mobile phone number or Email address. These fields are pre-filled with the patient's mobile and/or email on the patient record. You can send the signature request to a different mobile number or email address..
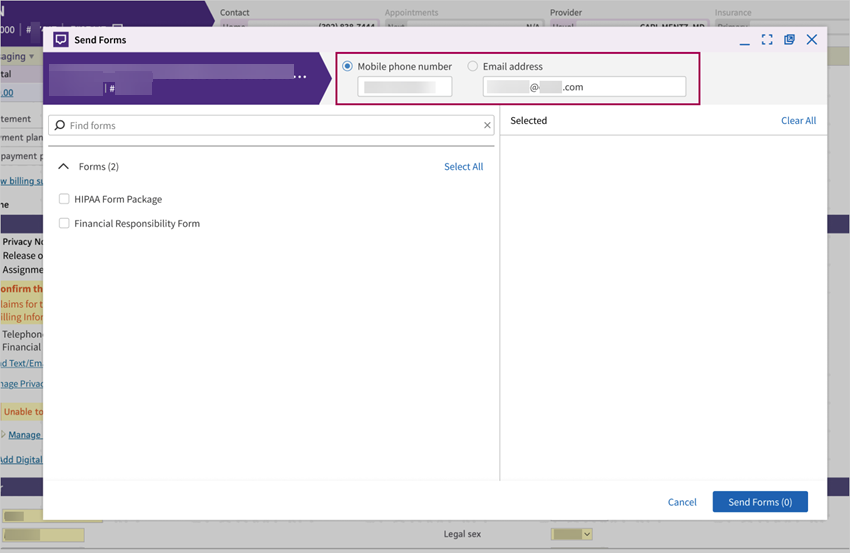
Note
The purple banner shows the patient's information. - Select the forms to send to the patient. You can select one form or multi-select to send multiple forms at once.
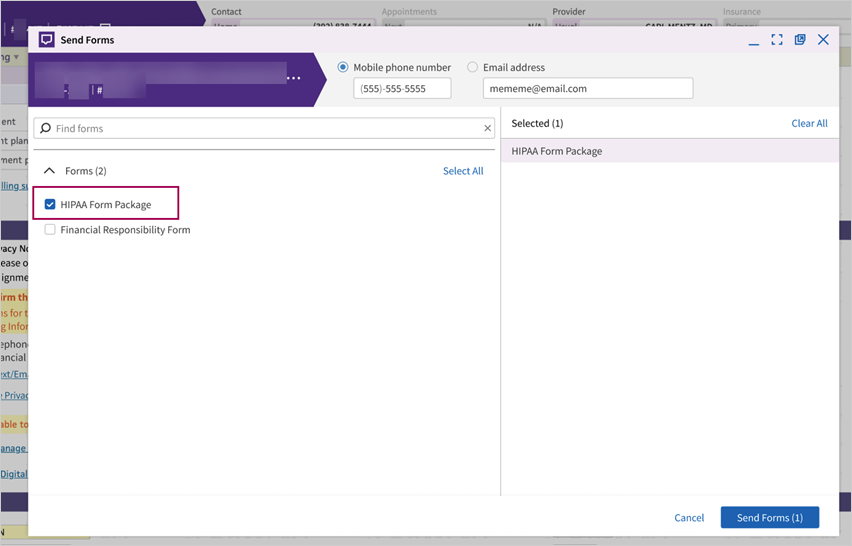
Note
The listed checkboxes in the Privacy (Notices on file) section may not exactly match the names of the forms in this window due to your practice configurations.
The Send Forms window appears on top of athenaOne but can be repositioned anywhere on your screen. For instance, you might move it to one side so you can view the Privacy > Notices on file section, helping you recall which forms must be sent to the patient.
-
Click Send Forms. A success message appears indicating that the request was sent successfully.
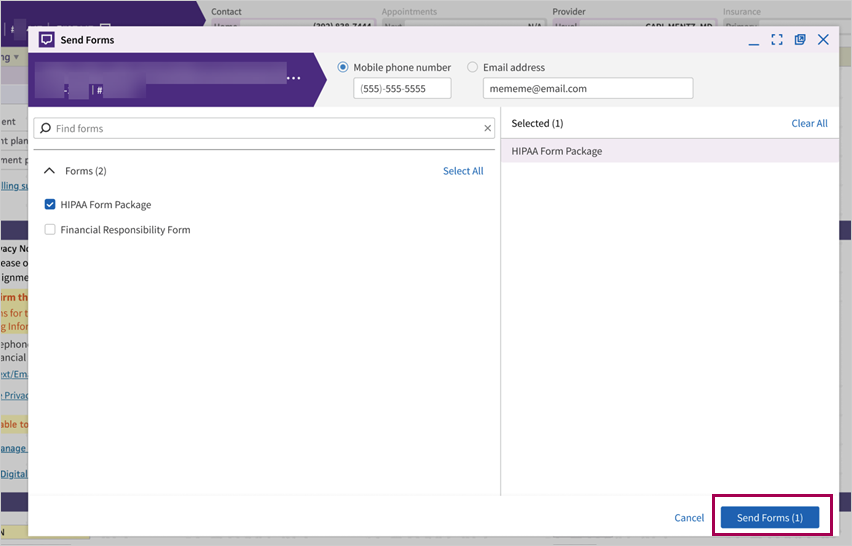
Patient will receive an email or text message that requests their signatures on the forms that were sent. The link included in the message expires in 7 days.
Once the patient signs and submits the form, athenaOne automatically checks the relevant boxes under Privacy (Notices on file) on these pages:
-
Quickview
-
Check-In
-
Full Registration
athenaOne will also upload the signed form documents to the patient chart.

When signed, per your practice’s settings on the Digital Patient Forms page, athenaOne automatically records the:
-
Effective and expiration dates of the Release of Billing Information and Assignment of Benefits forms
-
The Privacy Notice signing date.
These appear on the Manage Privacy page in the Notice of Privacy Practices and Signatures on file section.
-
You must have athenaOne for ambulatory products to use the new functionality to send digital forms to the patient. You must have all three of these products:
-
athenaClinicals
-
athenaCollector
-
athenaCommunicator
-
-
You must use Digital Patient Forms and create forms with “Acknowledgements & Consents” form elements and “Consent” document subclass. (The body paragraph should not include appointment-specific Dynamic Variables.)
Note
-
If you have set up forms previously with these criteria using Digital Patient Forms, no further action is needed.
-
You don't need to have all three athenaOne products to use the Print forms button.
For more information, see the Digital Patient Forms section of the User Guide — Enhanced Self Check-In topic.
Important
To prevent a patient's claim from being put on hold, athenaOne needs both Release of Billing Information and Assignment of Benefits checkboxes to be checked. If you only associate the form to one checkbox and not the other, the claim will be put on hold. You must associate the form to both checkboxes, for more information see To prevent patient claims from being put on hold.
You will see the Send Text/Email Request To Patient button, but once the app is opened, a notification will prompt you to set up forms using Digital Patient Forms to use this feature. We recommend proactively transitioning to Digital Patient Forms to ensure your staff can complete sending forms to patients without any interruptions.
The Send Text/Email Request To Patient button appears and is still accessible in this scenario. You have an opportunity to provide a new number or email address to send the request to in the Send Forms window.
You also can choose between one of the two methods (email or text), if one method cannot be used due to the status of the patient number or email.
Note
The new mobile phone number or email address you enter in the Send Forms window is not automatically saved to the patient record. It is treated as a one-time use.
Best Practice
We recommend that you check the validity of the patient's mobile phone and email address in the Contact List section of Quickview or Check-In before sending the request. If the patient has both an invalid mobile phone and an undeliverable email, you should hold off on sending the request until you can get updated information from the patient.
Please check your login department to ensure you're logged into a department with athenaClinicals enabled.
In this version of the feature, we do not yet provide information on whether a previous request was sent to the patient or when it was sent, nor details on the patient’s interactions with the request (such as whether they clicked the text). These capabilities are being considered for enhancement in the future.
This version of the feature does not include reporting capabilities, such as tracking how many times a patient has received a request or identifying which practice users sent them. We will continue to evaluate this need for future enhancements.
Display Check-in:
On the Non-Clinician home page, click a patient name in the schedule. On the Appointment page, click Start Check-in
Display Quickview:
In the patient chart, click the Menu icon and select Quickview
Display Full Registration:
On the Patient Actions Bar, click Registration > Click Full Registration
Display Digital Patient Form builder:
To access the Digital Patient Form builder, you must go to the Self Check-in Settings page: On the Main Menu, click the Settings icon > Under ADMIN, click Communicator > In the Task Bar, under PRACTICE LINKS — Patient Self Check-in, click Self Check-in Settings > Click Manage Digital Patient Forms.
You can set Tribal Affiliation on Quickview and Check-in.
You can find this new Tribal Affiliation field in the improved Demographic Characteristics section.
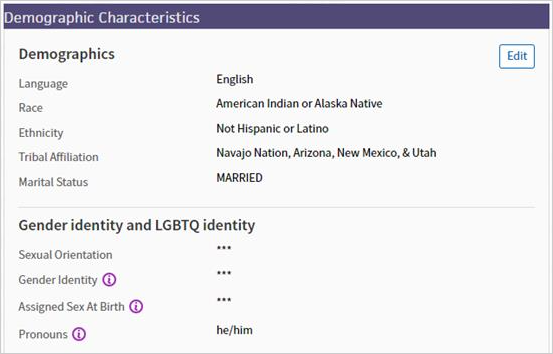
Note: The Patient Registration page does not support the Tribal Affiliation field. Go to Quickview or Check-in to manage the Tribal Affiliation field.
We made this update because of the Office of National Coordinator for Health Information Technology's (ONC) latest rules (HTI-1). As part of certification requirements listed in these rules, certified EHR developers need to build, certify, and deploy support for United States Core Data for Interoperability (USCDI) version 3 and US Core v6.1.0 by end of 2025.
USCDI V3 and US Core v6.1.0 includes support for Tribal Affiliation:
"The Tribal Affiliation data element provides the patient’ association by name with federally recognized Indian tribes or with federally recognized Alaska native villages/tribes within the state of Alaska."
Note:
-
This means that athenahealth is required to provide a means of capturing this information, NOT that you are required to capture the information.
-
This field is optional by default.
-
You can request to set Tribal Affiliation as a required field in your Required Fields settings. Contact your CSM for more information.
Demographics section has been retitled to Demographic Characteristics. The section is divided into Demographics and Gender Identity and LGBTQ identity sub-sections.
-
There are no changes to existing fields in Demographics section (Language, Race, Ethnicity, Marital Status, Sexual Orientation, Gender Identity, Assigned Sex at Birth, Pronouns). Staff can continue to view and update these fields with the same set of values as before.
-
On view mode, recorded Sexual Orientation and Gender Identity (SOGI) values (except Pronouns) continue to be redacted.
-
This section will respect the practice's Required Fields setting as it has been.
-
Language options in athenaOne reflect the complete list of values and codes defined in ISO 639-2
-
Options for Gender Identity include:
-
Non-binary gender identity
-
Unknown
-
You can enter one or more Tribal Affiliation options. Available actions include:
-
Typing text to search for an option.
-
Setting the field as Patient Declined.
-
Picking from the top 10 options in alphabetical order when you open the list.
Note: athenaOne displays these top 10 results gradually as your practice chooses Tribal Affiliation options. This helps you quickly find the options your practice uses most often, instead of typing to search.
-
Have athenaOne automatically include Tribal Affiliation information as default data for common patient index (CPI) syncs. There is no action required.
With this update, we're ensuring you can set Tribal Affiliation as a globally supported patient demographics data in the QuickView and Check-in pages and improving how information is presented in the overall Demographics section (this includes an Edit button that helps prevent accidental updates to this information).
You can edit any of the fields as needed:
-
If the Demographic Characteristics section is empty and some or all of these fields are set as required fields, you see the section appear editable when Quickview or Check-in appears.
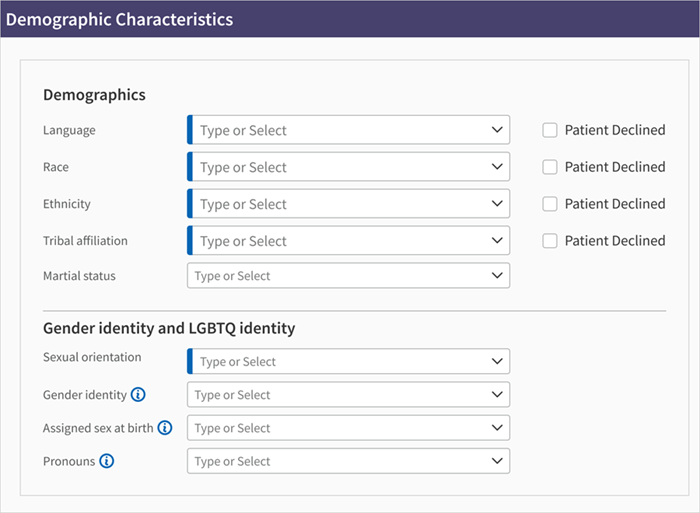
-
If the Edit button appears, click it to update any existing content, or fill in empty fields, in the new Demographic Characteristics section.

For example:
- You're completing all fields in the Demographics sub-section.
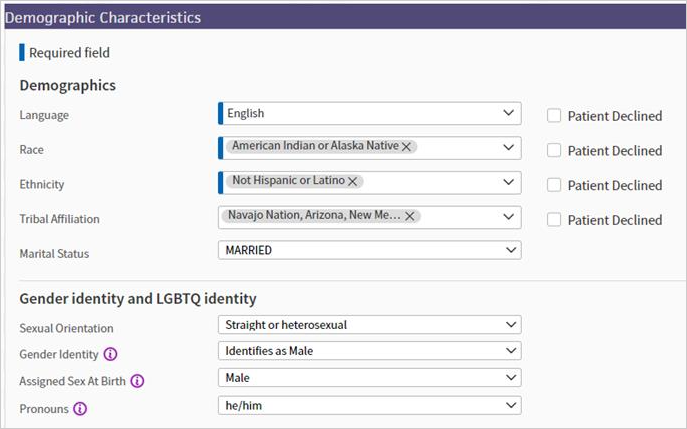
- You're indicating that the patient declined all fields in the Demographics sub-section.
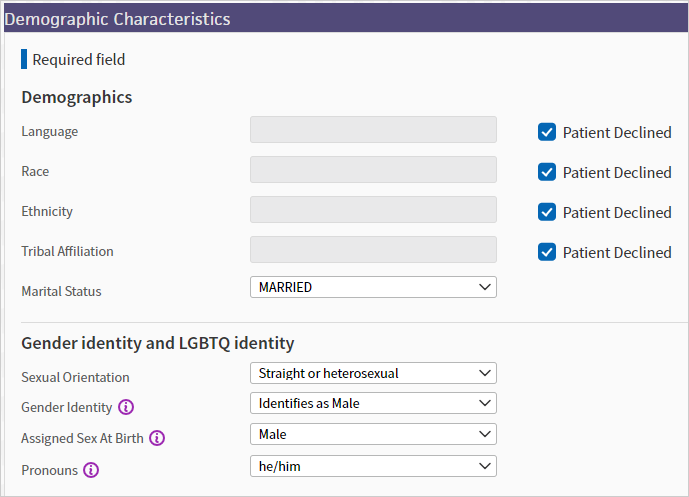
| Scenario | Edit button behavior |
|---|---|
| The fields are empty and none are set as required. | The Demographic Characteristics section defaults as read-only when you go to Quickview or Check-In. You can click the Edit button to open up edit mode if you want to start filling in values. |
| Some or all of the required fields have missing values. | The Demographic Characteristics section appears directly editable when you go to Quickview or Check-In. This means that you do not have to click the Edit button to start filling in the fields. |
| Required fields have been filled out and you want to update existing information or fill in non-required empty fields. |
The Demographic Characteristics section appears with the Edit button. |
| Sexual Orientation, Gender Identity and Assigned Sex At Birth values are redacted. | To view this information, click the Edit button. |
The list of Tribal values comes from HL7 TribalEntityUS ValueSet as specified by USCDI V3 specification.
No, you can leave it blank or check the Patient Declined box because this field is optional by default.
Your practice can request to set Tribal Affiliation as a required field in your Required Fields settings. Contact your CSM for more information.
You can use Report Builder to report on Tribal Affiliation information.
For more information on Report Builder, see Report Builder in O-help.
For more information see the API release note in the developer portal:
25.7 Release: Updates to FHIR R4 Patient API as required by HTI-1
For more information see the API release note in the developer portal:
athenaOne automatically releases bad address statement holds after it detects an address change. This occurs regardless of where the update was made (for example, Patient Portal by patient, athenaOne by a practice user, or API by a Marketplace Partner).
For practices that have the Guarantor feature on Quickview and Check-in (and the Family Billing setting not enabled), practice staff see a new notification in the Contact List section to prompt correction of the invalid or undeliverable guarantor address causing statement hold.
-
athenaOne removes bad address holds once a valid address is entered to replace the bad address.
-
For practices that do not have the Family Billing setting enabled, staff will see a new notification in the Contact List on Quickview and Check-in that informs the patient has a bad address statement hold, which prompts collection of a new address.
When the guarantor address is not valid or the guarantor has no forwarding address due to no longer residing at the address on file, we are unable to deliver patient statements. This can prevent collection on outstanding balances. In this situation, the patient record is put on Bad Address Statement Hold, halting all future statements to be sent.
Currently, to remove such hold, practice staff has to manually reset the Hold Statement reason in athenaOne on Quickview, Check-In, or Patient Registration. This causes additional work and delays both resuming of statements getting sent to the patient and payment collection.
We're making enhancements to address these challenges:
-
You can save time by no longer having to manually remove Bad Address Holds on patient statements after making an address update. athenaOne will automatically release the hold after an address change is detected, regardless of where the update was made (for example, by a patient via Portal Portal, by a practice user via athenaOne, or by a Marketplace Partner via API).
-
For practices that have Guarantor feature on Quickview and Check-in (Family Billing setting not enabled), staff will also see a new notification under guarantor address in the Contact List section to prompt correction of the invalid and undeliverable guarantor address causing statement hold.

Note:
-
The automatic hold removal applies to all address update workflows (like Patient Portal or API), not just address updates in athenaOne. The automatic hold removal applies to all clients, including customers with Family Billing enabled.
-
If the patient has multiple patient copies due to Common Patient Index (CPI) synchronization, the automatic hold removal will only release the hold on the copy being edited
-
For practices with Family Billing and multiple patients share the same guarantor, the bad address hold is only released on the patient record whose guarantor's address has been updated.
When the statement hold reason is because of a bad address:
-
Bad Address Holds appear in the Contact List.

Note: A new notification appears in the Contact List on Quickview and Check-in that informs you statements couldn't be mailed to the address on file. You're instructed to update the address, which you can complete via your usual workflow. This hold will automatically remove once the address is updated.
-
The Hold Statements? field will no longer appear in the Outstanding Balances section of Quickview and Check-in.
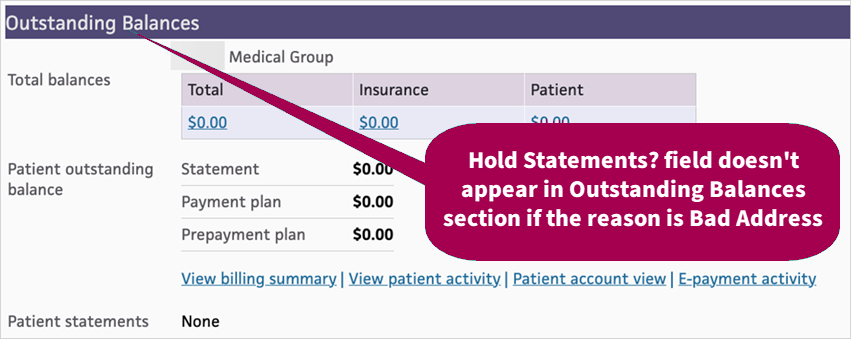
Important: The Hold statements? field is only replaced by the new notification in the Contact List when the statement hold reason is due to Bad Address - No Forwarding Address or Bad Address - Invalid Address. For other statement hold reasons, you will continue seeing the Hold statements? field and any warnings related to that reason as you previously did.
If you need to change a Bad Address hold reason to another reason (for example, Bankruptcy), you can do so on Patient Registration.
We also moved the Copy button to the Hold statements? field in the Billing section of Patient Registration so you can easily copy the reason. This Copy button was previously available in the Hold statements? field in Quickview and Check-in.
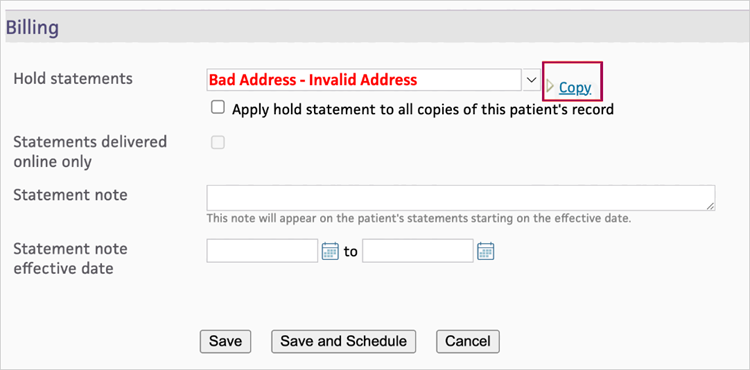
-
Bad address statement hold is automatically removed when an address has been updated. You no longer need to manually release the hold in athenaOne. The automatic hold removal applies to all address update workflows (like Patient Portal or API), not just address updates in athenaOne.
-
You will not get any new notifications in Quickview and Check-in. You will continue to see Bad address statement hold notification under the Hold statement? field in Outstanding Balances section of Quickview and Check-in. The Copy button continues to remain next to the Hold statement? field.
-
If you need to change the hold reason (for example, to Bankruptcy), you can do so in Hold statements? field in Quickview and Check-in or in Full Registration.
You can now create contacts in the Contact List that only have either a mobile, home, or work phone number. This means that email is no longer a requirement to create a contact.
Contacts that you create in the Contact List can now be a combination of:
-
Only phone number(s) (mobile, home and/or work)
-
One or all phone number types and an email address
Note: In this feature, you can set the patient whose record is being edited as a contact in the Contact List without an email address. However, if the new contact you want to add is another patient at the practice, you will need to provide an email and phone number.
-
Phone-only contacts cannot register for the athena Patient Portal because there is no email to use.
Tip: You can add an email to a phone-only contact later and proceed with Patient Portal registration.
-
For contact people whose email was already added, you will not be able to remove the email address.
As a front desk staff member, follow the below steps if you need to add a phone-only contact:
Click the Add Contact With/Without Portal Access button as you normally do. Since you are no longer required to enter an email, you can create a Not the Patient contact with only a phone number by checking the No email box and entering a phone number.
Note: Mobile phone will be defaulted but you can change to a different phone type such as home or work.
If the contact you want to add can provide an email, there is no change to existing workflow. You can input their email and phone number and proceed with next step.
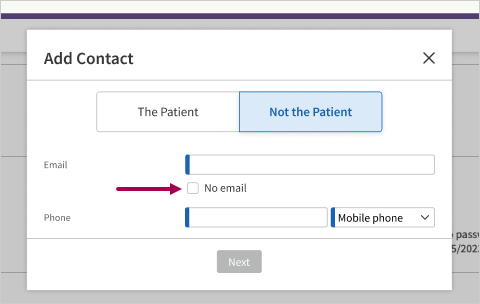
When adding a new contact with only a phone number, if a phone number match is identified, you can view a list of existing contacts with matching phone numbers to choose from.

| Action | Description |
|---|---|
|
Add Contact |
Existing contact in the database. Click Add Contact to add them as a contact. |
|
Edit Contact Details |
Contact already included in patient's Contact List. Click Edit Contact Details to avoid a duplicate contact. |
|
Edit Contact Details on Quickview |
Patient at the practice (with associated Patient ID) already added to patient's Contact List. Click Edit Contact Details on Quickview to avoid a duplicate contact. |
If none of the matching contacts are the person you intend to add to the Contact List, click Add a New Contact with Phone [phone number] in the top right corner of the Contact List to create a net new contact.
Once the contact person with only a phone number has been created, they are successfully listed in the Contact List. You can view a mix of contacts with and without email.

For any contacts who were initially created without an email, you can edit their contact card and add an email later.
-
Uncheck the No email box.
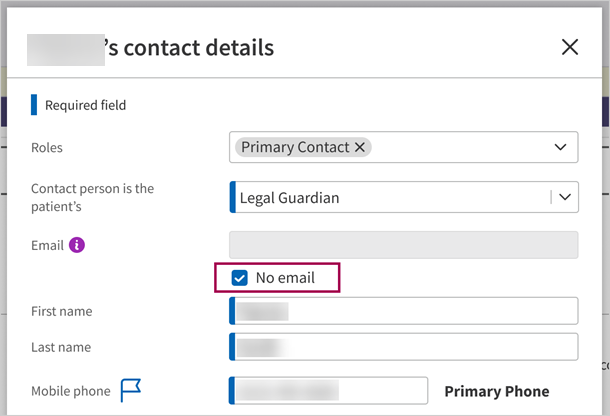
-
Enter the email.
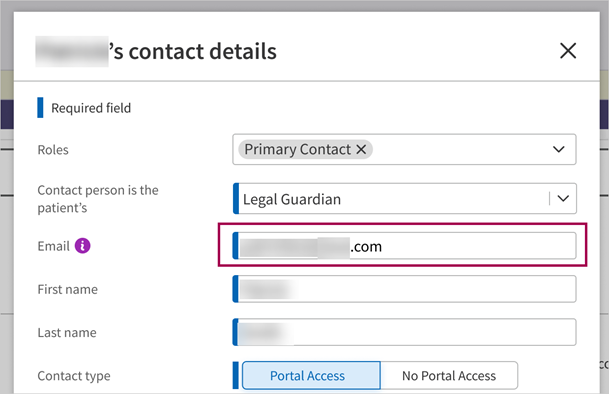
-
Proceed with Portal registration and/or click Save.
Important: For contacts whose email has been added, in this iteration of the feature, you will not be able to remove their email.
Chart alerts help you communicate important information about specific patients internally across several patient-focused workflows in athenaOne.
If a patient is registered in a department that has athenaClinicals enabled, you can add a text alert to the patient's chart to alert staff about special precautions that they should take when scheduling, rooming, and caring for specific patients. Examples include patients who are immuno-compromised, have physical or mental impairments, or who may need other special accommodations.
When there is no alert to display for a patient, a faint alert icon with an exclamation point appears next to the patient's name in the patient banner.
To add and edit chart alerts, you need the Chart Alert: Edit permission. This permission is included in the Superuser, Clinicals, and Receptionist roles by default.
- On the Quickview, click the alert icon
 in the patient banner at the top of the page.
The alert text box appears. - Enter the text of the alert in the text box and click Save.
The alert icon next to the patient's name is now yellow ( ).
). - To edit the alert:
- Click the alert icon and then click Edit.
Note: Click Audit history to display all changes to the alert. - Edit the alert text and then click Save.
- To delete the alert:
- Click the alert icon and then click Edit.
- Delete all text in the alert text box and then click Save.
The alert icon turns purple again ( ).
).
A warning message appears if you add or update information on a patient's Quickview page such that the new or updated page too closely resembles another patient in your practice. For example, if you add a Social Security number for a patient that exactly matches the Social Security number in another patient record, you receive a warning message.
The warning includes a link to the similar patient (or patients) so that you can ensure that you are updating the correct patient record. If the two patient records are duplicates, you can delete one record or merge the records (see the Merge/Delete Patient page).
Note: Duplicate patient warnings also appear on the full Patient Registration page.
Patient validation messages alert you to potential billing or workflow issues. Validation messages appear on these pages: Quickview, Check-in, Update Policy Details, Appointment, and Schedule Appointment. By addressing these issues, you reduce work for your billing staff and increase the probability of successful claim adjudication. These issues include:
- Demographic mismatches
- Missing patient demographic data
- Missing insurance card images
- Insurance package review issues
- Coordination of benefits issues
Note: Primary insurance is checked on the Quickview, Check-in, Update Policy Details, Appointment, and Schedule Appointment pages. Secondary insurance is checked only on the Update Policy Details page.
These validation checks are based on rules from the athenahealth billing rules engine and the patient rules engine. If a patient validation rule is triggered, a message indicating the potential issue appears on one or more of these pages.
- A red warning message alerts you to issues that will cause the patient's claim to go into HOLD or MGRHOLD.
- A purple informational message indicates issues that you should be aware of but that may not hold the claim.
To ignore a warning message, click Dismiss in the warning message. To reduce the likelihood of claims being sent to your HOLD and MGRHOLD queues, correct these issues before claim creation.
The Patient Validation Rules report provides visibility into staff behavior and creates training opportunities for your practice. This report, which you can find on the Front Office Operations tab of the Report Library, displays the following information:
- For each user and each rule, the number of times that the user dismissed the rule at check-in.
- Number of claims created in HOLD with that rule.
If you have a Topaz digital signature pad, your patients can sign privacy forms electronically at your practice.
Note: This feature is available for the Chrome and Microsoft Edge browsers only.
Before you can use this feature, you must install the latest version of the athenaOne Device Manager (ADM) and the Topaz software for your signature pad device model from the Topaz website. For instructions on how to install ADM and how to add a device to ADM, see Device Management.
You can access the forms to be signed and submitted from the patient's Quickview or at check-in time. After you submit a form, athenaOne saves it to the patient's account and updates the corresponding privacy form checkboxes.
You must use the interactive form capabilities of Adobe Acrobat Pro to create a privacy form PDF file that is enabled for digital signature using a Topaz device.
Note: This feature is available for the Chrome and Microsoft Edge browsers only.
To learn more about how to create an interactive form or to add certain types of fields, please visit http://www.adobe.com/support/.
Note: Instructions may vary depending on your version of Adobe Acrobat Pro. If you need assistance creating a .pdf file, please contact the CSC from athenaOne > Support > Success Community > Contact Client Support Center.
- Open the PDF file in Acrobat Pro and click Tools.
- In the Forms menu, click Edit.
- Under Other Options click Prepare a form.
-
In choose an option to create a form > Auto detect form field ON > click Change.
-
Uncheck the Automatically detect Form fields box and > click OK.
-
Click Create Form.
-
Under Add Form Components > click Text Field.
- Add new text fields throughout the document. You can use magic words in the file by naming the text fields with the name of the magic words, such as PATIENTFIRSTNAME, PATIENTLASTNAME, or TIMESTAMP.
Note: Magic words retrieve data from athenaOne that may already be available, such as last name. Enter magic words in the PDF file in all capital letters, with no brackets or braces, for example, PATIENTLASTNAME. - In the PDF file, create a text field named ESIGNATUREFORM. You can place this field anywhere in the form. This magic word allows the signed form to be saved in the correct location. After you name the field:
- Click Properties.
- On the General tab, under Common Properties, change the Form Field value to Hidden but printable. Click Close.
Under Add Content > click E-signature field. Place this field where you want patients to sign the form. Use more than one digital signature field, if necessary.
- Click Properties.
- Close the form editing menu and save the PDF file.
Note: This feature is available for the Chrome and Microsoft Edge browsers only.
- Display the Forms and Documents page: On the Main Menu, click Settings
 >Billing. In the left menu, under Practice Links — Billing Slips and Forms, click Forms
and Documents.
 - Name — Enter a unique, descriptive name for the PDF form. This name appears in the Patient Privacy section of the patient's Quickview or the Check-in stage of a patient encounter.
- Departments — Select the departments or provider groups (if applicable) that will use the form.
- Effective date — Enter or select the effective date for the form.
- Expiration date — Enter or select the expiration date for the form.
- Ordering — Enter a digit to order this form in the list of forms.
- Note — Enter any relevant notes.
- View on Patient Portal — Do not select this option. Signature Pad .pdf forms are intended for office use only.
- Type of form/document — Select the Signature Pad PDF option.
- Signature Pad PDF Applies to — Select the privacy notices to which this form applies.
Note: If you created checkboxes for non-standard privacy consent forms on the Custom Fields page, select the custom option, along with any other option. The custom checkboxes appear in the Privacy section of the Patient Registration, Quickview, and Check-in pages. For more information, see "To create checkboxes for custom privacy forms" on the Custom Fields page. - Form/document pdf — Enter the file path and name of the file that you want to upload, or click Choose File to locate the PDF file on your system.
- Mark form/document as final? — Review the form carefully. Select this option when you consider the form final.
Note: After you mark the form as final, you cannot make any changes to the form or its attributes. - Click Save.
Note: Signature pad .pdf forms are accessible via the patient's Quickview or the Check-in stage.
These instructions apply only to practices that use a Topaz signature pad device with the Chrome or Microsoft Edge browser.
- Display the patient Quickview or the Check-in stage of an encounter.
- Scroll down to the Privacy section and click the link for the form in the Forms field. (The link shows the name that you entered in the Name field on the Forms and Documents page when you created the form.)
The document opens in the same window.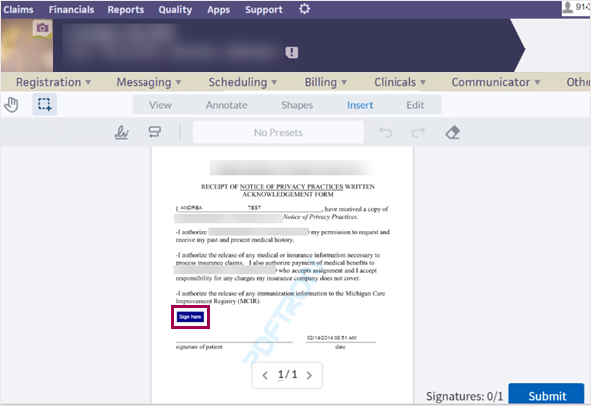
- Click Sign Here in the document.
The Draw (External Device) window opens.
- Ask the patient to sign her name with the signature device.
- Click Retrieve Signature in the Draw (External Device) window.
The signature appears in the window.
Note: If the signature device is not working, you can click Use computer in the Draw (External Device) window to retrieve the signature. The patient must use your computer mouse to sign. - Click Create.
The signature appears in the document.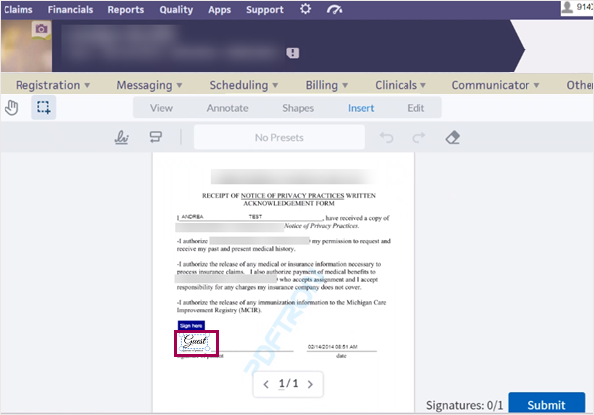
- Click Submit.
The signed PDF document appears in the Privacy section of the Quickview or Check-in page. When you select the document, it opens in a new tab with Adobe Acrobat Reader.
Important: You may see the Submit to athenaOne button on the form from the legacy signature pad feature. If you see this button, do not click it because it will cause an error.
After you learn that a patient is deceased, you should cancel all future appointments in one action.
Appointment cancellation reasons are specific to your practice. You can add cancellation reasons using the Appointment Cancellation Reasons page.
Note: Marking a patient as deceased or inactive does not prevent statements from going out. To prevent a statement from going out to a patient, the statement must be held.
- Display the Patient Registration page: On the Patient Actions Bar, click Registration, and then click Full Registration.
- Deceased date — Enter the date of death, or click the calendar icon and select the date.
- Click Save.
If future appointments are scheduled for this patient, the Cancel Existing Appointments window appears. By default, all appointments are selected for cancellation.
Note: If you mistakenly entered a Deceased date for a patient or if you do not wish to cancel future appointments, click Cancel to close the window. You must return to the Patient Registration page to remove an invalid Deceased date. - Reason — In the Cancel Existing Appointments window, select a cancellation reason, and then click OK.
The patient Quickview appears.
To hold statements for deceased patients
- Display the Patient Registration page: On the Patient Actions Bar, click Registration, and then click Full Registration.
- Scroll to the Billing section at the bottom of the Patient Registration page.
- Hold statements — Select Patient is deceased as the hold statement reason. This option also allows for more accurate reporting in Report Builder on active statement holds.
- Click Save.
You can enter several kinds of notes in athenaOne:
- Appointment notes — You can enter an appointment note on the Quickview and Check-in pages
- Patient notes — You can enter a patient note (an "internal" note) on the patient Quickview page
- Claim notes — You can enter a claim note on the Claim Action and Claim Edit pages
We are adding guarantor information that appears on the Full Registration page to the Contact List section on both Check-in and the Quickview, so you no longer have to divide tasks between these pages when managing guarantor information.
With this update, you can:
-
Remain in the Check-in stage when you notice that you need to edit guarantor information
-
Review and edit guarantor information from your patient's Quickview page
-
Avoid returning to the Full Registration page after a patient is registered
Now, the guarantor for the patient appears as a label that you can quickly see right in the Contact List section.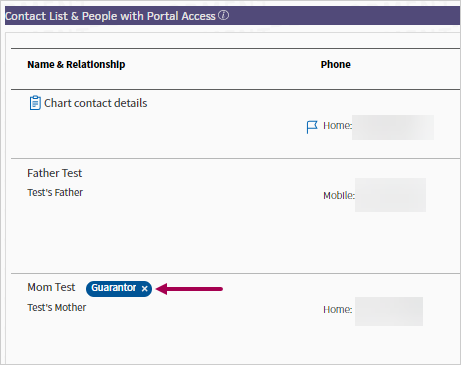
The guarantor information that appears on the Full Registration page is now read-only. You can click the Patient Contact List on Quickview link to access the Quickview where you can edit the information.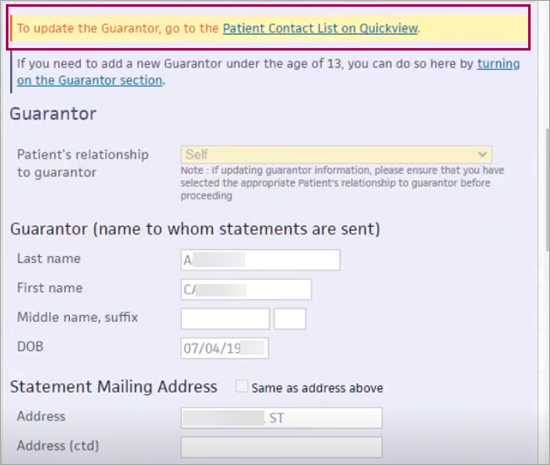
Note: Clicking the turning on the Guarantor section link in the Guarantor section of the Full Registration page allows you to use the Full Registration page in the following ways:
-
Add and manage a Guarantor under the age of 13.
-
Specify these patient's relationships to their guarantor: Employee, Unknown, Handicapped Dependent, Sponsor Dependent, Dependent of Minor Dependent, Emancipated Minor, Organ Donor, Cadaver Donor, and Injured Plaintiff.
-
These relationships are set to Other when viewing the Guarantor on the Contact List.
-
For more information, see Review and Update Guarantor on Check-in or Quickview.
The Contact List & People with Portal Access section on the Quickview and Check-in pages displays the Patient Portal status of the patient and the patient's family members.
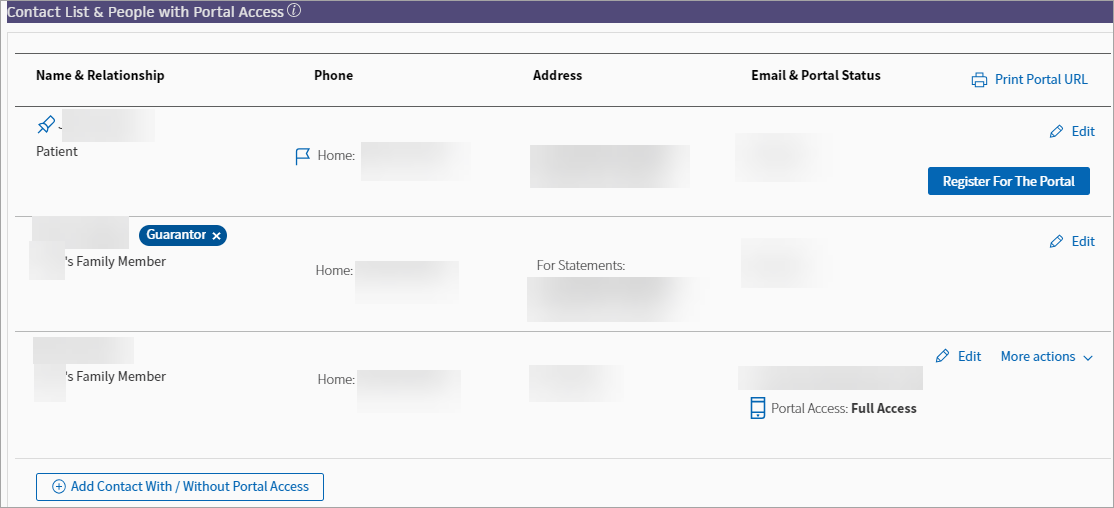
Tip: Hover over the image for a closer look.
The Contact List & People with Portal Access section displays the names and contact information of all Patient Portal users who have access to this patient record.
Note: The chart icon ![]() indicates which phone numbers and address are on the patient's chart. The details flagged by the chart icon may not belong to a specific person (hover over the icon to learn more about the contact details).
indicates which phone numbers and address are on the patient's chart. The details flagged by the chart icon may not belong to a specific person (hover over the icon to learn more about the contact details).
From the Contact List & People with Portal Access section of the Quickview or Check-in page, you can:
- View and manage Patient Portal access for this patient, including access by family members.
- Invite a patient or family member to register for the Patient Portal (or the Patient Information Center).
- Register a patient or family member for the Patient Portal (or the Patient Information Center). For instructions, see To register a patient for the Patient Portal or Patient Information Center in the office.
- Click Edit to edit the contact information on the Quickview page, or click Manage portal access from the More actions menu to display the Portal Accounts page, where you can update the contact information for any user who can access this patient's Patient Portal account.
Note: If the Patient Portal user is a patient at your practice, but not the patient whose Quickview is open, you can click Edit on [patient_name] Quickview to display the Quickview for that patient.
The athenahealth account for Patient Portal users creates a clear distinction between:
- Patient's or caregiver's athenahealth account (email and password).
- Patient's or caregiver's access to your organization's Patient Portal.
Note: Patient Portal users do not need to be patients at your practice.
The athenahealth account exists separate from your organization.
- A patient or caregiver can use the athenahealth account to log on to any Patient Portal powered by athenahealth, as well as to other applications.
Note: Patients and caregivers can manage their athenahealth account from the My profile page of any Patient Portal they use.
- Your organization manages a patient's access to your Patient Portal through the patient Quickview in athenaOne.
When you send a patient an email invitation to your Patient Portal, you grant permission for that patient to access your Patient Portal using their athenahealth account. If the patient or caregiver does not have an athenahealth account at that email address, they can create an athenahealth account using the invitation email you sent them.
When you delete a patient's Patient Portal account, you revoke that patient's access to your organization's Patient Portal; you are not deleting the patient's athenahealth account.
Patient Portal users can have different levels of access to patient records, as follows:
- Self — Patient Portal user is accessing her own patient record.
- Full access — Patient Portal user has full access to a patient record that is not his own. Full access is used in a family access scenario, such as when a mother has a Patient Portal account and accesses her child's patient record. (The Patient Portal user does not need to be a patient at your practice.)
- Billing-only access — Patient Portal user has billing-only access to a patient record that is not her own. A Patient Portal user with billing-only access can see only billing information, not health information. An example of this type of access is when a parent is the Patient Portal user with billing-only access to the patient record of a 20-year-old child.
Patient Portal users can access multiple records using the same login credentials (email address and password), for example, when a parent accesses her own patient record and the records of her children and elderly father.
Age of majority
The age of majority is governed by state law (in most states, the age of majority is 18). On the child's age of majority birthday, athenaOne automatically changes the access level for all family members who have full access to this patient record from full access to billing-only access. The practice or the patient can subsequently change the family member's access level or remove access at any time. If you are unsure of the age of majority in your state, check online. You can also contact the CSC to verify the age of majority in your state and control these settings.
When patients register for a Patient Portal account to access their own records, athenaOne identifies the Patient Portal user as a registered patient of the practice using the following matching logic.
- The following items entered on the Patient Portal registration page must match the corresponding items in athenaOne:
- First name
- Last name
- Date of birth
- Gender
- In addition, one of the following items must also match:
- Phone number, OR
- Email address
The best way to register patients for the Patient Portal is to register them in your office or to send them an email invitation. These methods are preferred because athenaOne knows who the patient is, who the provider is, and what department the patient is registered in; there's no need to ask the patient to enter any demographic information.
For example, when the patient receives an email invitation, opens it, and clicks Register Now:
- The first factor of authentication is the email itself.
- The second factor is the call or text message that the patient receives to confirm her identity.
Your practice has the patient's email address and phone number, and the patient's identity is confirmed when she responds to a message that the Patient Portal sends to the corresponding device.
When patients register for the Patient Portal on their own
When one of your patients searches the Internet for your practice, finds your website, and decides to register for the Patient Portal on their own (without an email invitation from your practice), no electronic link exists between the patient and your practice. The Patient Portal collects some initial information:
- Is this a patient or a patient's family member?
- Basic demographic information about the patient: first name, last name, gender, DOB, phone number, and email address.
The Patient Portal attempts to match this demographic information to existing patients at your practice by checking the first name, last name, gender, DOB, and either the phone number or email address. Even if this information matches one of your patients in athenaOne, the information constitutes only one factor of authentication, so the Patient Portal cannot tell the user whether it has confirmed that she is a patient at your practice.
Someone could fraudulently enter another person's first name, last name, gender, DOB, and phone number on the Patient Portal in an attempt to "phish" for PHI. The Patient Portal cannot reveal anything, including whether the named person is a patient at the practice, until there is a second factor of authentication, such as confirming the person's identity via phone or text message.
For this reason, the Patient Portal then asks the user to confirm his identity via phone or text message. After the user confirms his identity, the Patient Portal can safely indicate the user's next steps:
- If the user is an existing patient at your practice and enters the correct demographic information, the Patient Portal matches the user to a patient at your practice. This user sets a password and completes the Patient Portal registration without any issues.
- If the user is an existing patient at your practice but enters demographic information that does not match a patient record for your practice in athenaOne, a warning message instructs the user to call your office to resolve the problem. This user should not continue the Patient Portal registration process.
- If the user is a brand new patient, the demographic information she enters will not match any patient record for your practice in athenaOne. The Patient Portal prompts the user to select a provider and location, and then create a password. After the user does this, she is registered as a new patient at your practice, with the correct provider, department, and provider group; the user is also registered for the Patient Portal.
Note: New patients who register for your practice on the Patient Portal appear on the Manage Prospective Patients page.
You can see a message on Quickview and Check-in if an email sent to your patient has bounced, meaning it wasn't delivered. This message appears in the Contact List and Details section:
-
The message provides an opportunity for you to review the email address on file with the patient to ensure they are indeed getting email communication from your practice
-
This message is informational and does not prevent you from completing Check-in or from making other updates to the patient's Quickview.
-
When you change or remove an email address associated with a Patient Portal account, a pre-existing warning appears that states changing the email address for a patient with Patient Portal access requires the patient to register again with the new email address. This is a requirement for safety and compliance reasons.
-
The need for your patient to re-register for the Patient Portal with the new email address is a pre-existing requirement, we're calling it out specifically to provide clarity that it is not new functionality related to this feature.
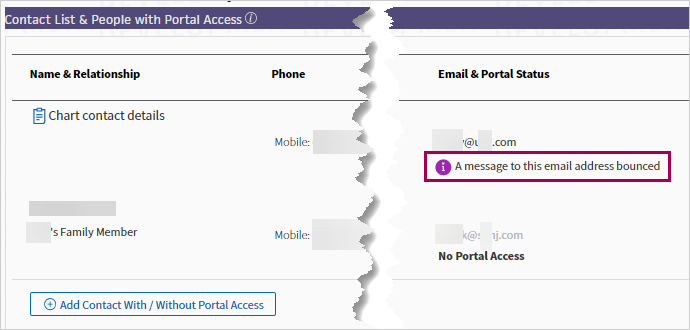
Note: Seeing this message appear doesn't block you from completing check-in
In Contact List section on Quickview and Check-in
A purple info icon appears next to the message. Under the email field, the message tells you that our records indicate a previous attempt to deliver an email to this email address did not go through. The email bounced.
Here's an at-a-glance example of the message appearing in the:
-
Chart contact details row

Here's a closer look
-
Patient row (where the patient has a portal account)

Here's a closer look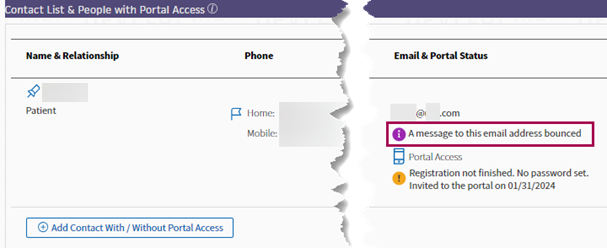
You should review this email address with the patient. If they want to change the email address on file, clicking on the email in the Contact List or the Edit link opens the edit workflow.
When you see this message, you are not prevented from leaving the email address as-is and proceeding with your Check-in workflow.
The purple info icon and message appear below the email field in the edit workflow. To change the email address on file, you can clear out the previous email and enter a new email.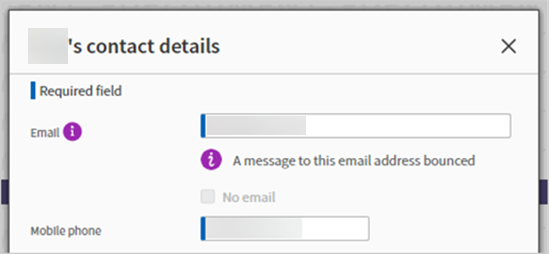
However, this message does not prevent you from leaving the email address as is and proceeding with Check-in or making updates on the patient's Quickview.
If you see the message, you can:
- Leave the previous email as is
- Enter a new email,
- Check the no email box
The following image is an example of the email bounced message for an email with Patient Portal access.
When you go to the edit workflow and clear the previous email, a Patient Portal specific alert appears below the email field.
Note: When you change or remove an email address associated with a Patient Portal account, the following pre-existing warning appears. Changing the email address for a patient with Patient Portal access requires the patient to register again with the new email address. This is a requirement for safety and compliance reasons.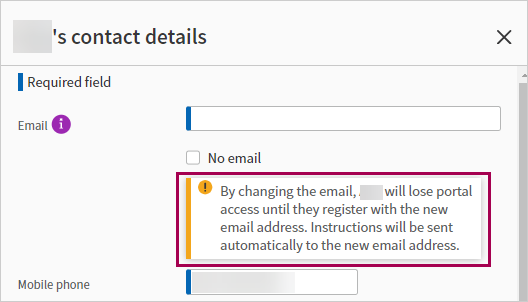
This is a pre-existing requirement, we're calling it out specifically to provide clarity that it is not new functionality related to this feature.
To edit the patient email, you can:
- Enter a new email — This option then brings you to the Patient Portal registration workflow because you need to re-register the new patient email with the Patient Portal.
- Check the no email box — This option removes Patient Portal access for the patient, as an email address is required for Patient Portal access
Note: When you check the No email box, the message changes to inform you that by not entering a new email, you're deleting the patient's Patient Portal account.
Why does my patient need to register for the Patient Portal again?
For compliance reasons, when the email is changed for a patient with a Patient Portal account, the patient will need to re-register to the portal with the new email address. This is an existing and current requirement that is not new to this feature.
What type of emails does the email bounced message apply to?
The email bounced message (which appears with a purple info icon) only applies to patient emails and does not apply to other patient contact emails. We intend to have this feature support patient contact emails in a future release.
How do I proceed with Check-in when I see the alert?
Check-in can proceed as is. It is not mandatory to change the email address for the patient when you see the message about a bounced email. It is recommended to review the email address with your patient at the time of check-in to ensure the correct email is on file and patient can receive emails from your practice.
From any patient-specific page that includes the Patient Actions Bar — such as the Appointment, Quickview, Check-in, and Patient Registration pages — you can view an audit history of all Patient Portal transactions for that patient, for example, who granted or deleted access to a Patient Portal user and the date of the transaction.
To display the Portal Access Audit History page: On the Patient Actions Bar, click Communicator, and then click Portal Access Audit History.
If you do not use the athenaCommunicator service, display the Portal Access Audit History page as follows: On the Patient Actions Bar, click Clinicals, and then click Portal Access Audit History.
You can register patients and their family members for the Patient Portal or the Patient Information Center while the patient is in the office from the Quickview, Check-in, Checkout, and Patient Registration pages.
Note: The starting point for the registration workflow is slightly different on the Checkout and Patient Registration pages. The instructions on this page begin on the Quickview or Check-in page.
Note: Non-patient users, such as family members, can register for the Patient Portal without being at your practice. These non-patient users can then access the Patient Portal on behalf of patients. The most common use case for your patients would be a parent registering to gain access to their child's full Patient Portal account. Refer to this user guide for a full description of the non-patient Portal self-registration feature.
Important: To comply with the Children's Online Privacy Protection Act (COPPA), patients under the age of 13 cannot create self-registered Patient Portal accounts, and you cannot register or invite new Patient Portal users under the age of 13.
Practice users (including clinical providers) can register a patient or family member as follows:
- From a practice computer.
- From a kiosk (a desktop, laptop, or tablet computer set up for this task).
- Using the patient's smartphone (iPhone or Android device).
Note: The smartphone option is not available when registering a patient for the Patient Information Center. - By sending an invitation email to the patient's registered email address in athenaOne.
Practice users can register patients for the Patient Portal at any stage of the patient encounter. A dedicated practice user can also help patients register for the Patient Portal before check-in.
Important: Register your patients (or their family members) in the office to increase the likelihood that you will meet quality program measures.
E‑statement notifications, message notifications, and test result notifications are all sent to the patient via email. Patients will not know that they have a message waiting for them on the Patient Portal if they do not have an email account. The use of email helps ensure that the patient or family member receives proper notification from the practice.
Important: To comply with the Children's Online Privacy Protection Act (COPPA), patients under the age of 13 cannot create self-registered Patient Portal accounts, and you cannot register or invite new Patient Portal users under the age of 13.
Note: Non-patient users, such as family members, can register for the Patient Portal without being at your practice. These non-patient users can then access the Patient Portal on behalf of patients. The most common use case for your patients would be a parent registering to gain access to their child's full Patient Portal account. Refer to this user guide for a full description of the non-patient Portal self-registration feature.
You can use the Quick Registration functionality to allow patients and their family members to sign up for the Patient Portal from athenaOne.
Important: If a patient's family member is creating a Patient Portal account (for example, the parent of a young child), do not enter the family member's email address in the Portal email field for the patient. If the patient does not have an email address, select the No email option.
To start the Quick Registration process:
- On the Quickview or Check-in page, scroll down to the Contact List & People with Portal Access section and click
 Add Contact Person and Grant Portal Access.
The Add contact window opens. - Click The Patient or Not the Patient to indicate whether the Patient Portal account owner is the patient or another person (a family member or caregiver, for example). If the patient already has a Patient Portal account, these options do not appear; the new contact that you are creating is assumed to be "not the patient."
Note: If your practice does not use family access, the Not the Patient option does not appear. - You can click Pre-fill fields using the chart contact details to fill in fields — such as address and phone number fields — that exist already in the patient chart. This option is especially useful for parents and guardians of minor children.
- Contact person is the patient's — Specify the relationship of the new contact to the patient by selecting an option from the menu, for example, Mother, Spouse, Child, Grandparent, or Caretaker.
- Email — Enter the email address for the patient or contact. You must enter an email address to create a Patient Portal account.
- Legal first name — Enter the legal first name of the patient or contact.
- Legal last name — Enter the legal last name of the patient or contact.
- Contact type — Select Portal Access or NO portal Access.
- The following field appears when you select Portal Access:
Portal & messaging access level — Select Full Access or Billing Only.- Full Access — Patient Portal user has full access to a patient record that is not his own. Full access is used in a family access scenario, such as when a mother has a Patient Portal account and accesses her child's patient record. (The Patient Portal user does not need to be a patient at your practice.)
- Billing Only — Patient Portal user has billing-only access to a patient record that is not her own. A Patient Portal user with billing-only access can see only billing information, not health information. An example of this type of access is when a parent is the Patient Portal user with billing-only access to the patient record of a 20-year-old child.
- Mobile phone — Enter the mobile phone number of the patient or contact, or select the No mobile phone option.
- Home phone — If you entered a mobile phone number, this field defaults to Same as mobile, but you can enter a different home phone number in this field.
Note: If you selected the No mobile phone option in the Mobile phone field, you must enter a phone number in the Home phone field. - Work phone — You can enter a work phone number in this field, if you choose.
- Address line 1 — Enter the first line of the contact's address. If you need a second line, use the Address line 2 field.
- Zip — Enter the contact's 5-digit ZIP code. The ZIP code populates the City and State fields from the athenahealth ZIP code database. (If you find an error, please contact the CSC from athenaOne > Support > Success Community > Contact Client Support Center.)
- City — Enter the contact's city.
- State — Enter the contact's state.
Note: You can click the Verify address option below the State field to validate the address that you entered (you must first enter the address and either the ZIP code or the city and state). - After you enter all required contact information, click Save and Go To Portal Registration.
The Choose Portal Registration Method window opens. - Click Register With This Computer.
A message appears about your responsibility for verifying the patient's or family member's identity. - Click Continue.
- You are logged out of athenaOne, and the Create new password page appears.
- Allow the patient or family member to use the device that the practice user was using.
- The patient or family member confirms the email address and types in a Patient Portal password on the Create new password page. This password must be 8-20 characters long and must have at least one uppercase letter, one lowercase letter, and one number or symbol.
- The patient or family member checks the box to accept the Terms and Conditions and the Privacy Policy and then clicks Create account.
The Patient Portal home page appears. - When the patient or family member signs out of the Patient Portal, the athenaOne login page appears.
- You log back in to athenaOne and are returned to the Check-in workflow.
You can set up a computer (desktop, laptop, or tablet) in your office to allow patients and family members to register for the Patient Portal or Patient Information Center while the patient is at the practice. From the Quickview or Check-in page, practice staff generate temporary passwords, which they give to the patient or family member; the patient enters this password on the login page set up on the kiosk computer to register for the Patient Portal or Patient Information Center. (These temporary passwords are case sensitive.)
Note: Generate temporary passwords while the patient is in the office, not over the phone.
To enhance the security of the kiosk workflow, athenahealth provides you with a unique URL, which enables an automatic timeout of a Patient Portal or Patient Information Center login after 3 minutes. Also, a large Signout button is displayed on the kiosk screen so that your patients and their family members can easily sign out after they register for the Patient Portal or Patient Information Center and explore it.
To use the kiosk registration feature, you must set up a kiosk (desktop, laptop, or tablet computer) in your office and then call the CSC to enable this feature. After the CSC enables the feature for you:
- Open a Web browser, such as Chrome or Safari, on the kiosk device, and enter one of the following URLs:
- If your practice does not use the Communicator Brands feature, enter "https://CONTEXTID.portal.athenahealth.com/?section=kiosk", where CONTEXTID = your practice ID.
- If your practice uses the Communicator Brands feature, enter
"https://CONTEXTID-BRANDID.portal.athenahealth.com/?section=kiosk", where CONTEXTID = your practice ID and BRANDID = your brand ID.
Note: To find your brand ID, display the Communicator Brands page: On the Main Menu, click Settings >Communicator. In the left menu,under Practice Links — Communicator, click Brands.
- Bookmark this URL, and make it the home page of the browser on the device.
- Make sure that you turn the device on and open the browser every morning.
Important: When you start the kiosk registration process, advise patients that they must complete their registration and create a new password within 2 hours or the password will expire.
- On your computer (not the kiosk device) display the Quickview or Check-in page for the patient.
- On the Quickview or Check-in page, scroll down to the Contact Details & People with Portal Access section and click
 Add Contact Person and Grant Portal Access.
The Add contact window opens. - Click The Patient or Not the Patient to indicate whether the Patient Portal or PIC account owner is the patient or another person (a family member or caregiver, for example). If the patient already has a Patient Portal account, these options do not appear; the new contact that you are creating is assumed to be "not the patient."
Note: If your practice does not use family access, the Not the Patient option does not appear. - You can click Pre-fill fields using the chart contact details to fill in fields — such as address and phone number fields — that exist already in the patient chart. This option is especially useful for parents and guardians of minor children.
- After you enter all required contact information, click Save and Go To Portal Registration.
The Choose Portal Registration Method window opens. - Click Register With Kiosk.
athenaOne generates a temporary password on your computer screen. - Write down this password and give it to the patient or family member (this password is case sensitive).
Note: The temporary password that you generate for kiosk registration is valid for 2 hours.
- Go to the kiosk that's set up for Patient Portal or Patient Information Center registration.
- On the landing page, tap
 .
. - Enter your email address and the temporary password given to you by the practice staff and then tap Log In.
- On the Security update page, tap Continue.
The Choose your security option page appears.
Note: For detailed instructions about creating your account, see To create a new Patient Portal account from a notification email. The steps are summarized here. - Select your security option and then verify access to your patient record.
- Create a permanent Patient Portal or Patient Information Center password.
- Enter the temporary password in the Current password field.
- Enter your permanent password in the New password fields.
This password must be 8-20 characters long and must have at least one uppercase letter, one lowercase letter, and one number or symbol. - On the All set page, tap Continue.
The Patient Portal or Patient Information Center home page appears. You are now registered.
Important: To comply with the Children's Online Privacy Protection Act (COPPA), patients under the age of 13 cannot create self-registered Patient Portal accounts, and you cannot register or invite new Patient Portal users under the age of 13.
Patients and family members can sign up for the Patient Portal as part of the check-in process, as long as they have an email address and a smartphone (iPhone or Android device).
Note: This option is available only when registering for the Patient Portal; you cannot use a patient's smartphone to register for the Patient Information Center.
Important: When you start the mobile registration process, advise patients that they must complete their registration and create a new password within 6 hours or the temporary password will expire.
- On the Quickview or Check-in page, scroll down to the Contact Details & People with Portal Access section and click
 Add Contact Person and Grant Portal Access.
The Add contact window opens. - Click The Patient or Not the Patient to indicate whether the Patient Portal or PIC account owner is the patient or another person (a family member or caregiver, for example). If the patient already has a Patient Portal account, these options do not appear; the new contact that you are creating is assumed to be "not the patient."
Note: If your practice does not use family access, the Not the Patient option does not appear. - You can click Pre-fill fields using the chart contact details to fill in fields — such as address and phone number fields — that exist already in the patient chart. This option is especially useful for parents and guardians of minor children.
- After you enter all required contact information, click Save and Go To Portal Registration.
The Choose Portal Registration Method window opens. - Click Register With Smartphone.
After you click this button, athenaOne:- Sends a text message to the mobile phone number with a secure link to access the Patient Portal.
- Generates a temporary password on your computer.
- Write down the temporary password and give it to the patient or family member.
Note: The temporary password that you generate for smartphone registration is valid for 6 hours.
- When you receive the text message, open it and then tap the link to the Patient Portal in the text message.
- On the Patient Portal page, tap
 .
. - Enter your email address and the temporary password given to you by the practice staff and then tap Log In.
- On the Security update page, tap Continue.
The Choose your security option page appears.
Note: For detailed instructions about creating your Patient Portal account, see To create a new Patient Portal account from a notification email. The steps are summarized here. - Select your security option and then verify access to your patient record.
- Create a permanent Patient Portal password. Enter the temporary password in the Current password field and then enter your permanent password in the New password fields.
This password must be 8-20 characters long and must have at least one uppercase letter, one lowercase letter, and one number or symbol. - On the All set page, tap Continue.
The mobile Patient Portal home page appears. You are now registered for the Patient Portal.
During a patient encounter, you can send an email invitation for the Patient Portal or Patient Information Center on the Intake and Exam tabs.
- In the banner at the top of the Intake and Exam page, click Manage Portal Account.
The Register Patient or Register Family Member page appears. - Confirm or enter the email address, home phone number, and mobile phone number for the patient.
- Click Send Email Invitation.
The patient will receive an email containing the Patient Portal or Patient Information Center registration link at the email address given during registration.
This feature applies to you if your practice DOES NOT have:
- athenaCommunicator
- The Patient Portal or Patient Information Center (PIC) enabled
This features helps practices that DO NOT use a Patient Portal or PIC understand and use the contact information of patients and their contact people.
Note: If your practice has multiple brands, you may see different versions of the Contact details section on Quickview and Check-in when logging into different departments because the Patient Portal or PIC may be enabled in one brand and not in another brand. The Contact list and details section appears differently based on availability of the Patient Portal or PIC. There is additional functionality available for brands with enabled Patient Portal or PIC.
- See contact information in a way that clearly identifies who it belongs to in the Contact List & Details section.
- View more detailed contact information for the patient's family members.
- Select if you’re adding contact information for The Patient or Not the Patient (like a parent, guardian, or caregiver) in the Add Contact window.
- Click the More Actions downward arrow to Remove contact.
-
Assign a primary contact for the patient.
-
Indicate a primary phone number.
-
See an audit history of changes to the Contact List.
You can add contact people for a patient with clearly identified contact information. We added this ability because you requested it. Keep those suggestions coming!
You can see precisely whom you're contacting when you view a phone number, email address, and home address associated with the patient, or one of their contact people, on the Quickview and Check-in pages.
To access the section on the Quickview and Check-in pages, scroll down the page to the Contact List & Details section.
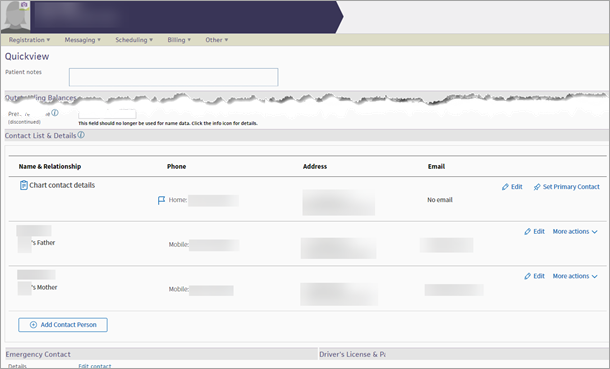
Here's a closer look
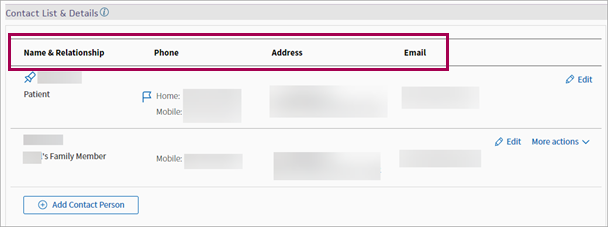
The header row shows which types of contact information appear in each column.
To use this feature, you must have:
- Access to the Quickview page. (You'll see a read-only version if you don't have edit permissions.)
- Access to the Check-in page.
To access the Contact List Audit History page, you must have the Register New Patient permission.
You can capture, track, view, and use more detailed patient contact information in the Contact List & Details section of the Quickview and Check-in pages.
Note: If the patient is the primary contact person, the patient info is on the topmost row.
You can see the following patient contact details and demographic information appear in the at a glance view. The header row indicates the type of contact information in each column:
- Name
- Relationship to patient
- Phone number (Home, Mobile, and Work)
- Address
- Email address
Contacts created on a patient's Quickview or Check-in via the Contact List & Details section appear on the payment plan workflow. These contacts are available as options to choose from in order to obtain digital consent for credit card payment plans.
When there is missing contact information for any row in the Contact List & Details section, you'll see it clearly identified. For example, when the row is missing an email address, the text "No email" appears in the Email column.
Tip: When you click the message and warning icon, the Chart contact details window appears displaying the cursor in the selected field for quick editing. The only field that isn't automatically displayed is the Consent field because there is no text box for the cursor to jump to.
You can identify and select the person that the primary contact information on the patient’s chart belongs to. A pin icon indicates:
-
That the patient is the primary contact.
-
Which phone numbers and addresses are on the patient's chart.
The primary contact can be:
The patient
- When the primary contact is the patient, you can hover over the pin icon to display a specific message with additional information.
Not the patient (family member, guardian, or caregiver)
- When the primary contact is not the patient, you can hover over the pin icon to display a message with additional information.
The primary contact appears at the top row of the contact people and details window:
- Chart contact details that are identified as The Patient — the mobile phone, home phone, home address, and email address info are synced to the patient chart.
- A contact person that is Not the patient — only the mobile phone, home phone, and home address are synced to the patient chart. The email address is not synced.
If the contact person is also a registered patient at your practice :
- See their patient identification number next to their name clearly marked as Patient ID. Click the patient ID link to display the patient Quickview page.
- Edit their contact details on their own patient Quickview page.
If the contact person is not a registered patientat your practice, click Edit to change their contact information.
You can directly edit contact information in the at glance details of the Contact List & Details section.
When you hover over certain contact details, you'll notice an edit icon appear. Click the edit icon for your cursor to insert directly into that field of the edit window for immediate typing.
The direct edit feature is enabled for the following contact details:
- Phone
- Home
- Mobile
- Work
- Address
- Email address
When there's no information in one of the fields, the field displays that there is no information. For example, if there is no address associated with the person the field says No address. Hover over the field to display the direct edit icon.
When you click the direct edit icon, the person's contact details window appears automatically display on the field that you selected. The cursor automatically selects the text box and you can immediately start entering information.
Important: If the contact person is also a registered patient at your practice, the Edit on [contact person first name] Quickview link appears instead of the direct edit icon.
To use the direct edit feature to display the Quickview of a registered patient from a patient Quickview that they're listed as a contact person for:
- Hover over the field you want edit.
- Click Edit on [contact person first name] Quickview.
The patient's Quickview page appears. - In the Contact List & Details section, click Edit.
The Edit window appears. - Edit the contact information as needed.
- Click Save.
You'll remain on that patient's Quickview. To display the previous patient's Quickview, search for that patient per your usual workflows.
If there is no identified primary contact, Chart contact details appears with the contact information associated with the patient’s chart. A chart icon also appears to signify that there is no primary contact set.
The following two images are examples of:
- Only the Chart contact details row with no contact people added.
- The Chart contact details row and a second row for a contact person.
A chart icon indicates which phone numbers and addresses are on the patient's chart.
Tip: Hover over the chart icon to display a specific message when no primary contact is associated to the chart contact details.
We’re accelerating the workflow for setting chart contact details as belonging to the patient.
When there is no identified primary contact, the Chart contact details heading is displayed with a chart icon in the top row of the Contact List & Details section.
To make the patient the primary contact:
- From the Contact List & Details section, ensure that the heading appears as Chart contact details.
If there are no contact people associated with the contact information, the Set As Patient button appears. - Click Set As Patient to set the chart contact details as belonging to the patient.
The Set patient details window appears. - Notice how the fields of the Set patient details window automatically fill with the existing chart contact details.
- Email — Enter an email for the patient.
- Click Update Primary Contact
The Contact List & Details appears with a pin icon in the top row, next to the primary contact's name.
.
- Click Add Contact Person to add a contact person.
A window appears. - Select The Patient or Not the Patient to indicate if the contact is the patient themself or a family member. The default selection is The Patient.
You can see a confirmation of the type of contact person you’re adding at the top of the Add contact window, and change it if necessary. - Fill out the required fields.
-
Click Save.
Important:
- For patients under 13, the default is Not the patient.
- For patients between 13 to 18 (age of majority) there is no default selection.
Depending on your selection of The Patient or Not the Patient, the following contact information fields appear in the Add Contact window. A required field is marked on the left side with a blue strip.
The Patient
- Email —ؙ Required. Check the No email box to skip this field.
- Mobile phone — Required if mobile phone is selected for Primary phone. Check the No mobile phone box to skip this field.
- Consent to receive automated — Required if there is a mobile phone listed. A Calls field appears with Yes or No options. Check the No mobile phone box to skip this field or mark Home phone as the Primary phone.
- Home phone — Optional or Required depending on your practice’s specific settings. However, this is required if Home phone is the Primary phone. Leave the field empty for “Same as mobile” to appear.
- Work phone — Optional or Required depending on your practice’s specific settings. However, this is required if Work phone is the Primary phone.
- Primary phone — Select either Mobile phone, Home phone, or Work phone. The Primary phone flag icon appears next to the selection’s corresponding field.
- Address line 1 — Optional or Required depending on your practice’s specific settings.
- Address line 2 — Optional or Required depending on your practice’s specific settings.
- ZIP code — Optional or Required depending on your practice’s specific settings.
- City — Optional or Required depending on your practice’s specific settings.
- State — Optional or Required depending on your practice’s specific settings.
Not the Patient
- Email — Required.
- Mobile phone — Required. Check the No mobile phone box to skip this field.
- Home phone — Optional or Required depending on your practice’s specific settings. Howeve, this field is required if you check the No mobile phone box. Leave the field empty for “Same as mobile” to appear.
- Work phone — Optional or Required depending on your practice’s specific settings.
- Address line 1 — Optional or Required depending on your practice’s specific settings.
- Address line 2 — Optional or Required depending on your practice’s specific settings.
- ZIP code — Optional or Required depending on your practice’s specific settings.
- City — Optional or Required depending on your practice’s specific settings.
- State — Optional or Required depending on your practice’s specific settings.
You’ll only see this option when the primary contact is not the patient. The Set Primary Contact option does not appear when the patient is listed in the top contact row. It is an option under the following circumstances:
- The top row is only Chart contact details
- There is at least one other contact person listed in the section
You can click Set Primary Contact to make another person the primary contact.
The Set Primary Contact window appears when you click Set Primary Contact.
Once you indicate the new primary contact’s consent to calls and select a preferred contact method, click Set Primary Contact.
Note: If there is more than one contact person, you're prompted to select the intended primary contact.
Set primary contact — when required information is missing
A message appears if you click Set Primary Contact but the contact person has missing contact details. Click Go to Edit Contact Details to add the missing information and make that contact person the primary contact.
You can click Pre-fill fields using the chart contact details as an accelerator for entering contact information for the chart contact details. The window has two versions:
-
Not the patient
-
The Patient
The Add contact window auto-fills with the existing chart contact details.
The following fields fill in when you click Pre-fill fields using the chart contact details:
- Phone (Mobile, Home, Work)
- Address
Note: When the contact person you're adding is Not the Patient, you must select the Contact person is the patient’s field manually. To complete this field, select the contact person’s relation to the patient.
Click Save to add the new contact.
When you add a contact, the next screen depends on the age of the patient:
- For patients between the ages of 13 and 18, you see a step to select either The Patient or Not the Patient.
- For patients under 13 years old, the Add contact window defaults to Not the Patient.
When you click Add Contact Person for a patient that is under 13 years old, the Add contact window appears with a message stating that the patient is under 13 years old and cannot be the primary contact. This message appears if you choose The Patient option.
From here you can:
- Select Not the Patient if the contact person is not actually the patient. You can also make them the primary contact for the patient.
- Alternatively, click edit the chart contact details to revise any patient demographic information once the Chart contact details window appears.
You can choose a primary phone number to contact for the patient.
After entering and selecting the primary phone, you’ll see a flag icon appear next to the primary phone number type.
You can select the Primary phone when you add or edit the primary contact.
Note: If Mail was previously indicated as the preferred contact method, the athenaOne system defaults the Primary phone field to the home phone number.
Tip: Click the flag icon to view a message about the field.
Click Save to close the window and see the flag appear next to that contact information.
Note: The Save button isn’t only related to the primary phone flag. It saves all entries in the patient’s contact details.
When you add a new primary contact, the mobile phone defaults to the Primary phone. After you select a Primary phone option, the flag icon that indicates a primary phone number appears next to the corresponding phone field and the Primary phone field becomes a required field.
If there is no home phone number entered for the primary contact, placeholder text appears in the Home phone field that says "Same as mobile." Once you click Save, the athenaOne system automatically copies the mobile phone number you entered into the Mobile phone field and enters it in the Home phone field.
- We did this to save you time and effort when entering contact details for a primary contact that only has a mobile phone number.
- You can also click Copy from mobile to make the home phone number the same as the mobile phone number if the person does not have a home phone but your practice requires a home phone.
When you enter the zip code, the city and state are automatically filled in.
You can also move quicker through address entry due to the auto-complete feature.
If you type the starting numbers of the address, pre-fill options appear for you to choose from. After your selection, all applicable address fields automatically fill in.
Click Verify address, which confirms the entered address is correct. If incorrect, the link provides options for verified addresses.
Choose the applicable residential address from the results that appear in the same window.
If the address cannot be found, a message appears.
Important: The Country field only displays if the "Foreign Patient Addresses" feature is enabled for your practice. If you need the Country field, contact the CSC to request it: On the Main Menu, click Support > Success Community > Contact Client Support Center.
You can add foreign addresses when you add or edit contact information in the Contact List & Details section.
Note: You can select the patient's country when you add or edit chart contact details and contact people.
Some countries have an address format that differs from the U.S. default of address, city, state, and ZIP code. The athenaOne system automatically formats foreign mailing addresses according to the country's specifications for all claims, bills, statements, and other correspondence.
There are differences in user experience when you enter foreign address:
- The country appears in the address field of the Contact List & Details section's at a glance details.
-
The State field is the State and province field.
Note: This field is a free text field.
- The Zip code field is the Postal code field.
For more information on the Country field and entering foreign addresses, please see the Quickview article in O-help; Once there, please see the Country row of the field reference table.
Click the More actions link to select the Remove contact option.
If the primary contact is not the patient, the Replace Primary Contact option also appears in the More actions menu.
When there is a set primary contact, the Replace Primary Contact option appears in the more actions menu.
After you add another contact person or if there are existing contact people associated with the patient, click Replace Primary Contact to make the new or existing contact person the primary contact.
A message appears at the top of the Replace Chart Contact Details window that explains what occurs in the window. Select the primary contact that is replacing the primary contact.
After you consent to texts and select a primary phone, click Replace Primary Contact.
For a primary contact, when you click Remove Contact, the guided workflow for the Replace Primary Contact feature appears on the Remove Contact window.
The Remove Contact window appears
You can either:
- Select the new primary contact from the contact people options.
- Click Remove without replacing.
If you choose to Remove without replacing, the Contact List & Details section appears with Chart contact details in the top row.
If you choose a new primary contact, the Remove Contact window displays the New Primary Contact section. Ensure required fields are filled in. Then, click Remove and Replace Primary Contact.
Important: A contact person must have all the required contact details to be set as the primary contact.
In the More actions menu, click Replace Primary Contact.
The Replace Primary Contact window appears.
After selecting the intended primary contact, notice a message appear warning you that they're missing either one or many required fields.
Click Go to Edit Contact Details for their contact details window to appear for you to enter the missing contact information and make them the primary contact.
A primary contact cannot have identical information as another primary contact.
When you click Replace Primary Contact, the warning message appears informing you that the action cannot be completed and the Replace Primary Contact feature is unavailable.
Note: You must have the Register New Patient permission to access this page.
To display the Contact List Audit History page:
On the Patient Actions Bar, click Registration, and then click Contact List Audit History.
The Contact List Audit History page shows you a detailed history of all changes made to a patient’s Contact List and Contact information, including:
- New contact information added
- Contact information that has been edited
- Contacts and Contact information that have been deleted
The Contact List Audit History shows the changes grouped under each Contact name.
For each Contact, you can see details for each change made to that Contact:
- Username of the practice user who made the change
- Date and time when the change was made
- Old value and new value for the field that was changed
Note: This feature is for both ambulatory practices and Hospitals & Health Systems.
This feature applies to practices with athenaClinicals that do not have an athenahealth Patient Portal (athenaCommunicator) or Patient Information Center (PIC) or have the Patient Portal or PIC turned off.
For patients and contact people (shown in the Contact List & Details section of the patient Quickview), you can now grant or remove the ability to access that patient's health information via third-party personal health record (PHR) apps. For example, apps listed with the “Personal Health Record (PHR)” capability on the athenahealth Marketplace.
-
Grant or remove PHR access for the patient
-
Option to grant PHR access when adding a contact person
-
Grant or remove PHR access for contact people
-
Send reset password emails
Patients can use any Personal Health Record (PHR) apps of their choice to access their electronic health information (EHI). The only way the PHR app will get access to patient data from your practice is if that patient downloads the app and authorizes use of their EHI.
For more information on how patients would use PHR apps, you can refer to the ONC's Guide for Patients.
If your practice has athenaClinicals but no Patient Portal or PIC, or has the Patient Portal or PIC turned off, this feature will allow you to enable PHR access for the patient. Once enabled, the patient can create a log in which they can then use in the PHR app to authorize the app access to their health records.
You must have the Quickview (or Quickview no financials) role or permission to access the Quickview.
This workflow enables you to grant PHR access to an existing patient or a contact person who has provided an email address and registered successfully for the Portal or PHR in another brand within the practice.
From the Contact List & Details section:
-
Confirm that there’s an email present for the patient. An email is required for PHR access.

-
Click Edit.

-
Notice that the PHR access available field defaults to the No option. To grant PHR access for the patient, you must click the No option to switch it to the Yes option.
The PHR access available field now says Yes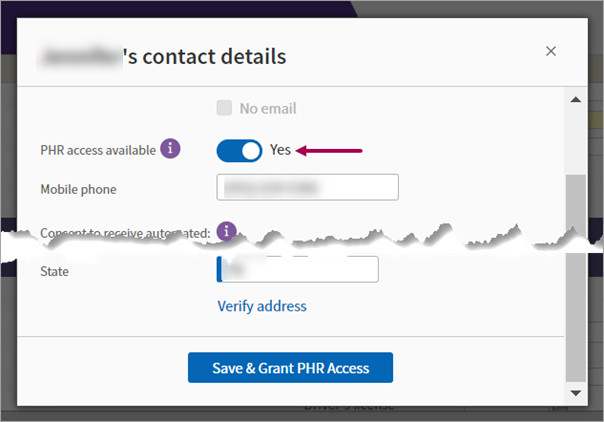
-
Click Save & Grant PHR Access.
-
Notice the "PHR access available" message under the patient email.

From the Contact List & Details section:
-
Confirm that there’s an email present for the contact person. An email is required for PHR access.

-
Click Edit.

Note: When a contact person has a patient ID, click Change PHR Access from the More actions menu.
-
Notice that the PHR access available field defaults to the No option. To grant PHR access for the contact person, you must click the No option to switch it to the Yes option.
The PHR access available field now says Yes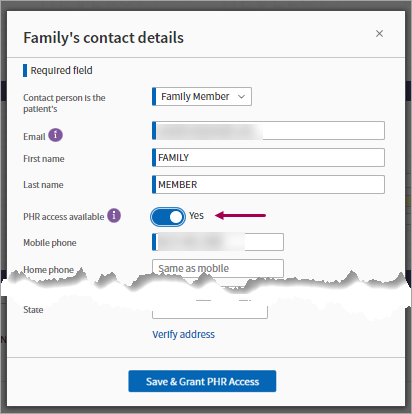
-
Click Save & Grant PHR Access.
-
Notice the "PHR access available" message under the family member's email.

From the Contact List & Details section:
-
Check if the "PHR access available" message is under the patient email.

-
Click Edit.

-
Notice that the PHR access available field is set to the Yes option. To remove PHR access for the patient, you must click the Yes option to switch it to the No option.
The PHR access available field now says No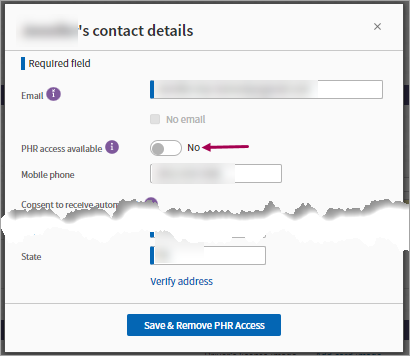
-
Click Save & Remove PHR Access.
-
Notice the patient's email no longer displays "PHR access available".

From the Contact List & Details section:
-
Check if the "PHR access available" message is under the patient email.

-
Click Edit.

Note: When a contact person has a patient ID, click Change PHR Access from the More actions menu to change their PHR access for the patient they’re a contact person for. If they are a patient, they can get PHR access to their own record as well as to another patient's record.

-
Notice that the PHR access available field is set to the Yes option. To remove PHR access for the contact person, you must click the Yes option to switch it to the No option.
The PHR access available field now says No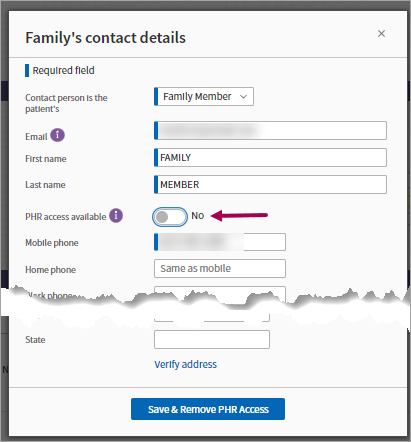
-
Click Save & Remove PHR Access.
-
Notice the family member's email no longer displays "PHR access available".

This workflow enables you to grant PHR access to a patient who has never been given PHR access. After access has been granted, the patient will need to finish PHR account set up. You will encounter this workflow if your practice does not have Patient Portal (athenaCommunicator) or Patient Information Center (PIC).
From the Contact List & Details section:
-
Make sure that there’s an email present for the patient. An email is required for PHR access.

-
Click Edit.

-
Notice that the PHR access available field defaults to the No option. To grant PHR access for the patient, you must click the No option to switch it to the Yes option.
The PHR access available field now says Yes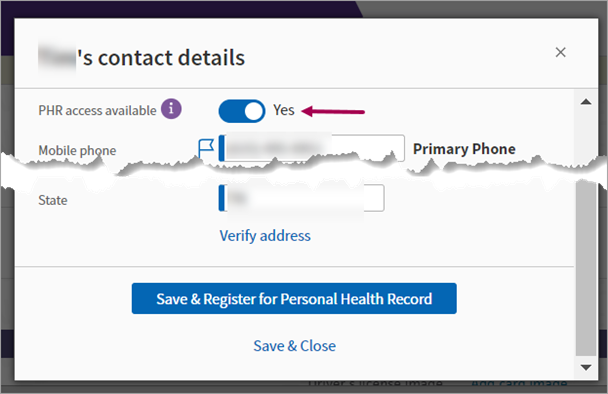
-
Click Save & Register for Personal Health Record.
The Choose Personal Health Record Registration Method window appears -
Click either:
-
Register with Smartphone
-
Send Email Invitation
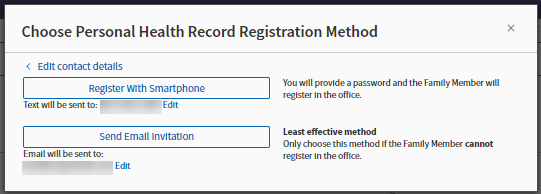
-
-
Instruct your patient or their family member to follow the additional instructions they receive via either email or SMS text message.
From the Contact List & Details section:
- Click Add contact person.

- Enter the required contact information.
- PHR access available — Click the No option and notice it switch to the Yes option.
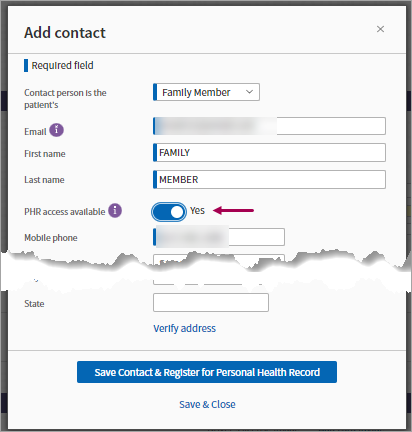
- Click Save Contact & Register for Personal Health Record.
The Choose Personal Health Record Registration Method window appears - Click either:
- Register with Smartphone
- Send Email Invitation

-
Instruct your patient or their family member to follow the additional instructions they receive via either email or SMS text message.
If a patient or contact person who has been granted PHR access needs the invitation to finish PHR set up, follow this workflow to issue the invitation.
Note: The login created as part of the Finish PHR registration workflow will only be used by the patient to authenticate and authorize PHR app access to their data. Depending on how registration works in the PHR app, the patient may need to create a separate log in / account to use the PHR app.
From the Contact List & Details section:
-
Click Finish PHR Registration if it appears for the patient.

The Choose Personal Health Record Registration Method window appears - Click either:
- Register with Smartphone
- Send Email Invitation

-
Instruct your patient to follow the additional instructions they receive via either email or SMS text message.
From the Contact List & Details section:
-
Click Finish PHR Registration if it appears for the contact person.

The Choose Personal Health Record Registration Method window appears - Click either:
- Register with Smartphone
- Send Email Invitation

-
Instruct the contact person to follow the additional instructions they receive via either email or SMS text message.
The following images are examples of the messages that your patients and their contact people receive when registering an account via email or text message for PHR access:
-
Email
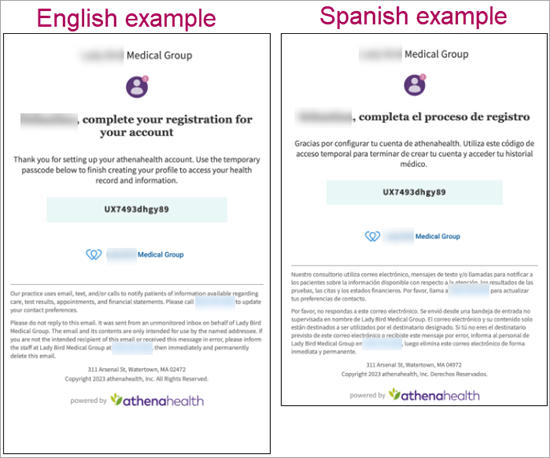
-
SMS text message

From the Contact List & Details section:
-
Click More actions.
-
Click Send password reset email.

-
Notice a green check mark appear with a message telling you the password reset email was sent.
-
Instruct that patient or contact person to follow the additional instructions in the email they receive.
Examples of password reset related emails sent to patients:
-
Password reset requested
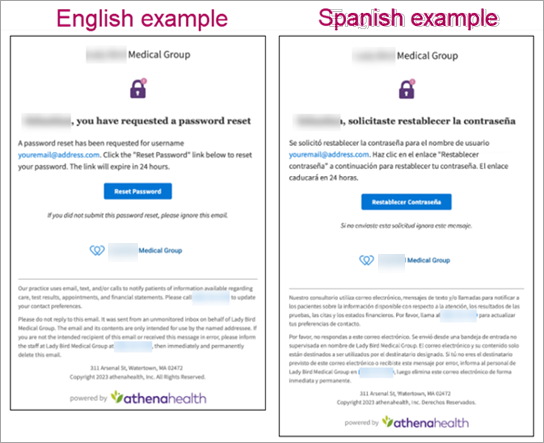
-
Password updated successfully
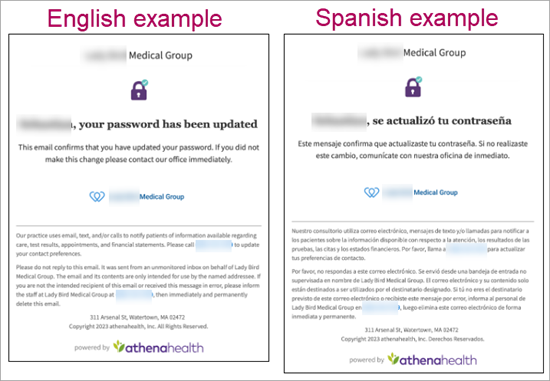
Note: This section only applies to practices with athenaCommunicator and multiple brands with at least one brand that has the Patient Portal or PIC disabled.
-
In the Quickview or Check-in page, scroll down to Contact List & Details section.
-
On the patient or contact person row, select "More actions".
-
Select "Manage Portal Access".
Alternatively:
-
In the Quickview or Check-in page, select "Manage Privacy" in the Privacy section.
-
In Communicator Privacy Status section, select "view portal access".
-
On the Patient Actions Bar, click Registration, and then click "Privacy Information".
-
In Communicator Privacy Status section, select "view portal access".
When viewing the Manage Portal Access/View Portal access page for a patient who is also registered in a provider group belonging to a brand with Patient Portal or PIC disabled, you will see a banner message informing that this page is specifically for athena's Patient Portal account management only. PHR access should be managed separately on the QuickView contact section, as outlined in the rest of this document.
The Quickview links for patient copies in different provider groups are displayed for easy access.

The following image is a closer look at the message that appears.
To display this page, in the top banner, select Settings icon, click Communicator. In the Practice Links navigation on the left-hand side, under Patient Portal, select Portal Accounts.
A banner appears with a message informing you that this page is specifically for athenahealth's Patient Portal account management only. PHR access should be managed separately on the Quickview contact section for the brand with the Patient Portal or PIC turned off.
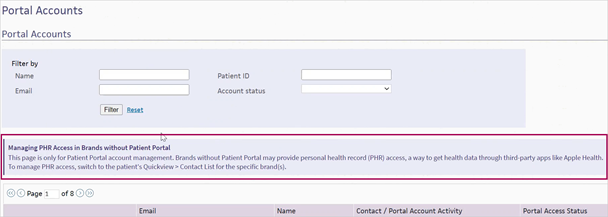
The following image is a closer look at the message that appears.
APIs are affected. See the API release note in the Developer Portal for more information
Note: Contact people created in the Contact List section of Quickview and Check-in can be retrieved via FHIR R4 RelatedPerson API. See the 25.7 Release: New FHIR R4 RelatedPerson API release note for more information.
You can now use an improved Contact List section on Quickview and Check-in where you can more easily view and manage the names and contact information of all Patient Portal users who have access to the patient record.
We're ensuring you maintain the ability to register the patient for Patient Portal or Patient Information Center (PIC) with this new experience.

In addition, you can now add and manage contact people for a patient with or without Patient Portal or PIC access.
To access the new section on the Quickview and Check-in pages, scroll down the page to the Contact List & People with Portal Access section.
Note: All driver’s license related fields and the Patient Photo field are now in their own Driver's License & Patient Photo section next to the Emergency Contact section.
The Office of National Coordinator for Health Information Technology (ONC) published their latest rule (HTI-1) in Jan 2024. As part of certification requirements listed in this rule, certified EHR developers need to build, certify and deploy support for United States Core Data for Interoperability (USCDI) version 3 by EOY 2025. USCDIv3 requires support of RelatedPerson FHIR resource.
In our implementation, we will use the Contact List as a data source for RelatedPerson API. Thus, it is mandatory for us to support the Contact List in all athena products and ensure all users have a way to create and update contacts, which enables data exchange for RelatedPerson via API.
Note: While athenahealth is required to provide you a means of capturing contact people this information in the EHR interface, you are not required to use the Contact List to create and manage contact people of the patient. This workflow is optional for your practice.
We moved license information and patient photo to a new section under the Contact List called Driver's License & Patient Photo.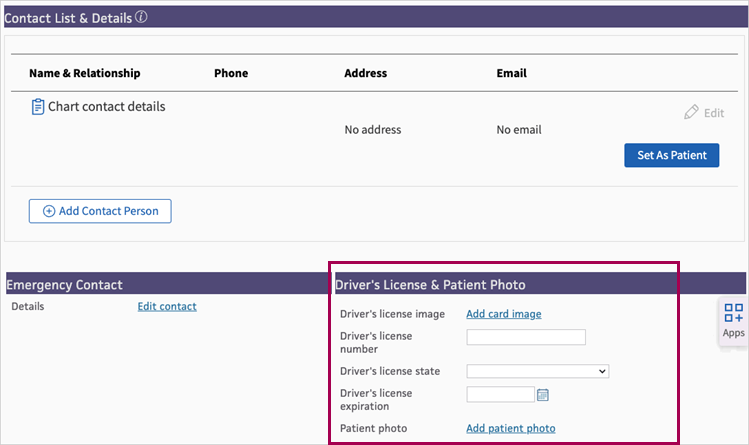
In the at-a-glance view, you can quickly, clearly, and easily see the following patient information:
-
Name
-
Relationship (to the patient)
-
Phone, including:
-
Mobile (cell phone)
-
Home
-
Work
-
-
Address
-
Email
-
Portal Status

Buttons available in the at-a-glance view include:
-
Print Portal URL
-
Edit (if the information is identified as the patient or their contact person)
-
Set as Patient/Register for the Portal (if the heading name listed is Chart contact details, meaning the information is not set as belonging to the patient ).
-
Add Contact With/Without Portal Access
-
Copy (when you hover over the phone number or email)

If the patient is the primary contact person, the patient info is on the topmost row. If the information is not set as the patient, the topmost row is labeled as Chart Contact Details. This means we do not know who the contact details belong to until you can set those to belong to the patient.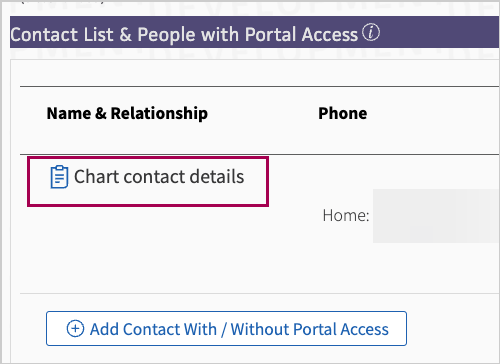
From the Contact List:
-
Click Add Contact With / Without Portal Access. The Add Contact window appears.
- If the contact you want to add:
- Can provide an email, enter it in the Email field.
- Cannot provide an email, check the No email box.
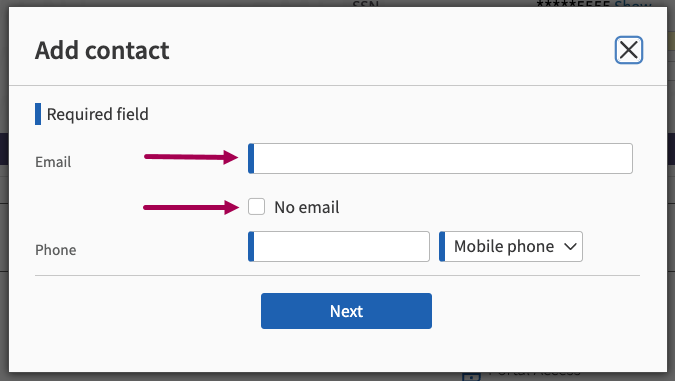
-
Phone — Enter a phone number and select the type of phone from the list of options, it can be Mobile, Home, or Work (this is required to proceed to the next step).
-
Click Next.
-
When an email:
-
Is not available, fill out the information for the contact person. Required fields are marked with a blue indicator on the left side of the field.
-
Contact person is the patient's: the relationship of the contact to the patient
-
First name
-
Last name
-
Phone number
-
Click Save Contact Without Portal Access
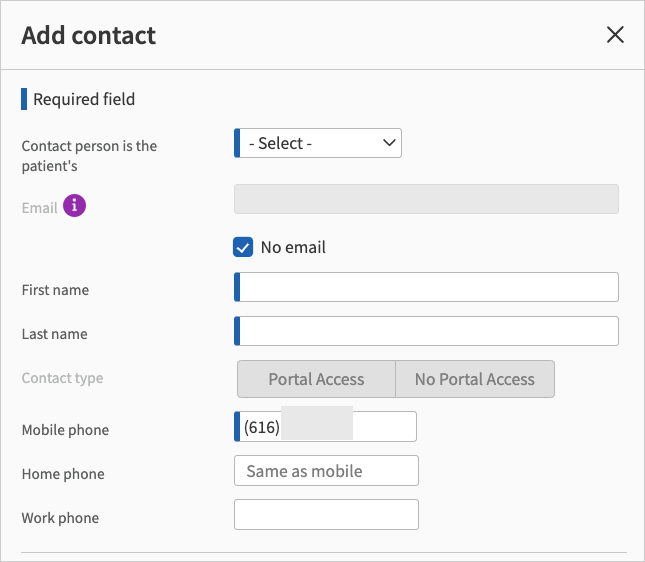
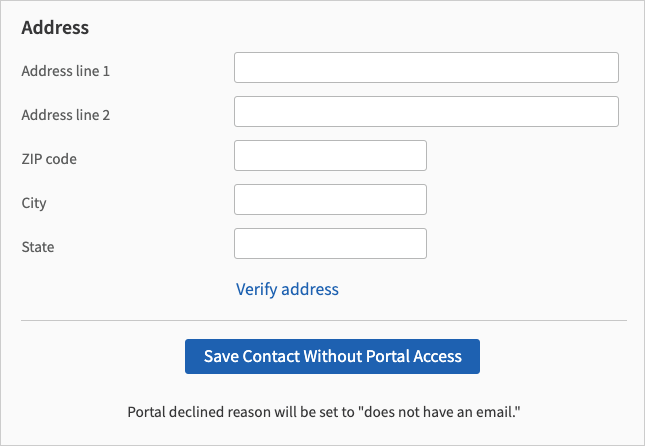
-
-
Is available, fill out the information for the contact person. Required fields are marked with a blue indicator on the left side of the field.
-
Contact person is the patient's: the relationship of the contact to the patient
-
Email
-
First name
-
Last name
-
Contact type: This is where you can grant Patient Portal (or PIC) access.
-
Portal & messaging access level: Choose Full or Billing only access.
-
Phone number
-
Click Save contact & Go to portal registration (you can also click Save & Close to grant Patient Portal access later).
-
Once you click Save contact & Go to portal registration, you must choose a method for Patient Portal registration.
Note: See Choose a method to send Patient Portal registration email for more information.
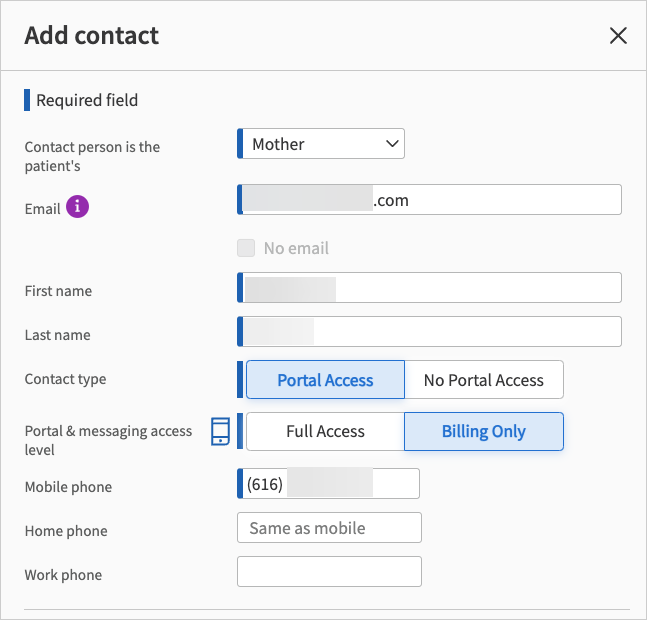
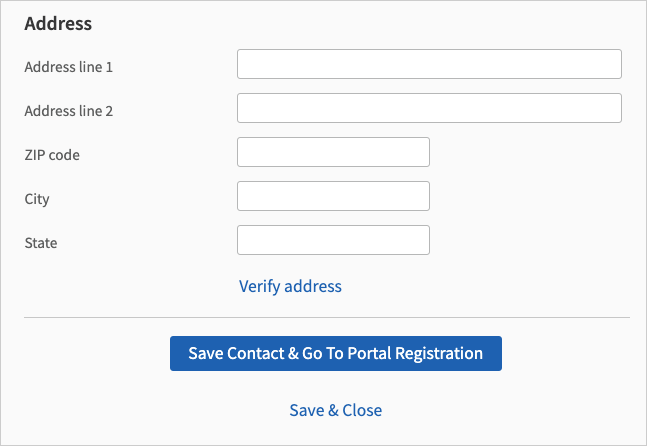
-
-
-
View the new contact person row in the Contact List under the patient row.
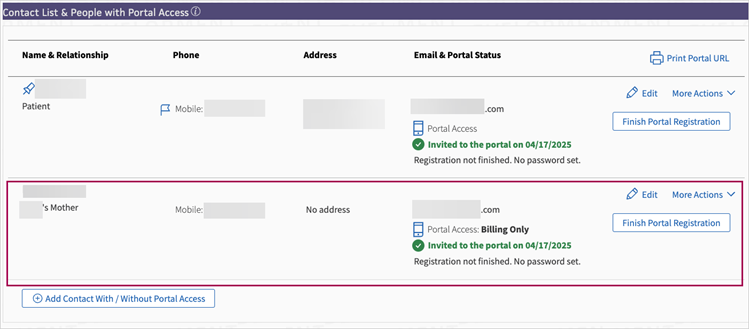
Note: The patient information was initially captured in a different EHR and later imported into athenaOne via inbound demographic interfaces. Contacts created in athenaOne are not automatically synced to your other EHR.
When you click Set As Patient / Register for the Portal, a window appears with existing contact information that was previously collected on the patient record. 
You can update anything that is missing and click Update Primary Contact & Go To Portal Registration to grant Patient Portal access.
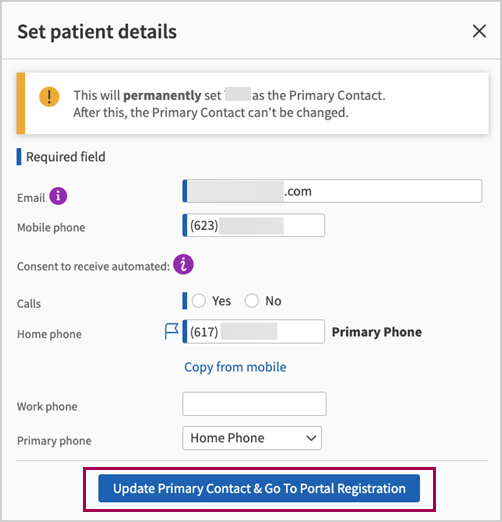
Note: To register a patient for the Patient Portal, you must enter an email and a phone number (home, mobile or work). This information is required because athenaOne needs it to send the Patient Portal invitation and lets the patient enable multi-factor authentication when logging in.
If there is no mobile phone, the Edit button is inaccessible.
You can click Set As Patient / Register for the Portal to add a mobile number and other contact information.
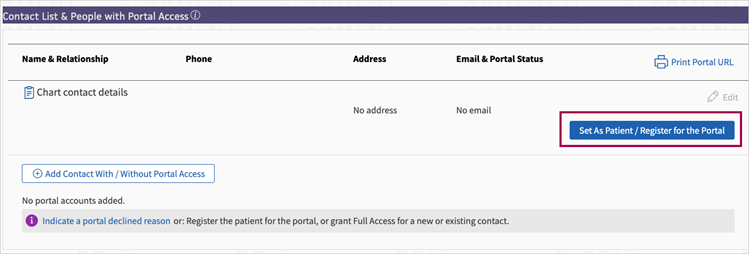
Once there's a mobile number, you can click Edit.
When you click Edit, only these fields are accessible in the Edit window:
-
Phone fields: view only
-
Consent to receive automated field and the option to update Consent to Calls
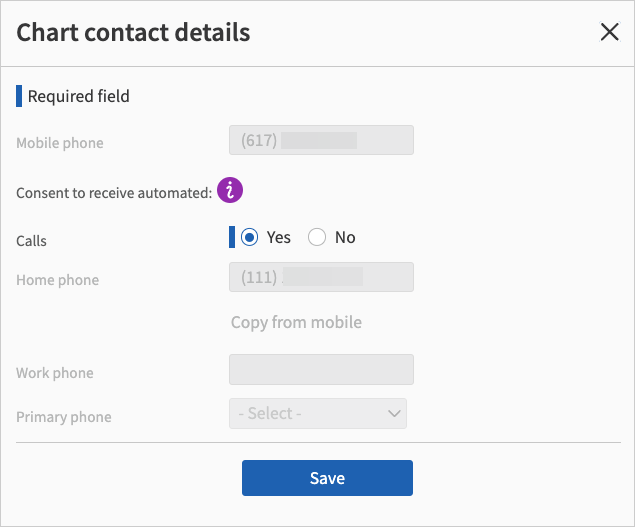
For an existing patient row with an email (that is not labeled Chart Contact Detail), you can click Edit or Register for the Portal to grant Patient Portal access.
Once you click Update Primary Contact & Go To Portal Registration, you must choose a method for Patient Portal registration.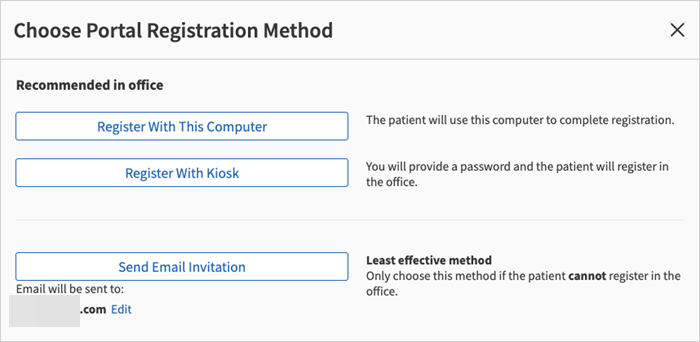
If patient completes portal registration but then forgets their password, you can send a password reset email.
-
Click More actions.

-
Click Send Password Reset Email.
To remove portal access for a patient or their contact person:
-
From the Contact List's at a glance view, click More actions (in either a patient or contact person's row).
-
Click Manage Portal Access. The Portal Accounts page appears.
-
Click Delete portal account at the top of the Edit Portal Account section. This removes the portal account of the patient or contact person you selected.
If you click Edit on the patient row after granting Patient Portal access, all fields except for Consent to Calls are inaccessible.
The following image shows how only Consent to Calls option is accessible. 
You can an indicate a portal declined reason if the patient or contact person does not want to register for the patient portal.
-
Click Indicate a portal declined reason.
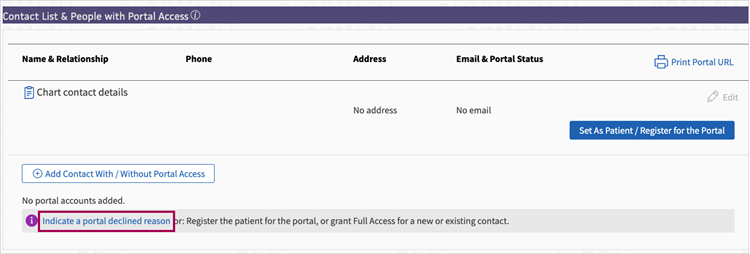
-
Reason — Choose a reason.
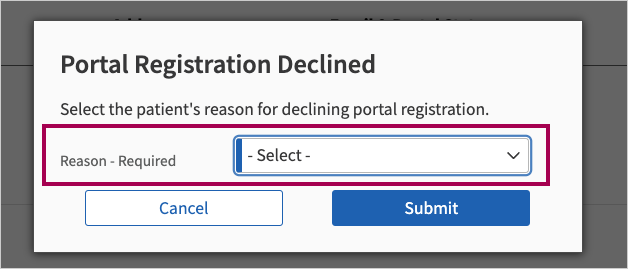
-
Once, you choose a reason, click Submit to enter the portal declined reason.
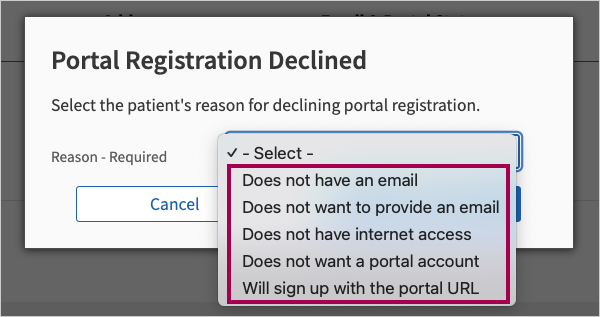
If the email is a duplicate of another patient's and you're trying to assign Patient Portal access, a matching email warning appears with the Add as a Contact Who is Not the Patient button.
You can also get the same warning while assigning Chart Contact Details as the patient if the email is already used by another patient in the practice to get portal access.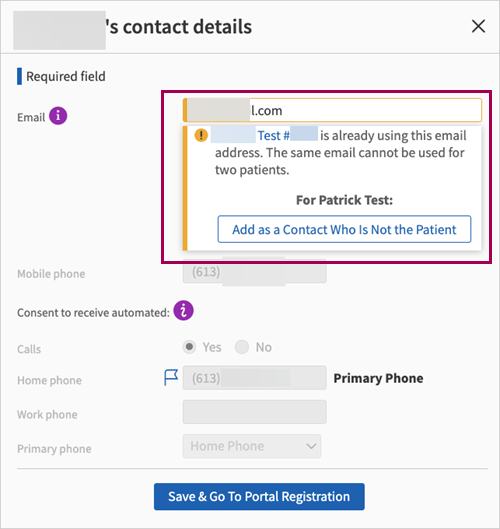
After you click Add a contact who is not the patient, the Add Contact window appears.:
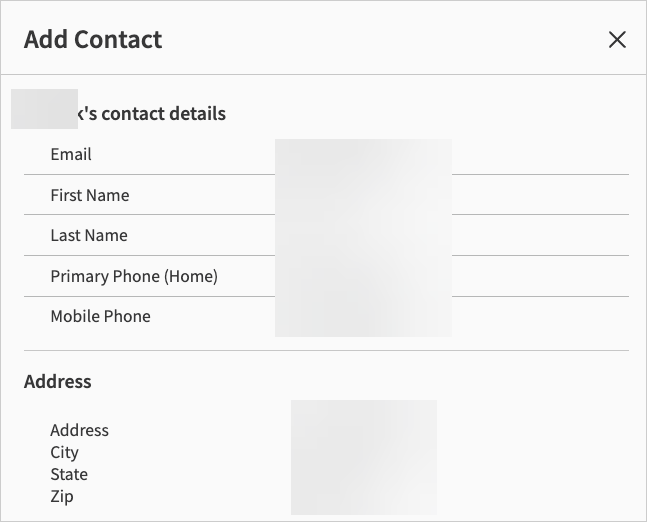
Click Add Contact & Grant Portal Access to finish adding the contact person to the patient record being edited.
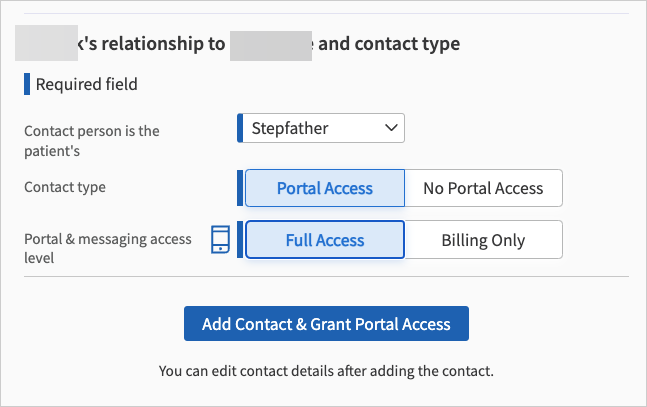
Once Add Contact & Grant Portal Access, the contact person (that is another patient at the practice with a unique email address) appears as a contact person row on the Contact list under the patient row. Their relationship to the patient is displayed under their name, for example "Stepfather".
When setting Chart Contact Details as the patient while using an email from another contact person of an existing patient in the practice, a matching email warning appears with the following options:
-
Add as a Contact Who is Not the Patient — Adds the existing contact as a contact on the Contact List of the patient being edited.
-
Confirm As The Patient — Confirm the contact is indeed the patient.
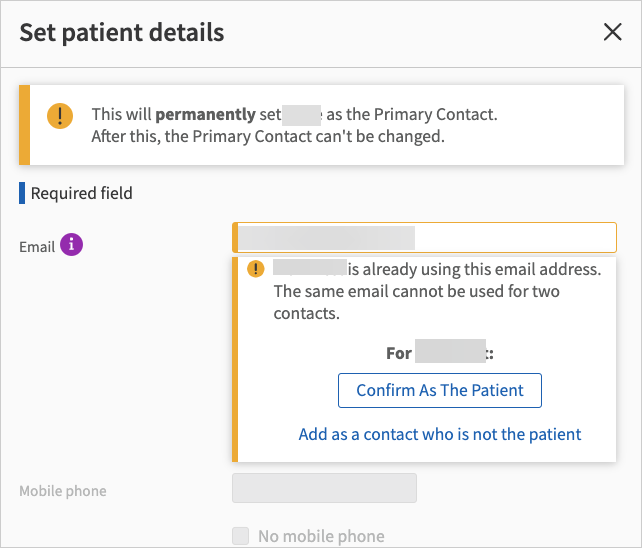
If you choose Add as a Contact Who is Not the Patient you're asked to review the information and click Confirm & Continue.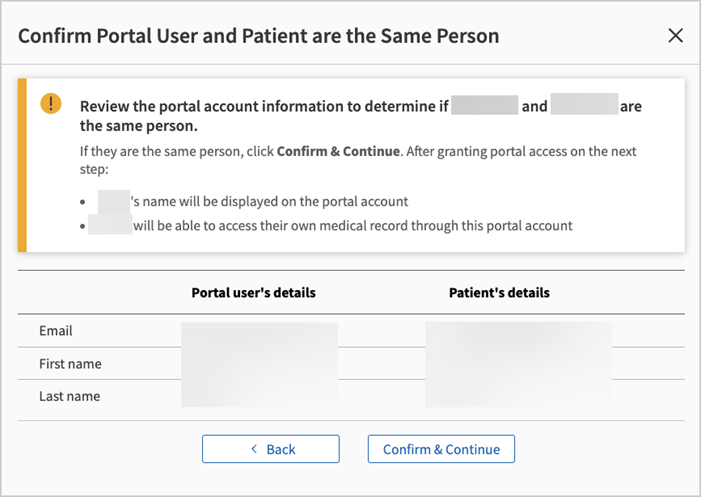
APIs are affected. See the API release note in the Developer Portal for more information
Note: Contact people created in the Contact List section of Quickview and Check-in can be retrieved via FHIR R4 RelatedPerson API. See the 25.7 Release: New FHIR R4 RelatedPerson API release note for more information.
You can now use the improved Contact List section on Quickview and Check-in, an enhanced experience that lets you easily view patient contact information.

New features available in the Contact List include:
- Add contact people for a patient with clearly identified contact information.
- Grant or remove access in Quickview and during Check-in to allow both the patient and their contact people to view health information in Personal Health Record (PHR) apps.
To access the new section on the Quickview and Check-in pages, scroll down the page to the Contact List & Details section.
Note: License information was moved to its own section (Driver's License and Patient Photo).
The Office of National Coordinator for Health Information Technology (ONC) published their latest rule (HTI-1) in Jan 2024. As part of certification requirements listed in this rule, certified EHR developers need to build, certify and deploy support for United States Core Data for Interoperability (USCDI) version 3 by EOY 2025. USCDIv3 requires support of RelatedPerson FHIR resource.
In our implementation, we will use the Contact List as a data source for RelatedPerson API. Thus, it is mandatory for us to support the Contact List in all athena products and ensure all users have a way to create and update contacts, which enables data exchange for RelatedPerson via API.
Note: While athenahealth is required to provide you a means of capturing contact people in the EHR interface, you are not required to use the Contact List to create and manage contact people of the patient. This workflow is optional for your practice.
Patients can use any Personal Health Record (PHR) apps of their choice to access their electronic health information (EHI). The only way the PHR app will get access to patient data from your practice is if that patient downloads the app and authorizes use of their EHI.
For more information on how patients would use PHR apps, you can refer to the ONC's Guide for Patients. You can also view these apps on the athenahealth Marketplace (listed with “Personal Health Record (PHR)” capability)
If your practice has athenaClinicals but no Patient Portal or PIC, or has the Patient Portal or PIC turned off, as part of this feature, we will allow you to enable PHR access for the patient and their contact people. Once enabled, the patient (or the contact people) can create a log in which they can then use in the PHR app to authorize the app access to their health records.
We moved license information and patient photo to a new section under the Contact List called Driver's License & Patient Photo.
In the at-a-glance view, you can quickly, clearly, and easily see the following patient information:
-
Name
-
Relationship (to the patient)
-
Phone, including:
-
Mobile (cell phone)
-
Home
-
Work
-
-
Address
-
Email
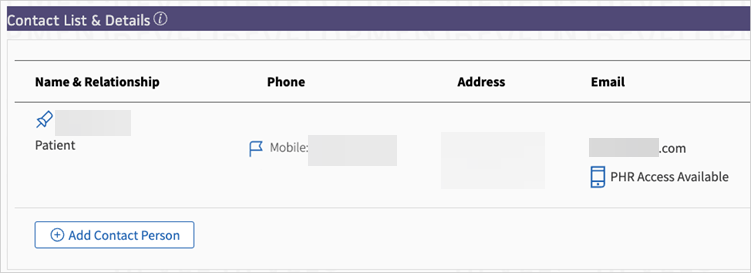
Buttons available in the at-a-glance view include:
-
Copy button for email and phone number
-
Set as Patient button
-
Edit button (only enabled when there is a mobile phone )

Note: PHR access status (if granted) displays under the email.
If the patient is the primary contact person, the patient info is on the topmost row. If the information on the chart has not been set as the patient, the topmost row is labeled as Chart Contact Details. This means we do not know who the contact details belong to until you can set those to belong to the patient.
From the Contact List:
-
Click Add Contact Person. The Add Contact window appears.

- If the contact you want to add:
- Can provide an email, enter it in the Email field.
Cannot provide an email, check the No email box.
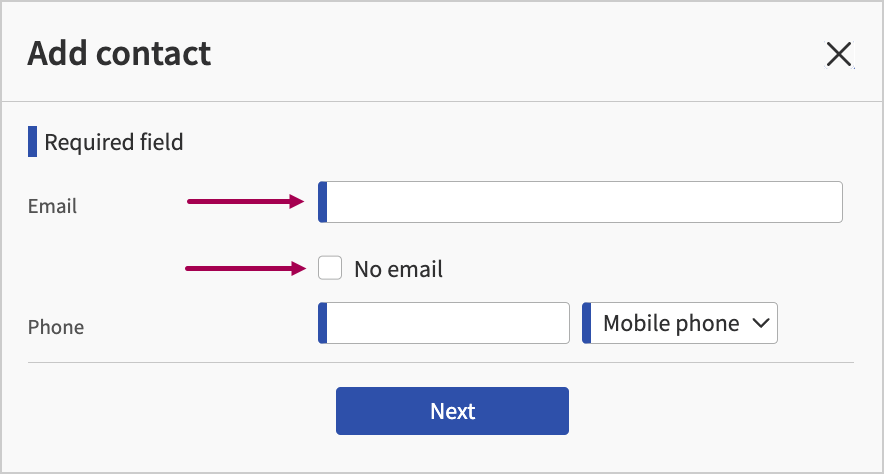
Note: An email is needed for PHR registration.
-
Phone — Enter a phone number and select the type of phone from the list of options, it can be Mobile, Home, or Work (this is required to proceed to the next step). Mobile phone is the default selection.
-
Click Next.
-
When an email:
-
Is not available, fill out the information for the contact person. Required fields are marked with a blue indicator on the left side of the field.
-
Contact person is the patient's: the relationship of the contact to the patient
-
First name
-
Last name
-
Phone number
-
Click Save Contact Without PHR Access
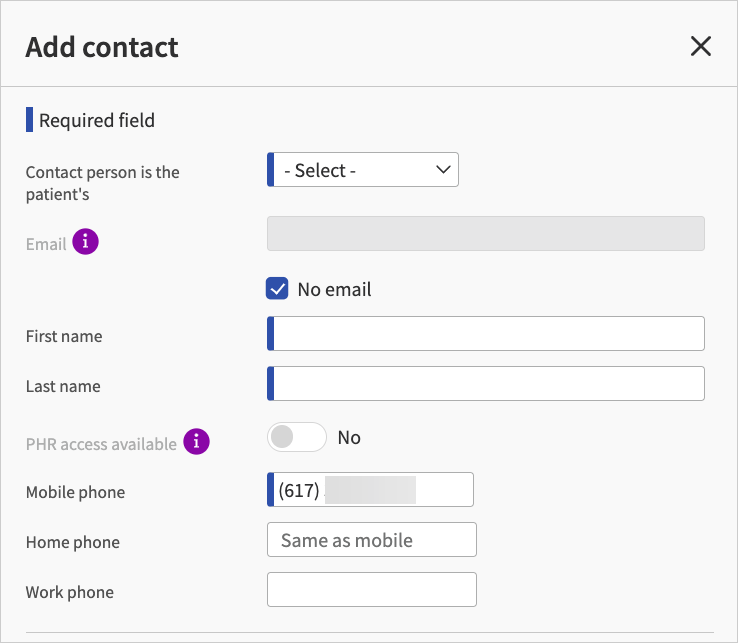
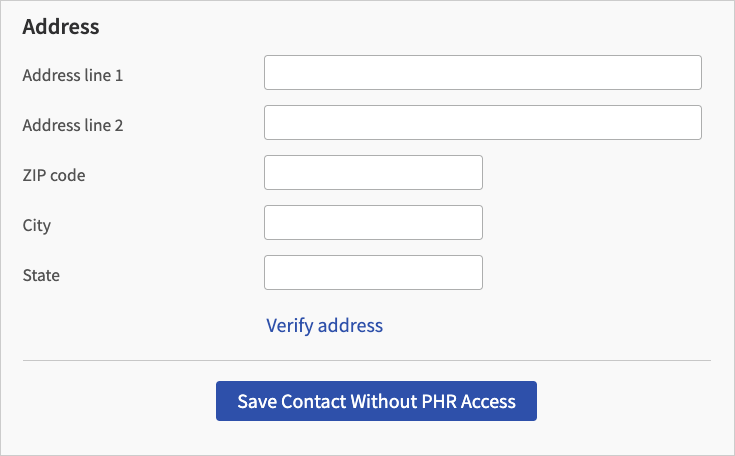
-
-
Is available, fill out the information for the contact person. Required fields are marked with a blue indicator on the left side of the field.
-
Contact person is the patient's: the relationship of the contact to the patient
-
Email
-
First name
-
Last name
-
PHR access available: toggle to the right to enable PHR access for the contact
-
Phone number
- Depending on whether you set PHR access available as:
- No:
- Click Save contact Without PHR Acess.
- If you need to grant PHR access at a later time, you can edit the contact person details from at-a-glance view to access the PHR toggle.
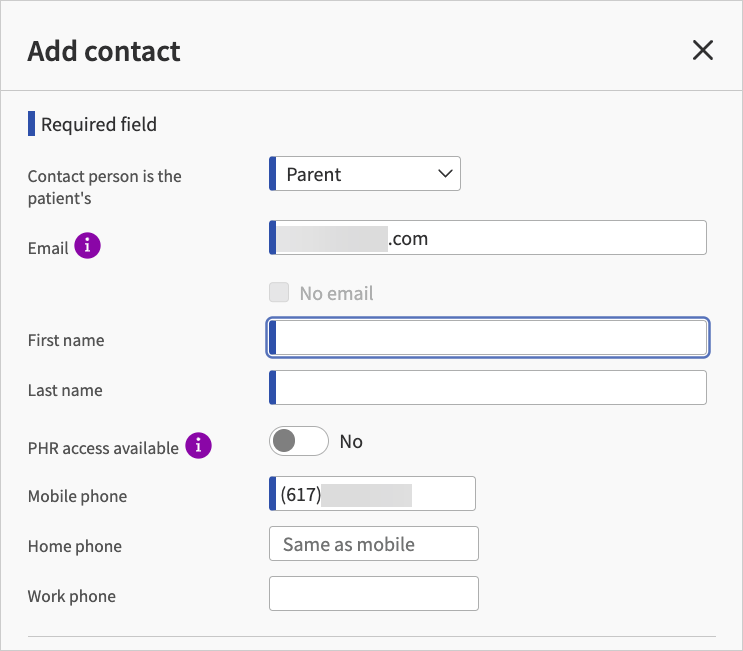
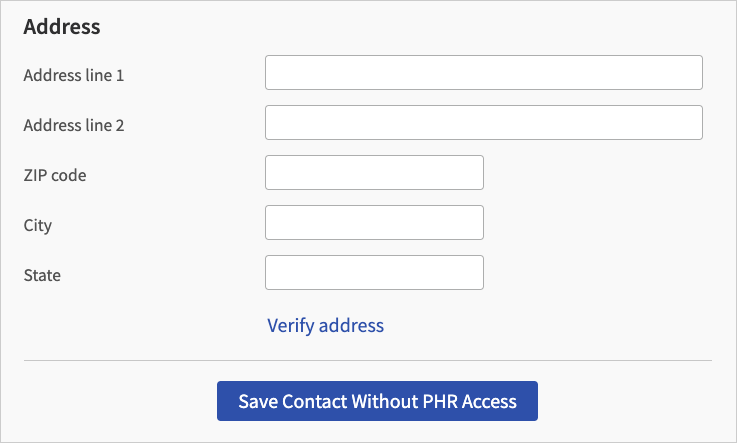
- Yes:
- Click Save contact & Register for Personal Health Record.
- Once you click Save contact & Register for Personal Health Record, you must choose a method for PHR registration.
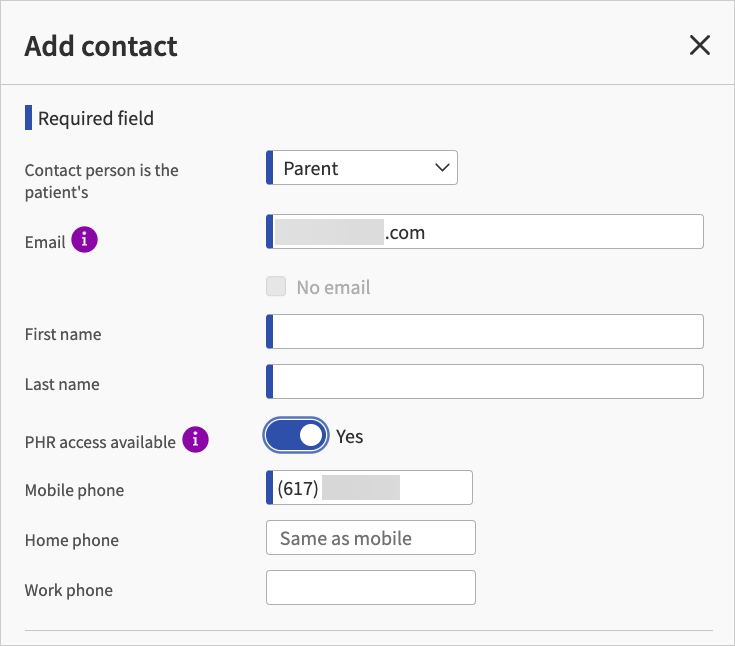
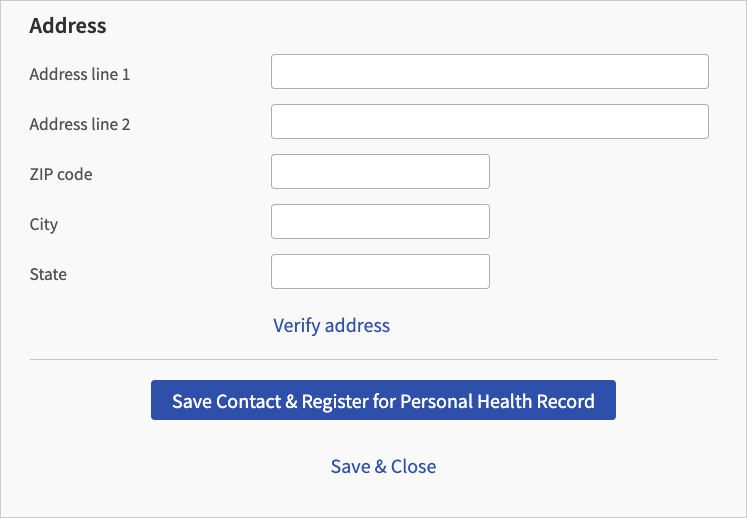
- No:
-
-
-
View the new contact person row in the Contact List under the patient row.
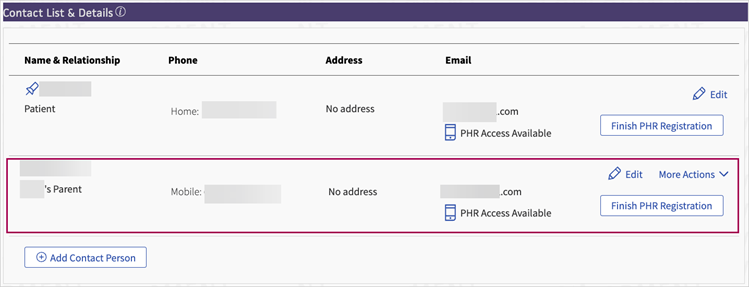
Tip: If you need to resend the PHR registration invitation, click Finish PHR Registration.
Note: Contact people created in athena will not be auto-synced to your other EHR, where the patient information was originally captured and later imported to athena via inbound demographic interfaces.
If there is no mobile phone, the Edit button is inaccessible.
Once there's a mobile number, you can click Edit.
When you click Edit, only these fields are accessible in the Edit window:
-
Phone fields: view only
-
Consent to receive automated field and the option to update Consent toCalls
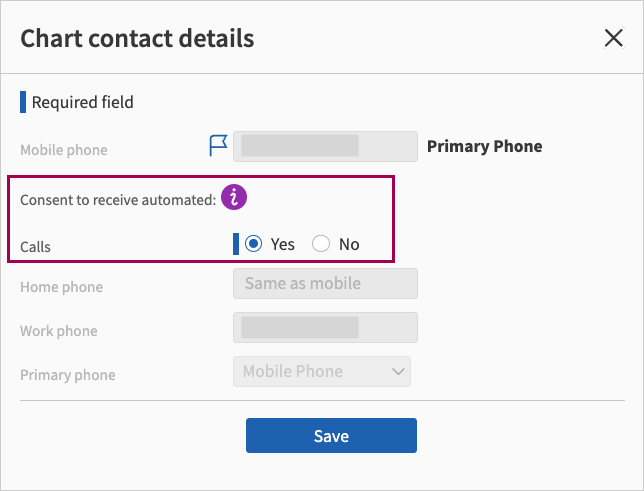
You can click Set As Patient to indicate the contact details on the Chart contact details row belong to the patient. This also sets the patient as their primary contact in the Contact List.
When you click Set As Patient, a window appears with existing contact information that was previously collected on the patient record. 
You can update anything that is missing and click Update Primary Contact.
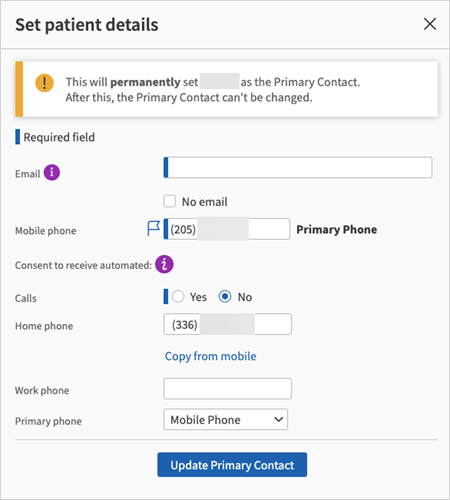
Note: To register a patient for the PHR, you must enter an email and a phone number (home, mobile or work).
If the patient has an email, you can assign them PHR access by setting PHR available field to:
-
Yes — Click Update Primary Contact & Register for Personal Health Record or Update Primary Contact.
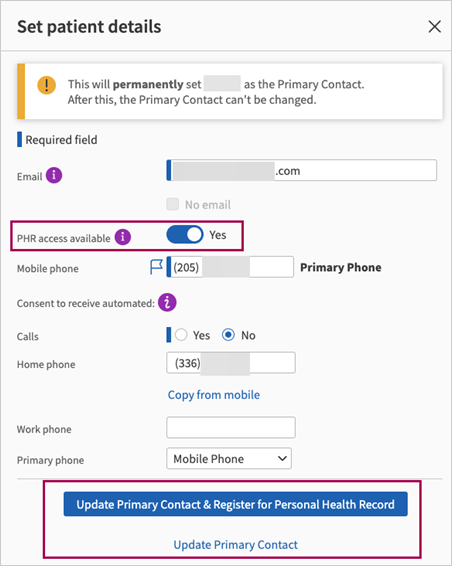
-
If you clicked Update Primary Contact, you can click Finish PHR Registration in the Contact List later. You must choose a method for PHR registration.

-
-
No — Click Update Primary Contact to proceed.
Once you click Update Primary Contact & Register for Personal Health Record, you must choose a method for PHR registration.
If you click Edit on the patient row after granting PHR access, all fields are inaccessible except for the:
-
Email
-
PHR access available
-
Consent to Call
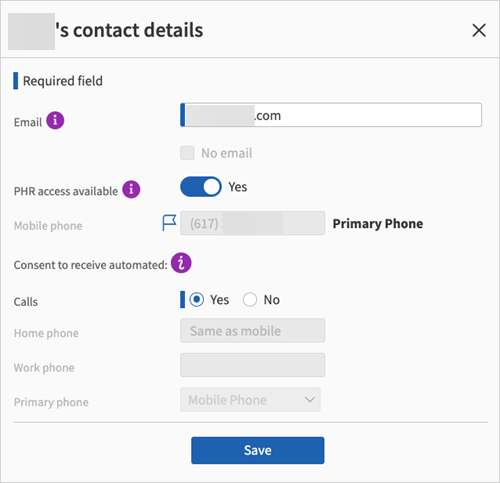
If you go to change the email after PHR access is granted, you're warned that PHR access for the patient will be removed because it was granted to the previous email.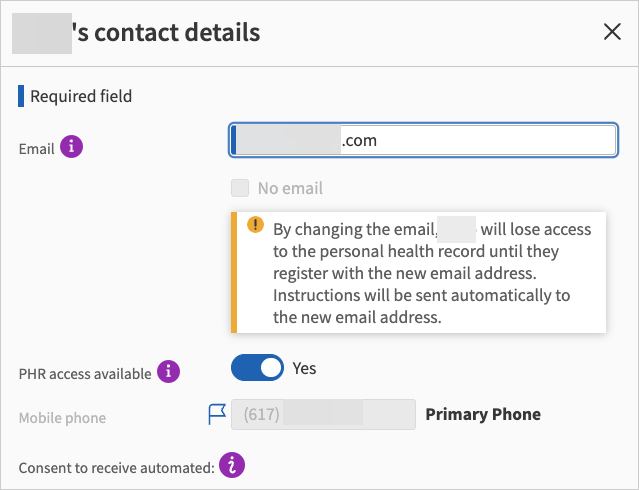
To remove PHR access, you can change the PHR access available field to No. The button in the Edit screen changes from Save to Save & Remove PHR Access.
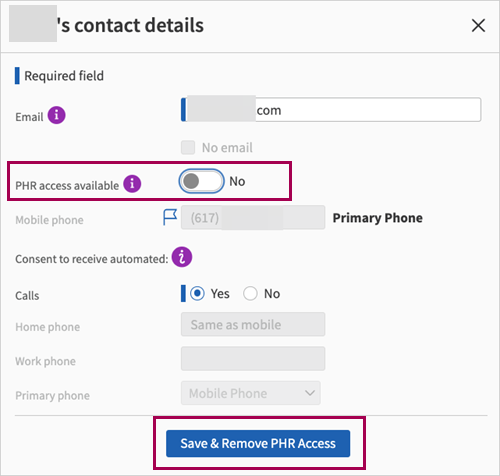
If PHR access wasn't granted when setting the Chart Contact Details as the patient, you can click Edit to grant PHR access.

While setting Chart Contact Details as the patient and using an email from another contact of an existing patient in the practice, a matching email warning appears with options to:
-
Add as a Contact Who is Not the Patient — Adds the existing contact as a contact person on the patient record being edited.
-
Confirm As The Patient — Confirms the contact is in fact the patient you're editing.
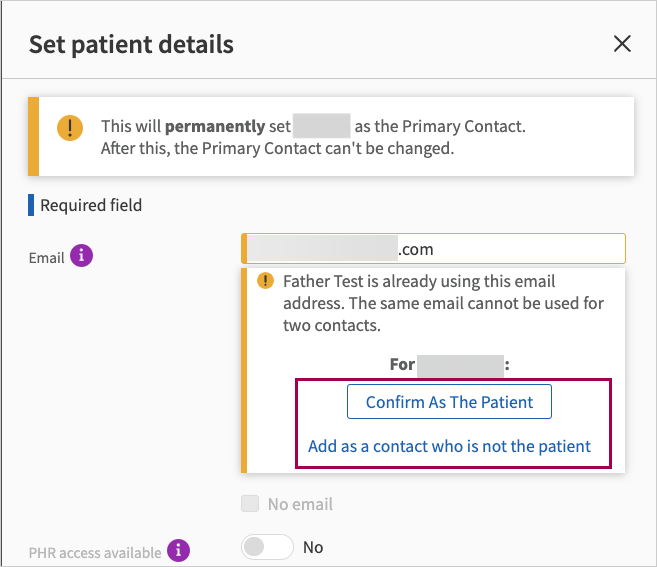
After clicking
-
Confirm As The Patient, review the information and click Confirm & Continue.
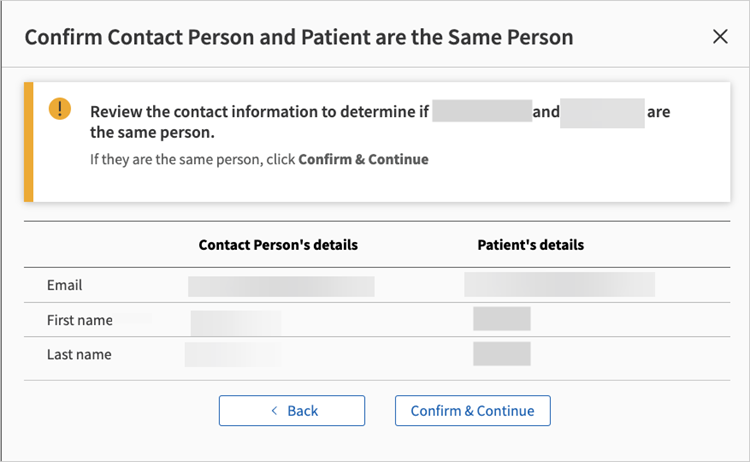
-
Confirm & Continue, any information changed for the patient gets saved for the contact person.
Some patient records may have invalid or unreachable mobile phone numbers, which reduces the effectiveness of automated messaging communications.
These mobile numbers are not usable in the following scenarios:
-
Mobile phone numbers that are no longer effective with any mobile networks or unable to receive text messaging.
-
Invalid format in the Mobile phone field that renders them unusable for automated messaging.
-
Landline numbers in the Mobile phone field, which get sent (but do not receive) automated messaging.
To improve the accuracy and data hygiene of mobile phone numbers, we're introducing the following functionality:
-
Real-time automated messaging validation — athenaOne partners with phone validation vendors to determine in real-time if a mobile number can receive automated text messages. This applies to:
-
Existing mobile numbers
-
New mobile numbers (for example, after staff enters a new number on the add or edit contact window)
Important: We do not message the patient to ask them to verify the status of their mobile phone numbers. All notifications shown are based on data provided by our phone validation vendors.
-
-
Format validation — All mobile numbers, except international, need to have a 10 digit format. No alphanumeric characters are allowed.
-
Consistency of mobile phone management across various pages and workflows:
-
Capture of mobile phone will be required on Patient Registration, Quickview, and Check-in.
-
International phone numbers can be recorded on the Quickview and Check-in pages, in addition to the Patient Registration page (which already supported these numbers).
-
With this feature, you'll see the following changes:
-
Practice staff will see alerts about the validity and text delivery status of mobile phone numbers.
-
Using this information, practice staff can then have conversations with patients and the primary contacts to verify and update the mobile phone number. You can now better ensure that mobile phone numbers on file are valid and usable for patient outreach.
Note:
-
The alerts appear in the Phone field on the Patient Registration page and the Contact List section of the Quickview and Check-in pages.
-
The alerts appear on the Mobile Phone field of the patient, Chart Contact Details, and Primary contact.
If your practice tests features and trains your staff in support environments, you can test this feature with these numbers:
-
Valid "test" mobile numbers: 201-201-5544, 201-201-5053, 201-201-4041
-
Invalid format "test" mobile number: 201-201-6182
-
Unable to receive SMS "test" mobile number: 983-758-3455, 984-502-7828, 345-435-3452
Mobile phone is now a required field on the following pages:
-
Patient Registration (sometimes referred to as Full Registration)
-
Quickview
-
Check-in
We are making this requirement to prompt more collection of mobile phone numbers (if available). This will help you notify patients in a timely manner about various actions that are important for patient care and have revenue impact to your practice.
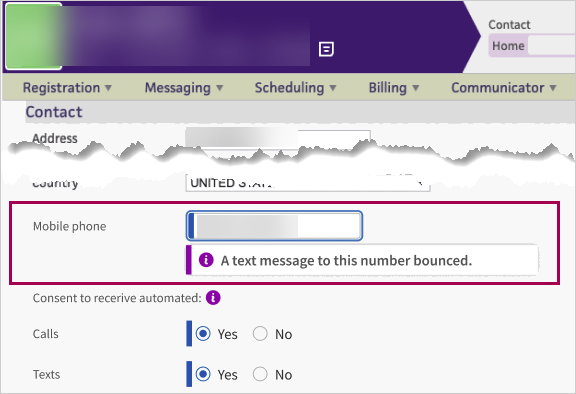
Important: Mobile phone cannot be made a non-required field. If the patient (or their primary contact) does not want to provide a mobile number, check the No mobile phone box to proceed.
Mobile phone is a required field, it cannot be made a non-required field.
However, if the patient (or their primary contact) does not have a mobile number or does not want to provide a mobile number, check the No mobile phone box to confirm there is no mobile phone for the patient (or contact person).
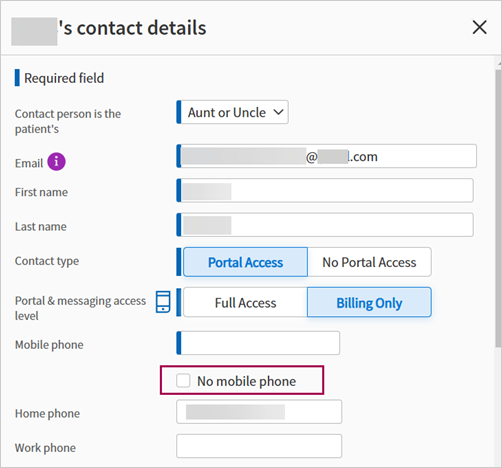
After you check the No mobile phone box, the:
-
Mobile phone field grays-out and becomes inaccessible.
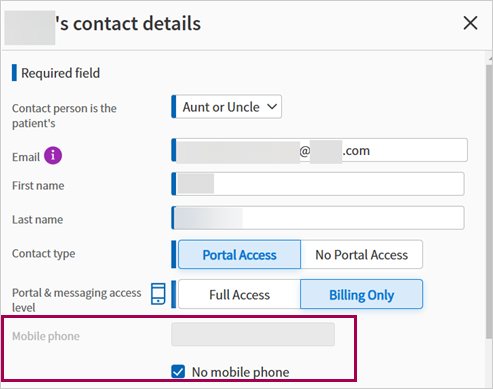
-
Primary phone becomes the Home phone, enter a home phone number to proceed.
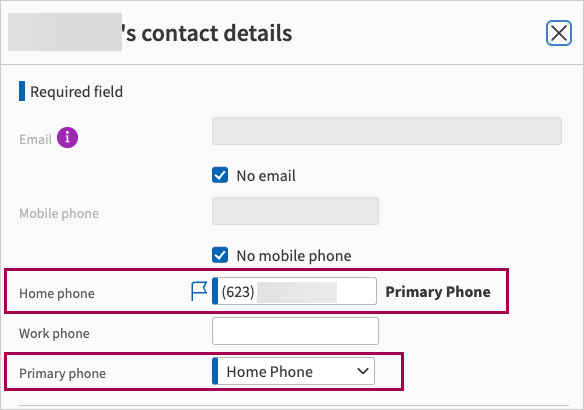
For patient records with a mobile phone number that recently failed automated text, athenaOne shows you that a text message sent to the mobile number bounced (meaning it wasn't successfully delivered). When you're shown that a text message bounced, ask the patient to provide a different mobile phone number.
The following images are examples of a bounced text message alert in the:
-
Main view of the Contact List.
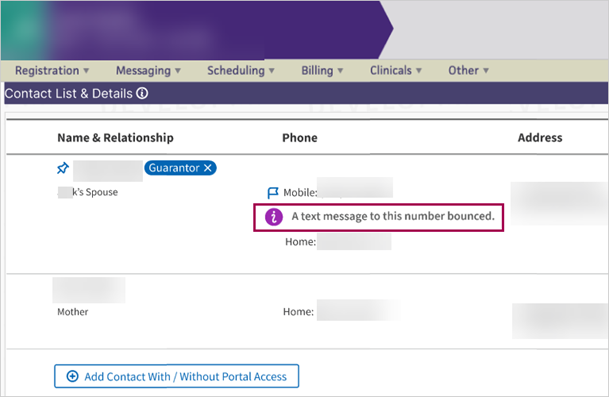
-
Edit window of a contact.
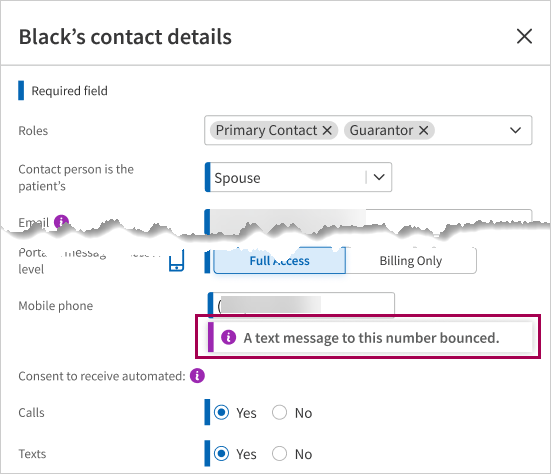
When the patient's mobile number has missing consents or when you enter a completely new mobile number on the patient record, athenaOne searches in its database to determine if it has:
-
Any existing information on this number
-
Its text delivery status
-
Its validity (e.g., whether it is a US-based mobile number)
You will see different variations of the notifications depending on validation results. Here is an image example of:
-
The number already being used by another patient in athenaOne and a text failing to send.
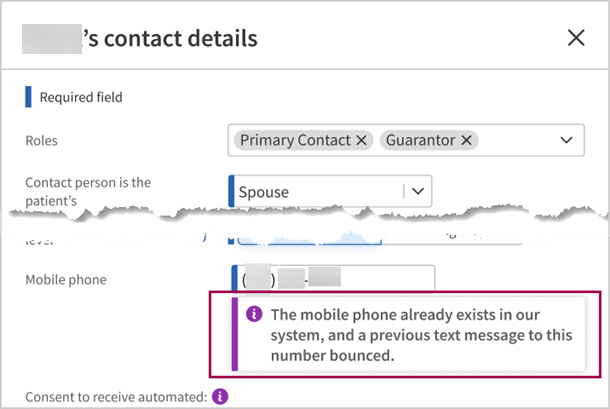
-
athenaOne recognizing that a mobile number cannot receive text messages.
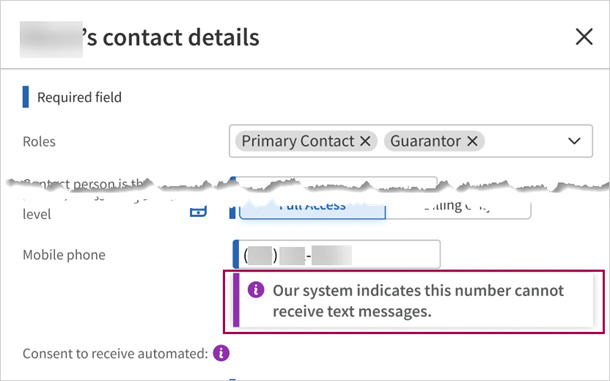
You will see notifications on invalid format when the mobile number has the following issues:
-
Alphanumeric characters

-
Over 10 digits

-
Repetition indicating an invalid number or typo

Important:
-
You are prevented from completing new patient registration or checking in a patient until they have a valid mobile number format.
-
For new patient registration, if the patient (or their primary contact) does not have a mobile number or want to provide a mobile number, check the No mobile phone box to proceed. Once you check this box, the Primary phone field will be changed to Home phone.
-
If your practice has the Home phone field set as a required field, we will not validate the format.
-
We do this to ensure you have flexibility to enter what is needed to complete patient registration.
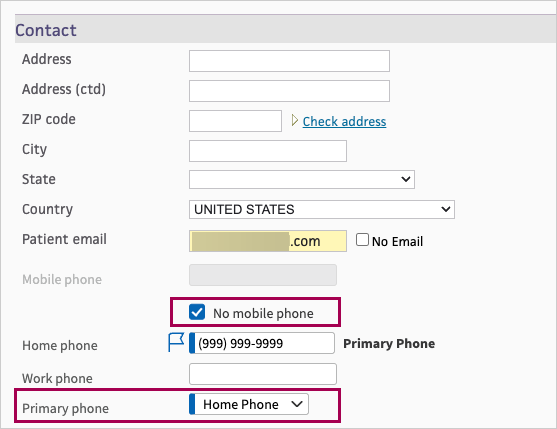
You can record an international phone number for the patient and their primary contact on Patient Registration, Quickview and Check-in pages.
Consents to call and consents to text will not be collected for international phone numbers as we do not have the capability to contact them.

Note: Custom fields are defined by your practice and, therefore, are not documented in the Field Reference. For more information, see Custom Fields.
| Provider group | Select a provider group from the drop-down menu. | ||||||||||||||||||||||||||||||||||||||||||||||||||||||||||||||||||
| Patient notes | Use this field to enter any notes about this patient. The notes that you enter here also appear in the Patient notes field on the Check-in and Patient Registration pages. You can enter up to 4000 characters. The field displays at least two lines of text and resizes itself based on your input; if it contains more than six lines of text, a scroll bar appears. | ||||||||||||||||||||||||||||||||||||||||||||||||||||||||||||||||||
|---|---|---|---|---|---|---|---|---|---|---|---|---|---|---|---|---|---|---|---|---|---|---|---|---|---|---|---|---|---|---|---|---|---|---|---|---|---|---|---|---|---|---|---|---|---|---|---|---|---|---|---|---|---|---|---|---|---|---|---|---|---|---|---|---|---|---|---|
| Currently admitted to |
Appears only if your practice has the Patient Rounding Lists practice setting enabled. Displays the department of admission if the patient has been admitted, and links to Edit admission, Discharge patient, and View admit history. Otherwise, displays "Not admitted." |
||||||||||||||||||||||||||||||||||||||||||||||||||||||||||||||||||
| Outstanding Balances | |||||||||||||||||||||||||||||||||||||||||||||||||||||||||||||||||||
| Total balances |
Total — Total account balance for the patient. Insurance — Outstanding insurance balance. Patient — Outstanding patient balance. Click any amount in the Total balances line to display the Billing Summary page filtered to show the specific claims that contribute to the balance you clicked. |
||||||||||||||||||||||||||||||||||||||||||||||||||||||||||||||||||
| Patient outstanding balance | Statement — The patient's outstanding balance. Debit amounts appear in red. Credit amounts appear in green. If the balance is over $100, the amount appears in red, with the message (LARGE PATIENT BALANCE).
If the patient has had balances written off to bad debt, the sum total appears in blue (Adjusted off to bad debt). This is visible only if you have the View Bad Debt Write-Off Amount permission (included in the Practice Superuser and Billing Admin roles).
If the patient has relevant balances, additional fields may appear:
Unapplied balance — The amount of non-payment plan and non-prepayment plan balances, calculated as: [non-payment plan and non-prepayment plan outstanding balances] – [non-payment plan and non-prepayment plan unapplied credits].
Payment plan — The balance outstanding for the payment cycle (same amount displayed in the Payment due field on the Update Payment Plan page).
Prepayment plan — The amount of prepayment plan balances, calculated as: [prepayment plan balance] — [prepayment plan payments]. |
||||||||||||||||||||||||||||||||||||||||||||||||||||||||||||||||||
| Card on File |
Card on File agreement information, with link to view the agreement details.
Appears if your practice uses the Card on File feature of Credit Card Plus. See Card on File for more information about this feature. |
||||||||||||||||||||||||||||||||||||||||||||||||||||||||||||||||||
| Claims in HOLD | This field is displayed if any claims for this patient are in HOLD status. The field provides a link to the relevant claims. | ||||||||||||||||||||||||||||||||||||||||||||||||||||||||||||||||||
| Family outstanding balance |
This field shows the combined outstanding balance for the patient's family. This field appears only if the patient has other family members registered in the practice, and if your practice has the Family Billing feature enabled. |
||||||||||||||||||||||||||||||||||||||||||||||||||||||||||||||||||
| Patient statements |
Click Show patient statements to view a list of available patient statements. The table shows the date that each statement was sent, the payment due date, the balance owed, the statement recipient, and the method by which the statement was sent to the recipient (paper or e-statement). To see a statement, click view (you can view more than one statement at once). If the patient has an outstanding balance, you see a link to View patient statement as it would be printed today.
Note: You cannot view statements sent before August 2013 (statements were not converted to PDF before this date).
Patients who receive e-statements If a patient has not paid a bill in full after receiving several e‑statements, athenahealth sends both a paper statement and a final electronic statement. The paper statement is sent for the final non-payment plan statement (dunning level 3) and the final payment plan statement (dunning level 7). In the Method column, e‑statement and Paper both appear, indicating that athenahealth sent both types of statements. (Patients continue to receive email notifications about new e‑statements.)
Note: Marking a patient as deceased or inactive does not prevent statements from going out. To prevent a statement from going out to a patient, the statement must be held. |
||||||||||||||||||||||||||||||||||||||||||||||||||||||||||||||||||
| Privacy |
|||||||||||||||||||||||||||||||||||||||||||||||||||||||||||||||||||
| In addition to the standard checkboxes for privacy and consent, you may also see checkboxes for other privacy and consent items that are state-specific, such as state immunization registries, or client-specific interfaces. Please contact your practice administrator for guidance on these items. | |||||||||||||||||||||||||||||||||||||||||||||||||||||||||||||||||||
| Notices on file |
The number of checkboxes that appear for this field depends on your practice settings and other athenahealth service options. Checked boxes indicate that the patient has received/signed the privacy form or notice. Note: If you select the Privacy Notice option in the Notices on file field, athenaOne automatically sets the Medication History Authority field to Yes (if you have not yet selected Yes or No for this field).
If the patient has any privacy notes and requests, they appear below the checkboxes. These items are administered using the Privacy Information page (click the Manage Privacy link to display this page). Note: If a patient turned 18 since her last visit, a message appears at the top of the Quickview and Check-in pages to inform you that the patient has turned 18 and may need to re-sign your HIPAA consent forms. |
||||||||||||||||||||||||||||||||||||||||||||||||||||||||||||||||||
| Health data sharing | This field lists the entities with which athenaOne shares information about this patient. | ||||||||||||||||||||||||||||||||||||||||||||||||||||||||||||||||||
| Patient Record Sharing |
If the patient consented to automatically share her medical records with other providers at connected care sites, this option is set to Yes (see "To enable patient record sharing").
For more information, see Patient Record Sharing. |
||||||||||||||||||||||||||||||||||||||||||||||||||||||||||||||||||
| CIIS Consent/CAIR Consent |
Appears if your practice uses an immunization registry interface with athenaClinicals.
If your immunization registry requires patient consent (an opt-in requirement), athenaClinicals will send immunization information only for those patients for whom you have selected Yes for CIIS Consent (CAIR for California).
If your immunization registry does not require consent (an opt-out requirement), athenaClinicals will send immunization information for all patients, except for those for whom you have selected No for CIIS Consent. In this situation, no selection is the same as a Yes selection.
Some registries have different consent requirements for children than adults, so you may see different options after a patient turns 19. Please consult your local registry to make sure that you understand the local requirements. |
||||||||||||||||||||||||||||||||||||||||||||||||||||||||||||||||||
| IMMTRAC Consent |
This option appears if you practice in Texas and you have an interface with the Texas Immunization Registry (ImmTrac2). Select Yes or No to indicate whether the patient (or parent) gives explicit consent to share immunization information with ImmTrac2. Important: The Texas Immunization Registry rejects a patient's vaccine information unless the patient explicitly consents for the practice or hospital to share the information with the registry. For more information, see Immunization Registry Interfaces. |
||||||||||||||||||||||||||||||||||||||||||||||||||||||||||||||||||
| Medication History Authority |
Appears if your practice uses athenaClinicals and allows medication history downloads to athenaOne. Select Yes or No to indicate whether the patient has signed a consent form allowing your practice to download his or her medication history from Surescripts. Note: If you select the Privacy Notice option in the Notices on file field, athenaOne automatically sets the Medication History Authority field to Yes (if you have not yet selected Yes or No for this field). See Medication History Download for more information. |
||||||||||||||||||||||||||||||||||||||||||||||||||||||||||||||||||
| Consent to call |
The Consent to call field helps you comply with the Telephone Consumer Protection Act. This field indicates whether you obtained "express consent" from the patient to receive automated calls from your practice to the patient's mobile phone. Automated calls include ReminderCall, GroupCall, ResultsCall, and Self-Pay calls. |
||||||||||||||||||||||||||||||||||||||||||||||||||||||||||||||||||
| Forms |
Privacy-related forms, when present, appear listed here. Privacy alerts, when present, appear below all other privacy information. |
||||||||||||||||||||||||||||||||||||||||||||||||||||||||||||||||||
| Privacy alerts | When present, privacy restriction alerts appear below all other privacy information. Approved privacy restriction alerts appear in red. | ||||||||||||||||||||||||||||||||||||||||||||||||||||||||||||||||||
| Identification/Provider | |||||||||||||||||||||||||||||||||||||||||||||||||||||||||||||||||||
| Legal last name |
The legal last name (surname) of the patient. |
||||||||||||||||||||||||||||||||||||||||||||||||||||||||||||||||||
| Legal first name |
The legal first name (given name) of the patient. Note: Do not enter only a punctuation mark (, . ; ? !) or symbol (@, #, %, ^, &, *, (, ), _, etc.) with no letters in this field. |
||||||||||||||||||||||||||||||||||||||||||||||||||||||||||||||||||
| First name used |
The patient's preferred first name or nickname. The name in the First name used field is the name that the patient goes by instead of the legal first name. This name appears in the patient banner (along with the legal first name); on the patient schedule; in athenaCommunicator messages (email, SMS, and phone); and on the Patient Portal. Note: Do not enter only a punctuation mark (, . ; ? !) or symbol (@, #, %, ^, &, *, (, ), _, etc.) with no letters in this field.
The name in the First name used field can reflect the patient's gender identity (for example, if a patient has the legal name "Nicholas" but goes by the name "Nicole"). For more information about the patient banner for transgender and nonbinary patients, see Transgender and Nonbinary Patient Care. Note: The patient's First name used is not transmitted on electronic forms.
You can use the Find patient tool to search for a name in the First name used field the same way you search for a legal first name. |
||||||||||||||||||||||||||||||||||||||||||||||||||||||||||||||||||
| Middle name, suffix | The middle name of the patient; name suffix (for example, Jr., Sr, III., etc.). | ||||||||||||||||||||||||||||||||||||||||||||||||||||||||||||||||||
| Previous name (last, first) |
Enter the patient's previous first and last names (if applicable): last name in the left-most field and first name in the right-most field. |
||||||||||||||||||||||||||||||||||||||||||||||||||||||||||||||||||
| Preferred name (discontinued) |
The Preferred name field has been replaced by the First name used field.
|
||||||||||||||||||||||||||||||||||||||||||||||||||||||||||||||||||
| Status |
The patient status within the practice. If you select Inactive from the Status menu on the patient Quickview:
Tip: You can use the Patient Status filter in the Report Builder to report on inactive patients. |
||||||||||||||||||||||||||||||||||||||||||||||||||||||||||||||||||
| Legal sex |
The patient's legal sex (male or female) on legal documents such as the insurance card or driver's license. Read here to understand how this data impacts measure enrollment in Quality Reporting programs. Note: Exam templates — such as the History of Present Illness Templates, Review of Systems Templates, and Physical Exam Templates — can be configured for male or female patients only. If your practice does not require the patient's gender/sex to be specified as part of patient registration or the check-in process, some of your exam templates may not be available when you see patients in an expedited encounter. |
||||||||||||||||||||||||||||||||||||||||||||||||||||||||||||||||||
| DOB | The patient's date of birth in the format: mm/dd/yyyy | ||||||||||||||||||||||||||||||||||||||||||||||||||||||||||||||||||
| SSN |
The patient's Social Security number. To see the full Social Security number after it is entered, you must have the Display Full SSN user permission. |
||||||||||||||||||||||||||||||||||||||||||||||||||||||||||||||||||
| Usual provider |
The patient's primary provider at this practice. By default, the name of the rendering provider is printed at the top of patient statements. If you prefer to print the name of the usual provider at the top of patient statements, please contact the CSC from athenaOne > Support > Success Community > Contact Client Support Center. |
||||||||||||||||||||||||||||||||||||||||||||||||||||||||||||||||||
| Care Team Members |
Click the Care Team Members link to add and remove care team members and to add notes that apply to the care team as a whole. The changes you make on the Quickview appear in the Care team section in the patient banner of the chart. For more information, see To add care team members and notes from the Quickview. |
||||||||||||||||||||||||||||||||||||||||||||||||||||||||||||||||||
| Primary department |
The patient's current active department. This is typically the department at which the chart is kept. It may differ from the department of registration if the patient has been transferred from one department to another. |
||||||||||||||||||||||||||||||||||||||||||||||||||||||||||||||||||
| Deceased date |
This field appears only if the patient has died and the deceased date has been entered on the Patient Registration page. The date appears in red. Note: If a patient dies, you can also mark the account as inactive using the Status menu on the patient Quickview page.
Note: Marking a patient as deceased or inactive does not prevent statements from going out. To prevent a statement from going out to a patient, the statement must be held. |
||||||||||||||||||||||||||||||||||||||||||||||||||||||||||||||||||
| Contact | |||||||||||||||||||||||||||||||||||||||||||||||||||||||||||||||||||
| Address |
The first line of the patient's address. For apartments, use this format: 1199 Whitney Ave #310. Note: You can click the Check address option (to the right of the ZIP code field) to validate the address that you entered (you must first enter the address and either the ZIP code or the city and state). |
||||||||||||||||||||||||||||||||||||||||||||||||||||||||||||||||||
| Address (ctd) |
The second line of the patient's address (use only if needed). Note: You can click the Check address option (to the right of the ZIP code field) to validate the address that you entered (you must first enter the address and either the ZIP code or the city and state). |
||||||||||||||||||||||||||||||||||||||||||||||||||||||||||||||||||
| ZIP code |
The patient's 5-digit ZIP code. The ZIP code autopopulates the City and State fields from the athenahealth ZIP code database. (If you find an error, please contact the CSC from athenaOne > Support > Success Community > Contact Client Support Center.) Note: You can click the Check address option (to the right of the ZIP code field) to validate the address that you entered (you must first enter the address and either the ZIP code or the city and state). |
||||||||||||||||||||||||||||||||||||||||||||||||||||||||||||||||||
| City |
The patient's city. Note: You can click the Check address option (to the right of the ZIP code field) to validate the address that you entered (you must first enter the address and either the ZIP code or the city and state). |
||||||||||||||||||||||||||||||||||||||||||||||||||||||||||||||||||
| State |
The patient's state. Note: You can click the Check address option (to the right of the ZIP code field) to validate the address that you entered (you must first enter the address and either the ZIP code or the city and state). |
||||||||||||||||||||||||||||||||||||||||||||||||||||||||||||||||||
| Country |
The patient's country. This field is displayed only if the "Foreign Patient Addresses" feature is enabled for your practice. If you need the Country field, contact the CSC from athenaOne > Support > Success Community > Contact Client Support Center to request it. Some countries have an address format that differs from the U.S. default of address, city, state, and ZIP code. athenaOne automatically formats foreign mailing addresses according to the country's specifications for all claims, bills, statements, and other correspondence. Note: If the Country field is enabled for your practice and the country is not the United States, select the country from the menu, and then enter the two-letter postal abbreviation for the country in the State field. |
||||||||||||||||||||||||||||||||||||||||||||||||||||||||||||||||||
| Home phone |
The patient's home phone number. |
||||||||||||||||||||||||||||||||||||||||||||||||||||||||||||||||||
| Mobile phone |
The patient's mobile phone number; format: (999) 999-9999. If the mobile phone is the same as the patient's home phone, click the Copy from home link. On the Check-in and Patient Registration pages, you must fill in this field. If the patient does not have a mobile phone or declines to provide the number, select the No mobile phone option. |
||||||||||||||||||||||||||||||||||||||||||||||||||||||||||||||||||
| Consent to text |
This field indicates whether you obtained "express consent" from the patient to send automated text messages from your practice to the patient's mobile phone. Automated text messages are used by the ReminderCall, GroupCall, ResultsCall, and Self-Pay services. If the patient consents to receive text messages, athenaOne automatically enables the Text Message options in the Communicator Automated Messaging Preferences section of the Privacy Information page for that patient. Patients are charged standard message and data rates for text messages from your practice. Note: If a phone number is provided in the Mobile phone field, you must set the Consent to text option to Yes or No to save changes on the Check-in, Patient Registration, or Quickview page. |
||||||||||||||||||||||||||||||||||||||||||||||||||||||||||||||||||
| Work phone | The patient's business phone number; format: (999) 999-9999 | ||||||||||||||||||||||||||||||||||||||||||||||||||||||||||||||||||
| Patient email |
The patient's email address. This field is required on the Patient Registration and Check-in pages for practices using athenaCollector and athenaCommunicator. Selecting the No email option clears any email address or other notation present in the Patient email field. If the No email option is already selected, the patient has already informed another staff member at your practice that he or she does not have an email address or does not wish to provide one.
Note: athenaCommunicator identifies email addresses that result in a hard bounce and prevents subsequent attempts to send emails to those addresses. Email delivery is attempted to these emails after a one-month time interval to help re-validate if the email address has been updated or is still invalid. |
||||||||||||||||||||||||||||||||||||||||||||||||||||||||||||||||||
| Contact preference |
Select the contact method preferred by the patient.
Note: The Contact Preferences selection does not affect the Communicator messaging preferences for athenaCommunicator. |
||||||||||||||||||||||||||||||||||||||||||||||||||||||||||||||||||
| Contact List & People with Portal Access |
The Contact List & People with Portal Access section displays the Patient Portal status of the patient and the patient's family members. From this section, you can:
The Contact List & People with Portal Access section displays the names of all Patient Portal users who have access to this patient record.
For more information, see Contact List & People with Portal Access section. |
||||||||||||||||||||||||||||||||||||||||||||||||||||||||||||||||||
| Emergency Contact | |||||||||||||||||||||||||||||||||||||||||||||||||||||||||||||||||||
| Name | Enter the name of the emergency contact for the patient. This information is for reference only. | ||||||||||||||||||||||||||||||||||||||||||||||||||||||||||||||||||
| Relationship | Select the relationship of the contact to the patient from the menu. | ||||||||||||||||||||||||||||||||||||||||||||||||||||||||||||||||||
| Home phone | Enter the emergency contact's home phone number. | ||||||||||||||||||||||||||||||||||||||||||||||||||||||||||||||||||
| Mobile phone | Enter the emergency contact's mobile phone number. | ||||||||||||||||||||||||||||||||||||||||||||||||||||||||||||||||||
| Driver's License & Patient Photo | |||||||||||||||||||||||||||||||||||||||||||||||||||||||||||||||||||
| Driver's license image | Click Add card image to add a scanned image or a photograph of the patient's driver's license. Click Update/Delete card image to replace or delete the driver's license image. | ||||||||||||||||||||||||||||||||||||||||||||||||||||||||||||||||||
| Driver's license number |
(Optional) For patients who participate in patient record sharing, driver's license information may help to match a patient with a medical record. |
||||||||||||||||||||||||||||||||||||||||||||||||||||||||||||||||||
| Driver's license state |
(Optional) For patients who participate in patient record sharing, driver's license information may help to match a patient with a medical record. The state is the one that issued the driver's license. |
||||||||||||||||||||||||||||||||||||||||||||||||||||||||||||||||||
| Driver's license expiration |
(Optional) For patients who participate in patient record sharing, driver's license information may help to match a patient with a medical record. |
||||||||||||||||||||||||||||||||||||||||||||||||||||||||||||||||||
| Patient photo |
Click Add patient photo to upload a patient photo.
Patients in practices using the athenaCommunicator Patient Portal can upload their own photos from the Patient Portal. The patient's uploaded photo appears in the patient banner (at the top of the Quickview), as well as on the Patient Portal Welcome page.
Your practice staff can also upload and delete patient photos, and delete a photo uploaded by a patient from the Quickview.
If your practice uses athenaClinicals, the uploaded photo also appears in the patient banner at the top of the patient chart. |
||||||||||||||||||||||||||||||||||||||||||||||||||||||||||||||||||
| Demographics | |||||||||||||||||||||||||||||||||||||||||||||||||||||||||||||||||||
| Language |
Select the patient's preferred language from the menu. If the patient does not provide a language, check the Patient Declined box. By default, a short list of the values that you most commonly select appears. To select a different value, enter the first few letters of the desired language and select it from the list. Note: athenaOne uses the Library of Congress ISO 639 standard with codes in the ISO 639-2 column to populate the language list.
Patient Declined checkbox — This checkbox is used to populate the value "61^Patient Declined" for language in outbound interfaces. |
||||||||||||||||||||||||||||||||||||||||||||||||||||||||||||||||||
| Race |
The patient's racial affiliation. To select more than one race, click the plus icon Note: athenaOne uses the CDC Race and Ethnicity Code Set Version 1.0 for races and ethnicities.
Patient Declined checkbox — This checkbox is used to populate the value "61^Patient Declined" for race in outbound interfaces. |
||||||||||||||||||||||||||||||||||||||||||||||||||||||||||||||||||
| Ethnicity |
The patient's ethnic affiliation. To select more than one ethnicity, click the plus icon Note: athenaOne uses the CDC Race and Ethnicity Code Set Version 1.0 for races and ethnicities.
Patient Declined checkbox — This checkbox is used to populate the value "61^Patient Declined" for ethnicity in outbound interfaces. |
||||||||||||||||||||||||||||||||||||||||||||||||||||||||||||||||||
| Tribal Affiliation | The patient’ association by name with federally recognized Indian tribes or with federally recognized Alaska native villages/tribes within the state of Alaska. | ||||||||||||||||||||||||||||||||||||||||||||||||||||||||||||||||||
| Marital status | The patient's marital status. | ||||||||||||||||||||||||||||||||||||||||||||||||||||||||||||||||||
| Gender identity and LGBTQ identity | |||||||||||||||||||||||||||||||||||||||||||||||||||||||||||||||||||
| Sexual orientation |
The patient's sexual or romantic preference:
The options in the Sexual orientation field are based on 2015 edition certification requirements. If you see patients with additional sexual orientations, you can capture this information by selecting the Something else, please describe option and then entering the patient information in the free-text field.
Note: To protect patient privacy, the data in the Sexual orientation, Gender identity, and Assigned sex at birth fields is masked on the Quickview, Patient Registration, and Check-In pages. To edit these fields, click Edit. |
||||||||||||||||||||||||||||||||||||||||||||||||||||||||||||||||||
| Gender identity |
The patient's internal sense of self as male, female, both male and female, or neither gender. A patient may identify as transgender or nonbinary if their gender identity is different than their assigned sex at birth.
The options in the Gender identity field are based on 2015 edition certification requirements. If you see patients with additional gender identities, you can capture this information by selecting the Additional gender category / other, please specify option and then entering the patient information in the free-text field.
Note: To protect patient privacy, the data in the Sexual orientation, Gender identity, and Assigned sex at birth fields is masked on the Quickview, Patient Registration, and Check-In pages. To edit these fields, click Edit. |
||||||||||||||||||||||||||||||||||||||||||||||||||||||||||||||||||
| Assigned sex at birth |
The patient's sex assigned at birth is generally determined by their physical anatomy at birth. This may be the same or different than the patient's gender identity and legal sex.
Read here to understand how this data impacts measure enrollment in Quality Reporting programs. Note: To protect patient privacy, the data in the Sexual orientation, Gender identity, and Assigned sex at birth fields is masked on the Quickview, Patient Registration, and Check-In pages. To edit these fields, click Edit. |
||||||||||||||||||||||||||||||||||||||||||||||||||||||||||||||||||
| Pronouns |
The personal pronouns that reflect the patient's gender identity (the pronouns may not be tied to the patient's gender identity).
|
||||||||||||||||||||||||||||||||||||||||||||||||||||||||||||||||||
| Additional Information | |||||||||||||||||||||||||||||||||||||||||||||||||||||||||||||||||||
| How did you hear about us? |
Select an option to describe how the patient heard about your practice. |
||||||||||||||||||||||||||||||||||||||||||||||||||||||||||||||||||
| Specify (if other, above) |
If you select Other in the How did you hear about us? field, you can enter a free-text source here. |
||||||||||||||||||||||||||||||||||||||||||||||||||||||||||||||||||
| Financial | |||||||||||||||||||||||||||||||||||||||||||||||||||||||||||||||||||
| Guarantor | The person who is responsible for the patient balance (usually the insurance subscriber or policy-holder). | ||||||||||||||||||||||||||||||||||||||||||||||||||||||||||||||||||
| Chart Home/Links/Care Summary | |||||||||||||||||||||||||||||||||||||||||||||||||||||||||||||||||||
| Chart home |
The department where the patient's chart is normally kept. |
||||||||||||||||||||||||||||||||||||||||||||||||||||||||||||||||||
| Current chart location | The department where the patient's chart currently resides. | ||||||||||||||||||||||||||||||||||||||||||||||||||||||||||||||||||
| Default pharmacy | (athenaClinicals only) Click Search to select a default pharmacy for this patient, for use with clinical orders. | ||||||||||||||||||||||||||||||||||||||||||||||||||||||||||||||||||
| Preferred lab |
(athenaClinicals only) Click Search to select a preferred lab for this patient, for use with clinical lab orders. |
||||||||||||||||||||||||||||||||||||||||||||||||||||||||||||||||||
| Preferred imaging facility |
(athenaClinicals only) Click Search to select a preferred imaging facility for this patient. |
||||||||||||||||||||||||||||||||||||||||||||||||||||||||||||||||||
| Patient care summary and letter delivery preference |
Indicates whether a patient prefers to receive provider-signed letters and the Patient Care Summary on the Patient Portal or on paper. This preference persists from appointment to appointment. You can set it on the Quickview, Check-in, Checkout, or Patient Registration page. Note: For ambulatory departments that use athenaClinicals without athenaCommunicator, your patients can access their electronic Patient Care Summary online using the Patient Information Center, a slimmed-down version of the athenaCommunicator Patient Portal. |
||||||||||||||||||||||||||||||||||||||||||||||||||||||||||||||||||
| Guarantor | |||||||||||||||||||||||||||||||||||||||||||||||||||||||||||||||||||
| Patient's relationship to guarantor |
Select who the patient is, in relation to the guarantor. The guarantor is the person who appears as the addressee on patient statements.
Patients who are minors If a new patient is a minor, you must select a guarantor relationship. However, if the Specialty type field on the Departments page is set to "Pediatric Medicine," this field defaults to "Child." This field also defaults to "Child" at the provider group level if the Group specialty field on the Provider Groups page is set to "Pediatric Medicine."
Note: When you remove a patient from a family billing relationship, athenaOne does not delete the guarantor data in the patient's account. You can update or delete this data manually on the Patient Registration page. If the patient is billed under a guarantor in multiple departments, you must remove the patient from the guarantor in each department before you can update the Patient's relationship to guarantor field to Self. |
||||||||||||||||||||||||||||||||||||||||||||||||||||||||||||||||||
| Last name |
Last name of guarantor. The guarantor is the person who appears as the addressee on patient statements.
Note: Guarantor is used for the Family Billing feature. After one family member is registered, additional family members can be linked to the same guarantor. |
||||||||||||||||||||||||||||||||||||||||||||||||||||||||||||||||||
| First name | First name of guarantor. | ||||||||||||||||||||||||||||||||||||||||||||||||||||||||||||||||||
| Address |
The guarantor address (if different from the patient's). Used as the send-to address for patient statements. If this field is blank, the patient's address is used as the address for patient statements. For apartments, use the format [Street] #[Apt. Number]: for example, 1199 Whitney Ave #310. Note: You can click the Check address option (to the right of the ZIP code field) to validate the address that you entered (you must first enter the address and either the ZIP code or the city and state). |
||||||||||||||||||||||||||||||||||||||||||||||||||||||||||||||||||
| Address (ctd) |
The optional second line of the guarantor address (if different from the patient's). Used as the send-to address for patient statements. If this field is blank, the patient's address is used as the address for patient statements. Note: You can click the Check address option (to the right of the ZIP code field) to validate the address that you entered (you must first enter the address and either the ZIP code or the city and state). |
||||||||||||||||||||||||||||||||||||||||||||||||||||||||||||||||||
| ZIP code |
The guarantor's ZIP code. The ZIP code autopopulates the City and State fields from the athenahealth ZIP code database. If you find an error, please contact the CSC from athenaOne > Support > Success Community > Contact Client Support Center.) Note: You can click the Check address option (to the right of the ZIP code field) to validate the address that you entered (you must first enter the address and either the ZIP code or the city and state). |
||||||||||||||||||||||||||||||||||||||||||||||||||||||||||||||||||
| City |
The guarantor's city. Note: You can click the Check address option (to the right of the ZIP code field) to validate the address that you entered (you must first enter the address and either the ZIP code or the city and state). |
||||||||||||||||||||||||||||||||||||||||||||||||||||||||||||||||||
| State |
The guarantor's state. Note: You can click the Check address option (to the right of the ZIP code field) to validate the address that you entered (you must first enter the address and either the ZIP code or the city and state). |
||||||||||||||||||||||||||||||||||||||||||||||||||||||||||||||||||
| Country |
Select the guarantor's country. This menu appears if your practice uses the country of address feature. |
||||||||||||||||||||||||||||||||||||||||||||||||||||||||||||||||||
| Correspondence | |||||||||||||||||||||||||||||||||||||||||||||||||||||||||||||||||||
|
|
Correspondence records in OPEN status are listed here. You can click the link to show all correspondence records to display records in CLOSED status. See Correspondence Dashboard for additional information about patient correspondence. |
||||||||||||||||||||||||||||||||||||||||||||||||||||||||||||||||||
| Insurances | |||||||||||||||||||||||||||||||||||||||||||||||||||||||||||||||||||
| Primary |
The insurance package to be used as the patient's primary insurance. The date that the policy was added is displayed under the "Primary" label. The copay types and amounts are displayed under the insurance name. The standard abbreviations for the copay type are:
|
||||||||||||||||||||||||||||||||||||||||||||||||||||||||||||||||||
| Secondary | The insurance package to be used as the patient's secondary (supplementary) insurance. The date that the policy was added is displayed under the "Secondary" label. | ||||||||||||||||||||||||||||||||||||||||||||||||||||||||||||||||||
| Tertiary | The insurance package to be used as the patient's tertiary (second supplementary) insurance. The date that the policy was added is displayed under the "Tertiary" label. | ||||||||||||||||||||||||||||||||||||||||||||||||||||||||||||||||||
| Quaternary | The insurance package to be used as the patient's quaternary (third supplementary) insurance. The date that the policy was added is displayed under the "Quaternary" label. | ||||||||||||||||||||||||||||||||||||||||||||||||||||||||||||||||||
| Reference |
A reference policy is an insurance package that does not have sequencing (primary, secondary, or tertiary). You can create and use reference policies for unique scenarios in place of a patient's usual insurance policies. For example, if the patient has Medicare Advantage as the primary insurance, but a service rendered requires your organization to bill traditional Medicare, you can add the traditional Medicare package as a reference policy so that your organization can appropriately bill for the services without changing the patient's primary or secondary insurance. During Scheduling, Edit Appointment, and Check-in — if a patient has an active case policy or reference policy, you'll see a Policy Alert message reminding you to select the appropriate insurance for the appointment. Note: You can use a reference policy to bill for the COVID-19 vaccination.
To add a reference policy, click Add reference policy to the right of the Insurances heading on the Quickview. You can create as many reference policies for a patient as you need.
After you select the insurance package on the Add Policy page, the Add Reference Policy Details page appears; you configure the reference policy just as you do for a primary or secondary insurance policy (see Add/Update Policy Details). Note: On the Add Policy page, you must choose a Standard policy (not a Case policy).
After a reference policy is added to the Quickview, users complete charge entry as usual. If needed, they can manually select the reference policy in the Primary payer or Secondary payer field on the Charge Entry page.
In some cases, the athenaOne rules engine automatically updates the insurance to the reference package before claim submission. The rules engine may also split the claim when some charges must be billed to the patient's primary payer and other charges must be billed to the reference insurance policy. Note: You will see the reference policy billed on the Claim Edit page when these scenarios occur.
A reference insurance package may appear automatically in the Quickview under these circumstances:
|
||||||||||||||||||||||||||||||||||||||||||||||||||||||||||||||||||
| Contracts |
athenahealth can send invoices and claims directly to corporations, law firms, and other non-health insurance payers; we call this "corporate billing," "legal billing," or "contract billing," depending on the type of payer. You can click View corporate account details to see information about the contract policy.
For more information about contract policies, see Corporate Billing. If your practice would like to enable the Corporate Billing feature, please create a support case from athenaOne > Support > Success Community > Contact Client Support Center. |
||||||||||||||||||||||||||||||||||||||||||||||||||||||||||||||||||
| Prescription |
Click check now to verify the patient's prescription insurance eligibility. Click Add card image to store an image of the patient's prescription insurance card (see Prescription Card Image). Click Update/Delete card image to update or delete a prescription card image (see Prescription Card Image). |
||||||||||||||||||||||||||||||||||||||||||||||||||||||||||||||||||
| Legal | This field appears if the patient has added a case policy that is classified in the "legal" category. | ||||||||||||||||||||||||||||||||||||||||||||||||||||||||||||||||||
| Appointments | |||||||||||||||||||||||||||||||||||||||||||||||||||||||||||||||||||
| Try NEW Appointment Schedule | Allows you to set your scheduling experience preference without first having to navigate to a patient's scheduling page. It is synced with the respective setting on the legacy scheduling page. Your preference is deferred to when you enable the option at either location | ||||||||||||||||||||||||||||||||||||||||||||||||||||||||||||||||||
| Upcoming |
Appears if the patient has upcoming appointments scheduled. If there is a series of recurring appointments, a recurrence link appears so that you can view the entire series. If you use athenaCoordinator direct scheduling Direct scheduling allows you to make appointments in departments outside your own practice. You can view upcoming direct scheduled appointments in the Upcoming field if you or a colleague in your department scheduled the appointment or if you have access to the original scheduling department. Direct scheduled appointments do not link to the Appointment page; you cannot cancel, reschedule, or add notes to these appointments. |
||||||||||||||||||||||||||||||||||||||||||||||||||||||||||||||||||
| Last seen at | Appears if the patient has been seen at this practice. The date and location where the patient was last seen by a provider in this practice. The appointment listed is linked to the Claim Review page. | ||||||||||||||||||||||||||||||||||||||||||||||||||||||||||||||||||
| History | The number of previous appointments, shown with the appointment status. | ||||||||||||||||||||||||||||||||||||||||||||||||||||||||||||||||||
| Automated Wellness |
This field displays information about automated wellness outreach messages, including the message date and time, the care gap that the patient was contacted about, the department, and the attributing provider. To schedule the appointment, click the Schedule link. For more information about the AWO feature, see Automated Wellness Outreach. |
||||||||||||||||||||||||||||||||||||||||||||||||||||||||||||||||||
| Tickler |
Any appointment ticklers for this patient appear here. See: To create an appointment reminder. |
||||||||||||||||||||||||||||||||||||||||||||||||||||||||||||||||||
| OB episodes (appears only if your practice has the OB episodes practice setting enabled) | |||||||||||||||||||||||||||||||||||||||||||||||||||||||||||||||||||
|
|
The OB episode is a mechanism to track OB enrollments and information on clinical outcomes. |
||||||||||||||||||||||||||||||||||||||||||||||||||||||||||||||||||
